How Hard is It to Paint Kitchen Cabinets: Expert Tips
Are you thinking about giving your kitchen a fresh new look? Painting your kitchen cabinets might be the perfect solution.
You’ve probably heard that this task can be daunting, but is it really as tough as people say? Imagine transforming your space without spending a fortune on new cabinets. Picture the satisfaction of seeing your kitchen come alive with your personal touch.
But before you dive in, let’s explore what makes painting kitchen cabinets challenging and how you can overcome these obstacles with ease. Get ready to discover tips and tricks that will make this project not only doable but possibly enjoyable. Your kitchen transformation is just a few brush strokes away! Keep reading to find out how you can achieve stunning results without the headache.

Credit: usacabinets.com
Preparation Essentials
Preparing to paint kitchen cabinets involves careful planning and patience. Cleaning and sanding are crucial first steps. Choosing the right primer and paint ensures a smooth finish.
Preparing to paint kitchen cabinets can seem daunting. Good preparation makes the task easier and ensures a smooth finish. Let’s explore the essential steps to prepare effectively.Gathering Tools And Materials
Start by collecting necessary tools. You need a screwdriver to remove cabinet doors and hardware. Sandpaper is crucial to smooth surfaces. Consider using both coarse and fine grit. A quality brush or roller ensures even paint application. Drop cloths protect floors from spills. Don’t forget a mixing stick for your paint. Also, grab a few clean cloths for dust removal.Choosing The Right Paint
Paint choice affects the final look and durability. Opt for paint suited for kitchen environments. Semi-gloss or satin finishes work well. They offer resistance to moisture and stains. Check paint labels for specific cabinet use. Primer is vital for adhesion. It helps paint stick better and last longer. Choose a primer that matches your paint type.Safety Precautions
Safety matters greatly. Ensure good ventilation in your work area. Open windows or use fans. Wear a mask to avoid inhaling fumes. Use gloves to protect your skin. Goggles prevent paint splashes in your eyes. Keep a first aid kit nearby for emergencies. Store paint and tools safely when not in use. These preparation steps ensure your cabinet painting project starts smoothly. Proper tools, paint choice, and safety practices lead to a successful makeover.Cabinet Cleaning And Repair
Painting kitchen cabinets can be a challenging task. Preparation is key to achieving a smooth finish. Sanding, priming, and choosing the right paint ensure lasting results.
Cleaning and repairing kitchen cabinets is crucial before painting them. It ensures a smooth and long-lasting finish. Cabinets often accumulate dirt and damage over time. Tackling these issues effectively makes the painting process easier. Let’s dive into cleaning and repairing kitchen cabinets.Removing Grease And Grime
Kitchen cabinets are magnets for grease and grime. Regular cooking causes oil splatters and dust build-up. Start by using a mixture of warm water and mild detergent. Scrub the cabinets with a soft cloth or sponge. A gentle scrub helps remove stubborn stains without damaging the surface. For heavy grease, consider using a vinegar solution. Vinegar cuts through oil and leaves surfaces clean. Rinse thoroughly to avoid residue.Fixing Dents And Scratches
Dents and scratches are common in kitchen cabinets. They affect the cabinet’s appearance. Begin by inspecting the cabinet surfaces closely. Use wood filler to repair small dents. Apply the filler using a putty knife and smooth it out. Sand the area lightly after the filler dries. For deeper scratches, consider using a touch-up pen matching the cabinet’s color. This helps conceal imperfections effectively. Ensure the surface is smooth before proceeding to paint.Surface Sanding Techniques
When it comes to painting kitchen cabinets, the preparation phase is crucial for achieving a professional finish. Surface sanding techniques play a vital role in this process, ensuring the paint adheres well and the final look is smooth and flawless. Sanding can seem intimidating, but with the right tools and techniques, it becomes manageable and even satisfying. Imagine the transformation of your kitchen as you refine each surface, preparing it for a fresh coat of paint. You’ll need to consider a few key factors, such as selecting the appropriate sandpaper grit and mastering proper sanding methods.
Selecting Sandpaper Grit
Choosing the right sandpaper grit is your first step towards a successful cabinet makeover. Grit refers to the coarseness of the sandpaper. Lower numbers mean coarser grit, while higher numbers indicate finer grit.
- Start with a medium grit, around 120. This effectively removes old paint and surface imperfections.
- Follow up with a finer grit, such as 220, to smooth the surface and prepare it for priming and painting.
- Avoid using grits that are too fine initially, as they won’t adequately remove defects.
Remember, the right grit sets the foundation for a smooth finish. Have you ever wondered why some paint jobs look flawless while others seem rough? Often, it’s the sandpaper grit that makes all the difference.
Proper Sanding Methods
Proper sanding methods ensure uniformity and prevent damage to the cabinet surfaces. It’s not just about moving the sandpaper back and forth; technique matters.
- Use consistent pressure to avoid uneven surfaces.
- Sand along the grain of the wood to prevent scratches that are difficult to cover with paint.
- Consider using a sanding block or an orbital sander for larger surfaces to maintain consistency.
Have you ever tried sanding and ended up with unsightly marks on your cabinets? This happens when you sand against the grain or apply uneven pressure. Take your time and be gentle; your cabinets will thank you with a beautiful, even finish.

Credit: www.youtube.com
Primer Application
Applying primer is essential for painting kitchen cabinets smoothly. It enhances paint adhesion and ensures even color distribution. Proper priming can make the painting process easier and more efficient.
Applying primer to kitchen cabinets is a crucial step. It prepares surfaces for paint and ensures a smooth finish. A good primer can help paint adhere better and last longer. Without it, you might face peeling or uneven color.Choosing The Best Primer
Selecting the right primer is essential for a lasting finish. Oil-based primers work well for wood cabinets. They block stains and prevent tannin bleed. Water-based primers are great for their quick drying time. They work best on pre-painted cabinets. Consider the material of your cabinets. This will guide your primer choice.Applying Primer Evenly
Uniform application is key for a smooth finish. Start by stirring the primer well. Use a high-quality brush or roller. Apply in thin, even coats. Cover all surfaces, including edges and corners. Allow the primer to dry thoroughly. Sand lightly between coats for a smooth surface. This helps the paint to adhere evenly. Proper primer application requires patience. It sets the foundation for a flawless paint job.Painting Process
Painting your kitchen cabinets can seem daunting, but breaking down the process into manageable steps makes it achievable for anyone willing to put in the effort. Understanding the painting process is crucial. It’s not just about slapping some paint on wood; it requires patience, precision, and a bit of creativity.
Using Brushes Vs. Rollers
Choosing between brushes and rollers can significantly impact your final result. Brushes allow for detailed work, especially in corners and grooves. They give you control but can leave stroke marks if not used carefully.
On the other hand, rollers cover large flat surfaces quickly and leave a smooth finish. They’re great for the bulk of the cabinet doors. Think about the texture you want and the time you have; this will guide your choice.
Some people find combining both tools works best—brush for edges and roller for flat surfaces. This hybrid approach can save time and improve the finish. Have you considered what tools suit your style?
Layering Paint Coats
Layering is an art. One coat is rarely enough for a durable, rich finish. Multiple thin coats are better than one thick coat, as they dry more evenly and prevent drips.
Allow each layer to dry completely before applying the next. This ensures that the paint adheres well and reduces the chance of smudging. Patience is key here—rushing could lead to a patchy look.
Consider using a primer as your first layer. It provides a uniform base and can enhance the final color. Have you ever noticed how a good primer can make colors pop?
Remember, the more layers you add, the more durable your cabinets will be. Each coat adds a layer of protection against chips and scratches. So, how many coats do you think your cabinets need for that perfect finish?
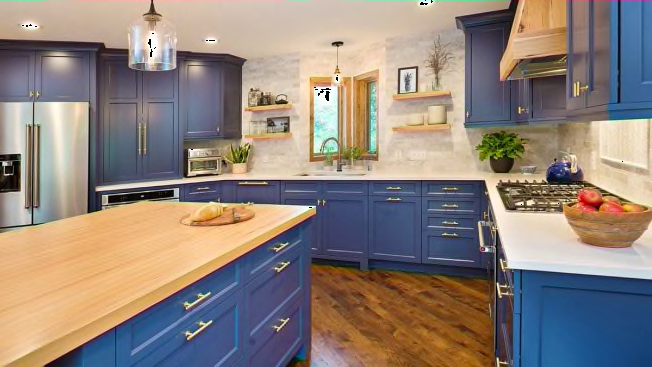
Credit: www.consumerreports.org
Drying And Curing
Painting kitchen cabinets can be challenging due to drying and curing. Proper drying ensures paint adheres well, avoiding peel. Curing takes time, affecting durability and finish quality.
Painting kitchen cabinets can transform your cooking space, but the drying and curing process is crucial to achieving a sleek finish. It’s not just about waiting for the paint to dry; it’s about creating the right conditions for a durable and smooth surface. Proper drying and curing ensure that your cabinets can withstand the daily wear and tear of kitchen life.Optimal Drying Conditions
To get the best results, you need to create an environment that supports the drying process. Ventilation is key—open windows and use fans to circulate air. This helps the paint dry evenly without trapping moisture, which can lead to bubbles and imperfections. Temperature also plays a significant role. Aim for a room temperature between 70-75°F. Too cold, and the paint might not adhere well; too hot, and it could dry too fast, causing cracks. Have you checked your thermostat lately? Humidity can be a silent saboteur. High humidity slows down drying, while low humidity speeds it up. A dehumidifier can be your best friend if you’re in a sticky climate, ensuring the paint dries as intended.Avoiding Paint Smudges
After putting in all that effort, the last thing you want is smudged paint. Touching the cabinets too soon can ruin your hard work. Set up reminders or timers to keep hands off until the paint is truly dry. Consider using “wet paint” signs to alert family members. It’s easy to forget, especially in a busy household. Little reminders can protect your paint job from accidental smudges. Think about your pets. If they’re prone to exploring, they might brush against your freshly painted cabinets. Maybe keep them out of the kitchen until the paint is fully cured. Have you thought about how curious your cat might be?Reassembly Tips
Painting kitchen cabinets can be challenging but rewarding. Proper preparation is crucial for a smooth finish. Use quality brushes and paints for the best results.
Reassembling kitchen cabinets after painting can feel like a puzzle. With patience and attention, the results can transform your kitchen. Start with reattaching the hardware and ensure everything aligns correctly. Here are some simple tips to guide you through the process.Reattaching Cabinet Hardware
Begin by gathering all screws and knobs. Ensure you have everything you need within reach. This prevents unnecessary delays and frustration. Use a screwdriver that fits the screws perfectly. This helps avoid damage to the hardware or paint. Organize the hardware by cabinet. Labeling can help if you have many pieces. Attach the hinges first. Hold the door steady while screwing in each hinge. This keeps the door from tilting or misaligning. Tighten screws securely but avoid over-tightening.Ensuring Proper Alignment
Check the cabinet doors for proper alignment. Adjust them as needed for even spacing. Use a level to ensure the doors hang straight. This provides a neat, professional appearance. If the door seems off, adjust the hinges slightly. Consider using a pencil to mark alignment points. This helps reposition the doors accurately if they shift. Test each door to ensure it opens and closes smoothly. Proper alignment prevents wear and tear on the hinges over time. Remember, reassembling cabinets requires patience. With careful attention, your kitchen will look refreshed and appealing.Expert Advice
Painting kitchen cabinets can be challenging. Proper preparation ensures a smooth finish. Choosing the right paint helps achieve lasting results.
Painting kitchen cabinets is a practical way to refresh your kitchen. It may seem simple, but expert advice can make a big difference. Professionals know the secrets to a smooth finish and lasting results. Here are some valuable insights to guide your project.Common Mistakes To Avoid
Rushing the prep work is a common error. Proper cleaning and sanding ensure paint sticks well. Skipping primer is another mistake. Primer helps paint adhere and hides old colors. Using the wrong paint type can also cause issues. Choose paint designed for cabinets for durability.Time-saving Tips
Label cabinet doors and drawers for easy reassembly. Use quick-dry paint to speed up the process. Invest in quality brushes and rollers for a smooth finish. Create a dedicated workspace to keep supplies organized. Plan your steps to reduce downtime between coats.Frequently Asked Questions
Can A Beginner Paint Kitchen Cabinets?
Yes, a beginner can paint kitchen cabinets. Start by cleaning and sanding them. Use a primer before applying paint. Choose quality tools and materials for the best results. Follow DIY guides or tutorials for step-by-step instructions. Practice patience and attention to detail for a professional finish.
Is It Worth It To Paint Kitchen Cabinets Yourself?
Painting kitchen cabinets yourself can save money and provide a personal touch. It requires time, patience, and some skill. Proper preparation is essential for a durable finish. DIY can be rewarding if you enjoy hands-on projects and have the necessary tools.
Consider professional help for flawless results.
Can I Just Paint Over My Kitchen Cabinets?
Yes, you can paint over kitchen cabinets. Clean, sand, and prime them first for best results. Use high-quality paint for durability.
What Is The Downside Of Painting Cabinets?
Painting cabinets can lead to chipping and peeling over time. It requires proper preparation and maintenance. Mistakes in painting can affect the cabinet’s appearance and durability. Some paints may not adhere well to certain surfaces, leading to unsatisfactory results. Professional help might be needed for optimal finish.
Conclusion
Painting kitchen cabinets can be a manageable task. With preparation, you achieve great results. Take time to clean and sand surfaces well. Choose the right paint for durability. Follow each step carefully for a smooth finish. Mistakes happen, but they teach you.
Be patient and enjoy the process. Transforming cabinets gives your kitchen new life. It’s rewarding to see the change. You gain skills and confidence with practice. Start small and learn as you go. Soon, you’ll have a fresh, updated kitchen.
Painting cabinets is worth the effort. Your kitchen will look bright and welcoming.