How to Spray Kitchen Cabinets: Expert Tips & Techniques
Have you ever looked at your kitchen cabinets and felt they could use a refresh? Spraying your kitchen cabinets is an efficient way to transform their look without the hassle of a complete renovation.
Imagine stepping into your kitchen and feeling that sense of satisfaction every time you see those beautifully finished cabinets. It’s easier than you think, and this guide is here to help you achieve that dream kitchen look. You might be wondering if you have the skills to pull this off.
The truth is, with the right technique and tools, anyone can do it. This article will walk you through the process step-by-step, ensuring you feel confident and capable from start to finish. So, get ready to unleash your inner DIY expert and make your kitchen cabinets the envy of all who enter your home. Keep reading to discover the secrets to mastering the art of cabinet spraying!
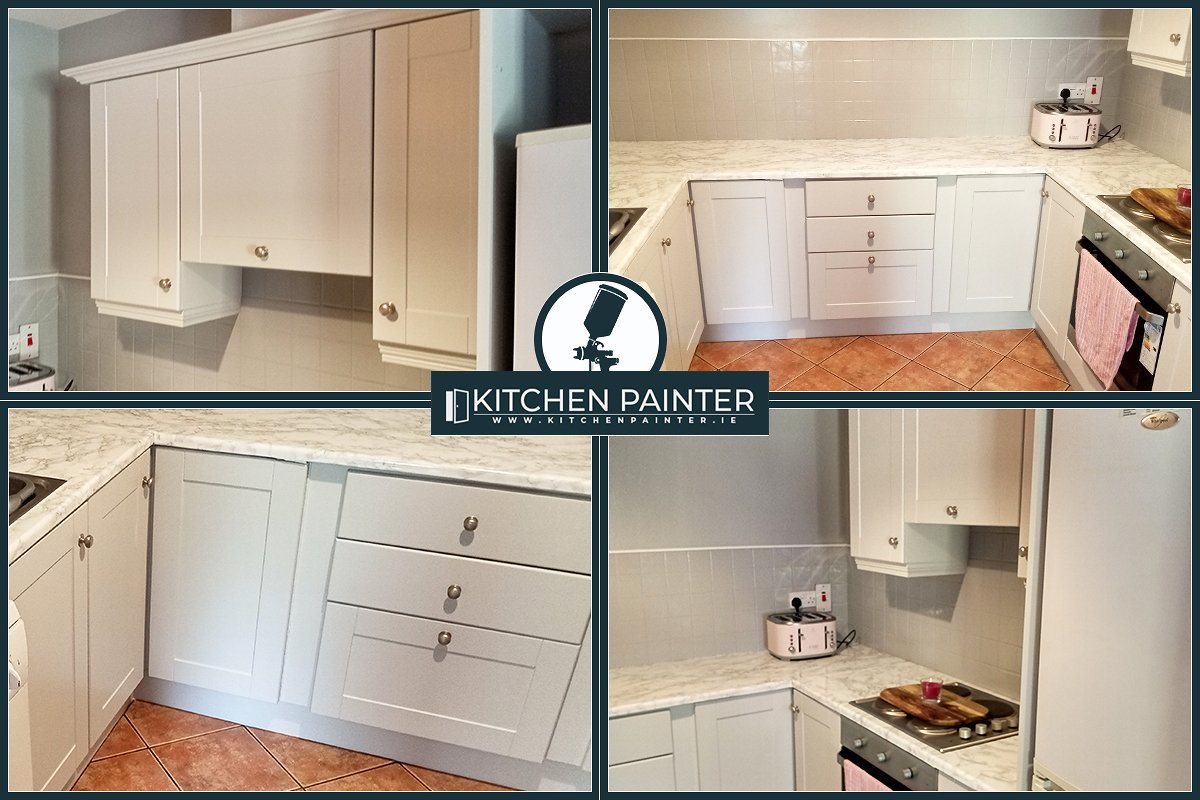
Credit: www.facebook.com
Choosing The Right Equipment
Choosing the right equipment is crucial when spraying kitchen cabinets. The quality of your tools directly impacts the finish and durability of your cabinets. With a variety of sprayers and safety gear available, making informed choices can save you time and effort while ensuring a professional look.
Selecting The Best Sprayer
Investing in a high-quality sprayer can make all the difference. Consider an HVLP (High Volume Low Pressure) sprayer, which provides precision and minimizes overspray. It’s ideal for achieving a smooth finish without wasting paint.
Before purchasing, think about the size of your project and the type of paint you’re using. A handheld sprayer might be sufficient for smaller jobs, while a larger, more powerful sprayer is better for extensive work.
Check online reviews and ask for recommendations from friends who have tackled similar projects. Their experiences can offer invaluable insights, guiding you towards the best choice for your needs.
Essential Safety Gear
Safety should never take a backseat. Protecting yourself is just as important as achieving a flawless finish. Make sure to wear a high-quality respirator to filter out fumes and particles.
Don’t underestimate the importance of goggles. They shield your eyes from paint mist and potential splashes, keeping you safe and focused on your task.
Consider wearing disposable gloves and a coverall suit. These prevent paint stains on your skin and clothing, allowing you to work comfortably and confidently.
Reflect on this: Are you equipped with the right gear to protect both yourself and your kitchen cabinets? Taking these precautions will pave the way for a successful and safe painting experience.
Preparing Your Workspace
Transforming your kitchen cabinets with a fresh coat of spray paint can breathe new life into your cooking space. However, the key to achieving a smooth, professional finish lies in how well you prepare your workspace. This crucial step ensures a clean and efficient painting process, minimizing mess and maximizing results.
Setting Up A Spray Booth
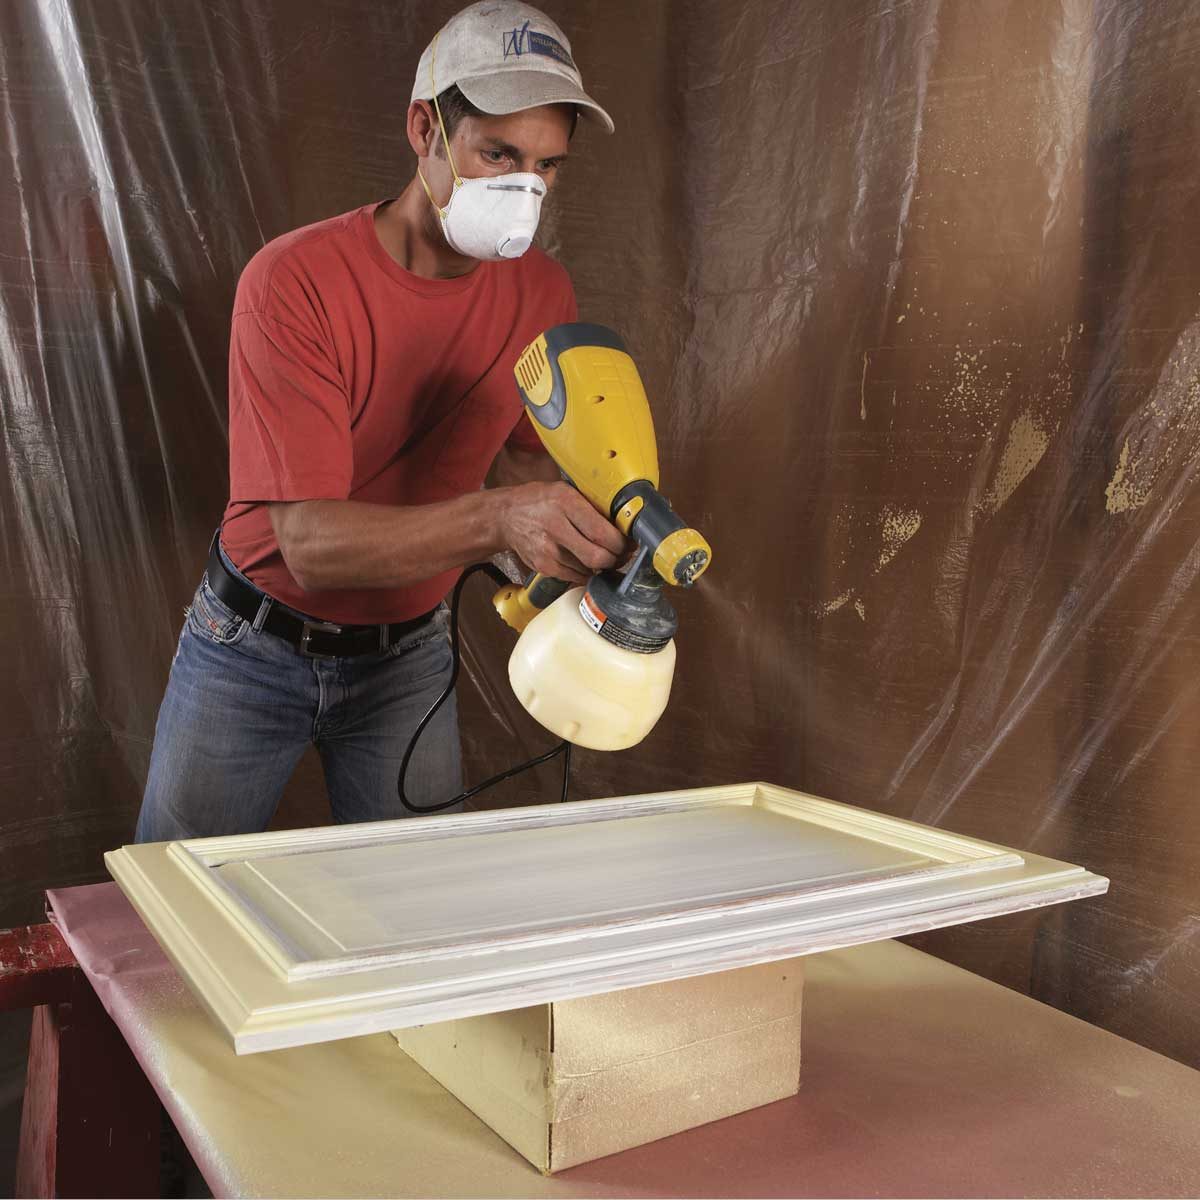
Creating a spray booth is essential for controlling overspray and ensuring a consistent coat. You can easily set up a temporary booth using plastic sheeting and poles. Hang the plastic around the area where you’ll be painting to contain the mist and protect other surfaces. Consider using a fan to improve ventilation and reduce paint fumes. Remember, a well-ventilated space not only protects your health but also enhances the drying process.
Protecting Surrounding Areas
Don’t overlook the importance of safeguarding the surrounding areas from accidental paint splashes. Cover nearby countertops, appliances, and floors with drop cloths or old sheets. Tape edges and corners to prevent paint from seeping through. You might think painting cabinets is just about the cabinets, but your kitchen is a hub of activity. Would you want paint on your favorite coffee maker or grandma’s heirloom platter? Thoughtful protection means less cleanup and peace of mind.
Cabinet Preparation
Preparing your kitchen cabinets for spraying is a crucial step that can make or break the final result. It might seem tedious, but the effort you put into preparation will pay off with smooth, professional-looking cabinets. Let’s dive into the essential steps to get those cabinets ready for a fresh coat of paint.
Cleaning And Degreasing
Begin by thoroughly cleaning your cabinets. Over the years, they’ve likely accumulated grease, grime, and dust, especially near your stove. Use a good degreaser; dish soap with warm water can also do the trick. Scrub all surfaces, including the insides and edges, to ensure every nook and cranny is spotless. This step is crucial because any leftover residue can affect paint adhesion and finish quality.
Sanding For Smoothness
Sanding is where you create a surface that the paint can cling to. Consider using 120-grit sandpaper to start, followed by 220-grit for a smoother finish. Pay extra attention to areas with old paint drips or imperfections. You can even find sanding sponges that contour to the shape of your cabinets for easier handling. Sanding not only smooths the surface but also opens up the pores of the wood, making it more receptive to paint.
Priming For Adhesion
Priming is your secret weapon for a lasting finish. Choose a quality primer that suits your cabinet material, whether wood, laminate, or MDF. Apply a thin, even coat and allow it to dry completely. This step helps the paint adhere better and reduces the chances of chipping. Some primers are also designed to block stains and prevent tannins from bleeding through, giving you that flawless, professional look.
Have you ever skipped a step and regretted it later? Imagine spending hours on painting only to see it peel. Proper preparation ensures your efforts result in a kitchen you’ll love to show off. So, take your time with these steps, and your cabinets will thank you with a stunning finish.
Credit: www.familyhandyman.com
Choosing The Right Paint
Spraying kitchen cabinets can give a smooth, professional finish. Choose high-quality paint suitable for kitchen surfaces. Ensure even application by maintaining a consistent distance with the spray gun.
Choosing the right paint for your kitchen cabinets is crucial. It determines the final look and durability. The wrong choice can lead to peeling or fading. With a little guidance, you can make an informed decision.Types Of Paint For Cabinets
Choosing paint involves considering its type. Some paints are better for cabinets. Here are a few options:- Latex Paint:It’s water-based and easy to clean. It dries quickly and is less toxic.
- Oil-Based Paint:Known for durability and smooth finish. It takes longer to dry.
- Chalk Paint:Ideal for a matte, vintage look. Requires a wax finish for protection.
Color Selection Tips
The color of your cabinets sets the kitchen’s tone. Consider these tips:- Natural Light:Bright colors work well in darker kitchens.
- Kitchen Style:Match colors with your kitchen’s overall design.
- Trends vs. Timeless:Neutral colors are timeless. Bold colors can be trendy.
Spraying Techniques
Spray kitchen cabinets evenly by using a steady hand and maintaining a consistent distance from the surface. Sand lightly between coats for a smooth finish. Choose high-quality paint and ensure proper ventilation to achieve professional results.
Spraying kitchen cabinets can give them a fresh, smooth finish. Mastering spraying techniques can make the job easier and result in stunning cabinets. Proper technique ensures even coverage and prevents common issues like drips and runs. Let’s dive into the essential spraying techniques for your kitchen cabinets.Achieving Even Coverage
To achieve even coverage, maintain a consistent distance from the cabinet surface. Aim for about 12 inches away for best results. Move the sprayer steadily across the surface. Avoid stopping in one spot. Overlap each pass slightly to ensure full coverage. Use smooth, even strokes from side to side. This helps distribute paint evenly. Start with a thin coat and build up layers for a solid finish.Avoiding Drips And Runs
Preventing drips and runs requires careful control of spray volume. Adjust the spray nozzle to a moderate setting. Too much pressure can lead to overspray and drips. Practice on scrap material first. This helps you gauge the right speed and pressure. Keep the sprayer moving constantly. Stationary spraying can cause paint to pool and drip. Wipe up any drips immediately to prevent them from drying.
Credit: www.youtube.com
Drying And Curing
Proper drying and curing ensure a smooth finish after spraying kitchen cabinets. Allow cabinets to dry in a dust-free area for a professional look. Adequate ventilation helps speed up the process while maintaining a flawless surface.
Drying and curing sprayed kitchen cabinets is crucial. It ensures a smooth, durable finish. Proper drying helps avoid smudges and imperfections. Curing solidifies the paint, making it resistant to wear. Both processes require attention to detail and patience.Optimal Conditions
Create a dust-free environment. Dust can ruin the smooth finish. Maintain a consistent temperature. Ideal temperatures range between 60-80°F. Humidity should be low, around 40-50%. High humidity slows drying. Good ventilation is key. Fresh air helps paint dry evenly. Use fans for air circulation. Ensure no direct sunlight. It can cause uneven drying. Keep the area free from pets and children.Timeframes For Drying
Drying time varies by paint type. Latex paint dries in 1-2 hours. Oil-based paint takes longer, up to 8 hours. Allow more time in humid areas. Curing takes longer than drying. It can take several weeks. Latex cures in 2-3 weeks. Oil-based paint cures in 3-4 weeks. Handle cabinets with care during this time. Avoid heavy use until fully cured.Final Touches
As you near the end of your kitchen cabinet makeover, it’s time to focus on the final touches. This stage is crucial to ensure that all your hard work pays off with a flawless finish. Paying attention to details will make all the difference in achieving a professional look. Whether it’s reassembling the cabinets or inspecting for any last-minute flaws, each step needs your careful attention. Let’s dive into how you can nail these final touches.
Reassembling Cabinets
Once your cabinets are dry and cured, it’s time to put everything back together. Start by carefully reattaching the doors and drawers. Use a screwdriver to ensure the hinges and handles are tightly secured. Double-check the alignment to make sure they open and close smoothly.
Think about adding new hardware for a fresh look. A sleek handle or knob can transform the aesthetic, making a simple change feel like a full renovation.
Inspecting For Flaws
Take a moment to inspect your cabinets for any imperfections. Look closely under natural light to spot any missed spots or uneven spray. Use a touch-up brush to correct minor issues that might have escaped your initial painting.
If you find any drips or rough patches, lightly sand them down and apply a thin coat of paint. This can make a significant difference in the overall appearance, ensuring your cabinets look polished and professional.
Completing these final touches can be a rewarding experience. How do you feel about your newly transformed kitchen? Could your cabinets be the envy of your guests? Remember, attention to detail is key to achieving the perfect finish.
Maintenance Tips
Spray kitchen cabinets effectively by first cleaning them thoroughly to remove dirt and grease. Use a primer for a smooth base, then spray paint evenly across the surface. Ensure proper ventilation and allow ample drying time for a polished finish.
Spraying your kitchen cabinets can give them a fresh, modern look, but maintaining that pristine finish requires some effort. Proper maintenance ensures that your cabinets continue to look their best for years to come. With a few easy steps, you can keep them looking like new without too much hassle.Cleaning And Care
Regular cleaning is essential to keep your cabinets looking fresh. Use a soft cloth or a microfiber towel to wipe down surfaces weekly. Avoid harsh chemicals; instead, opt for a mild dish soap diluted in warm water. Make sure to dry the cabinets thoroughly after cleaning to prevent moisture damage. Consider using a gentle furniture polish once a month for added shine and protection. Have you noticed any sticky spots? A mixture of vinegar and water can work wonders in breaking down grease without damaging the finish.Touch-up Techniques
Accidents happen, and over time, you might notice small chips or scratches. Keep a small container of your cabinet paint handy for quick touch-ups. Use a fine brush to apply paint only to the affected area, blending it gently with the surrounding surface. For deeper scratches or dents, you may need a bit of sanding before repainting. Sand lightly with fine-grit sandpaper, ensuring the area is smooth before applying paint. Assess your cabinets periodically. Are there spots that need a touch-up? Regular maintenance can prevent minor imperfections from becoming noticeable eyesores. By investing a little time in cleaning and touch-ups, you’ll ensure your kitchen cabinets remain a stunning focal point of your home.Frequently Asked Questions
What Is The Best Way To Spray Kitchen Cabinets?
Clean and sand cabinets thoroughly. Use a high-quality primer for better paint adhesion. Choose a durable paint suitable for cabinets. Apply paint using an HVLP spray gun for even coverage. Allow adequate drying time between coats. Ensure proper ventilation during the process for safety and optimal results.
Is It Best To Roll Or Spray Kitchen Cabinets?
Spraying kitchen cabinets offers a smoother, professional finish. Rolling is more accessible and less messy. Spraying requires special equipment, while rolling uses basic tools. Choose spraying for a flawless look, or rolling for convenience. Both methods can achieve great results with proper technique and quality paint.
Is It Better To Spray Or Paint Kitchen Cabinets?
Spraying offers a smoother and more professional finish for kitchen cabinets. It’s faster and provides even coverage. Painting with a brush or roller is more accessible for DIY projects but may leave brush marks. For the best results, consider your skill level and desired finish.
Do I Need To Sand Cabinets Before Spraying?
Yes, sanding cabinets is necessary before spraying. It helps remove old finish and creates a smooth surface for better paint adhesion. Proper sanding ensures a professional, long-lasting finish. Use fine-grit sandpaper and clean thoroughly after sanding for optimal results.
Conclusion
Spraying kitchen cabinets can transform your space easily. The process requires patience and care. First, prepare the cabinets thoroughly. Next, choose the right spray paint. Quality matters for a smooth finish. Practice spraying on a cardboard. This helps you get the technique right.
Apply paint evenly and in thin layers. Remember to ventilate the area well. Good airflow is crucial for drying. Finally, let the cabinets dry completely. This ensures durability and a great look. Now, enjoy your refreshed kitchen cabinets. A little effort makes a big difference!