Can You Paint Kitchen Cabinets With Chalk Paint: Expert Tips
Executive Chef & Lead Commercial Kitchen Specialist at Daily Kitchup Test Lab
Are you tired of looking at your outdated kitchen cabinets and dreaming of a fresh new look? You might be wondering if there’s an easy and cost-effective way to give them a facelift.
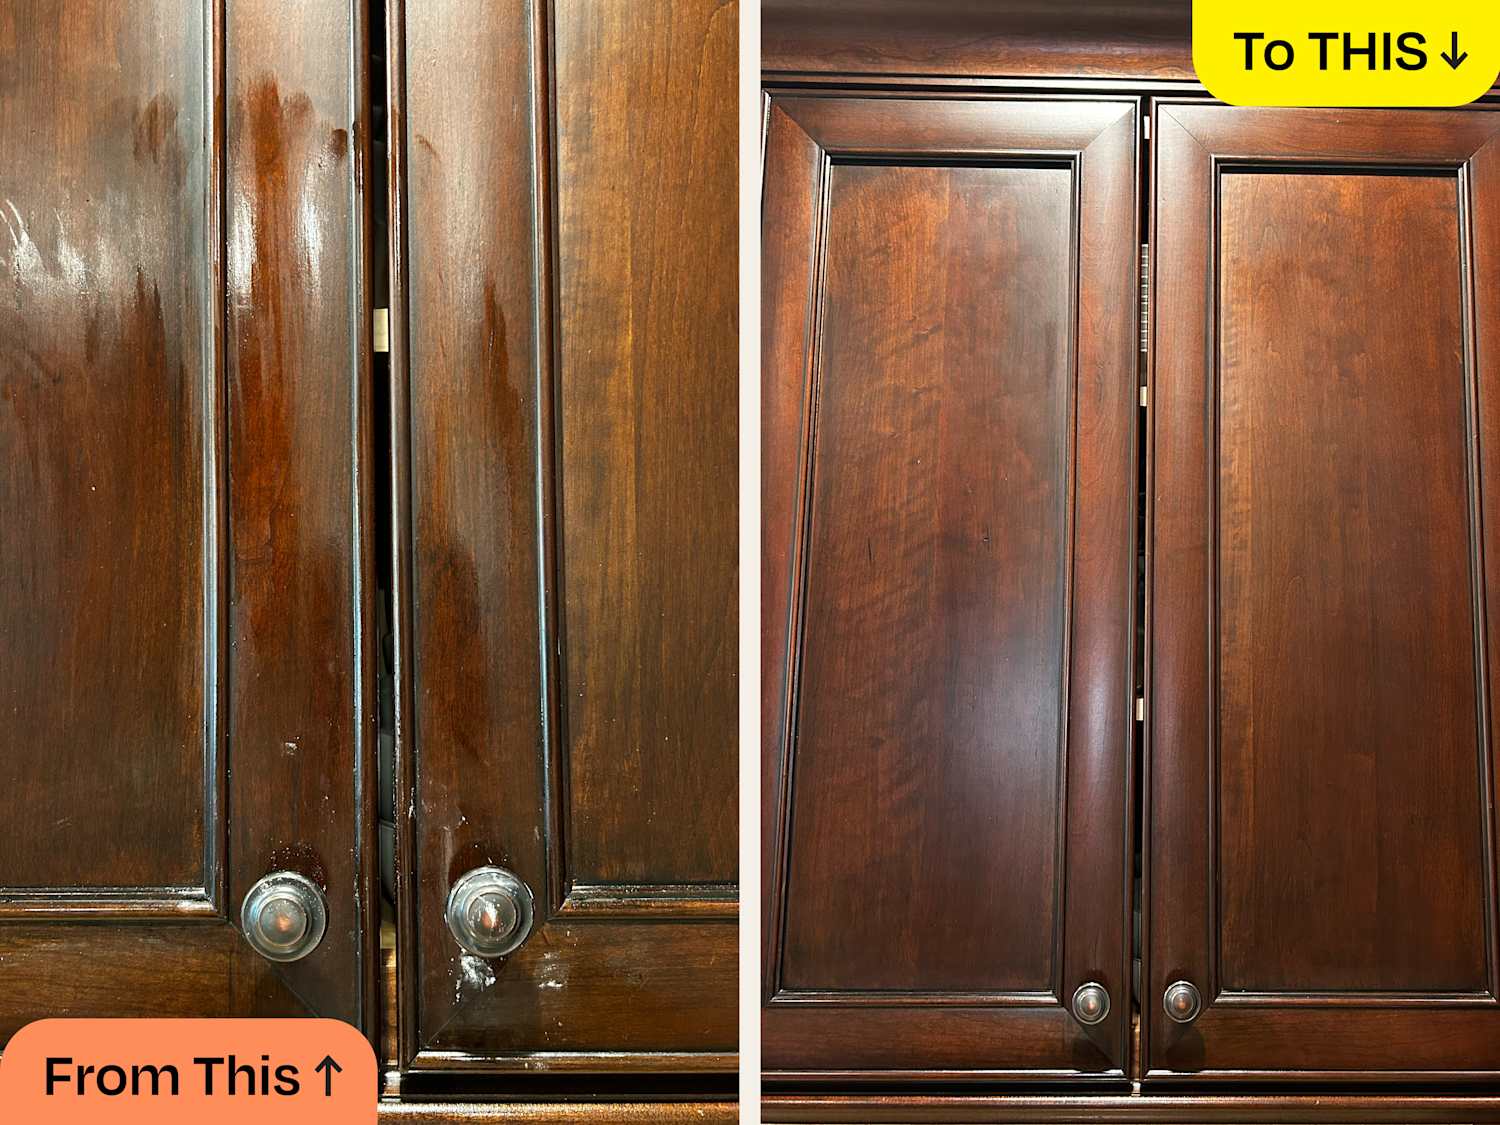
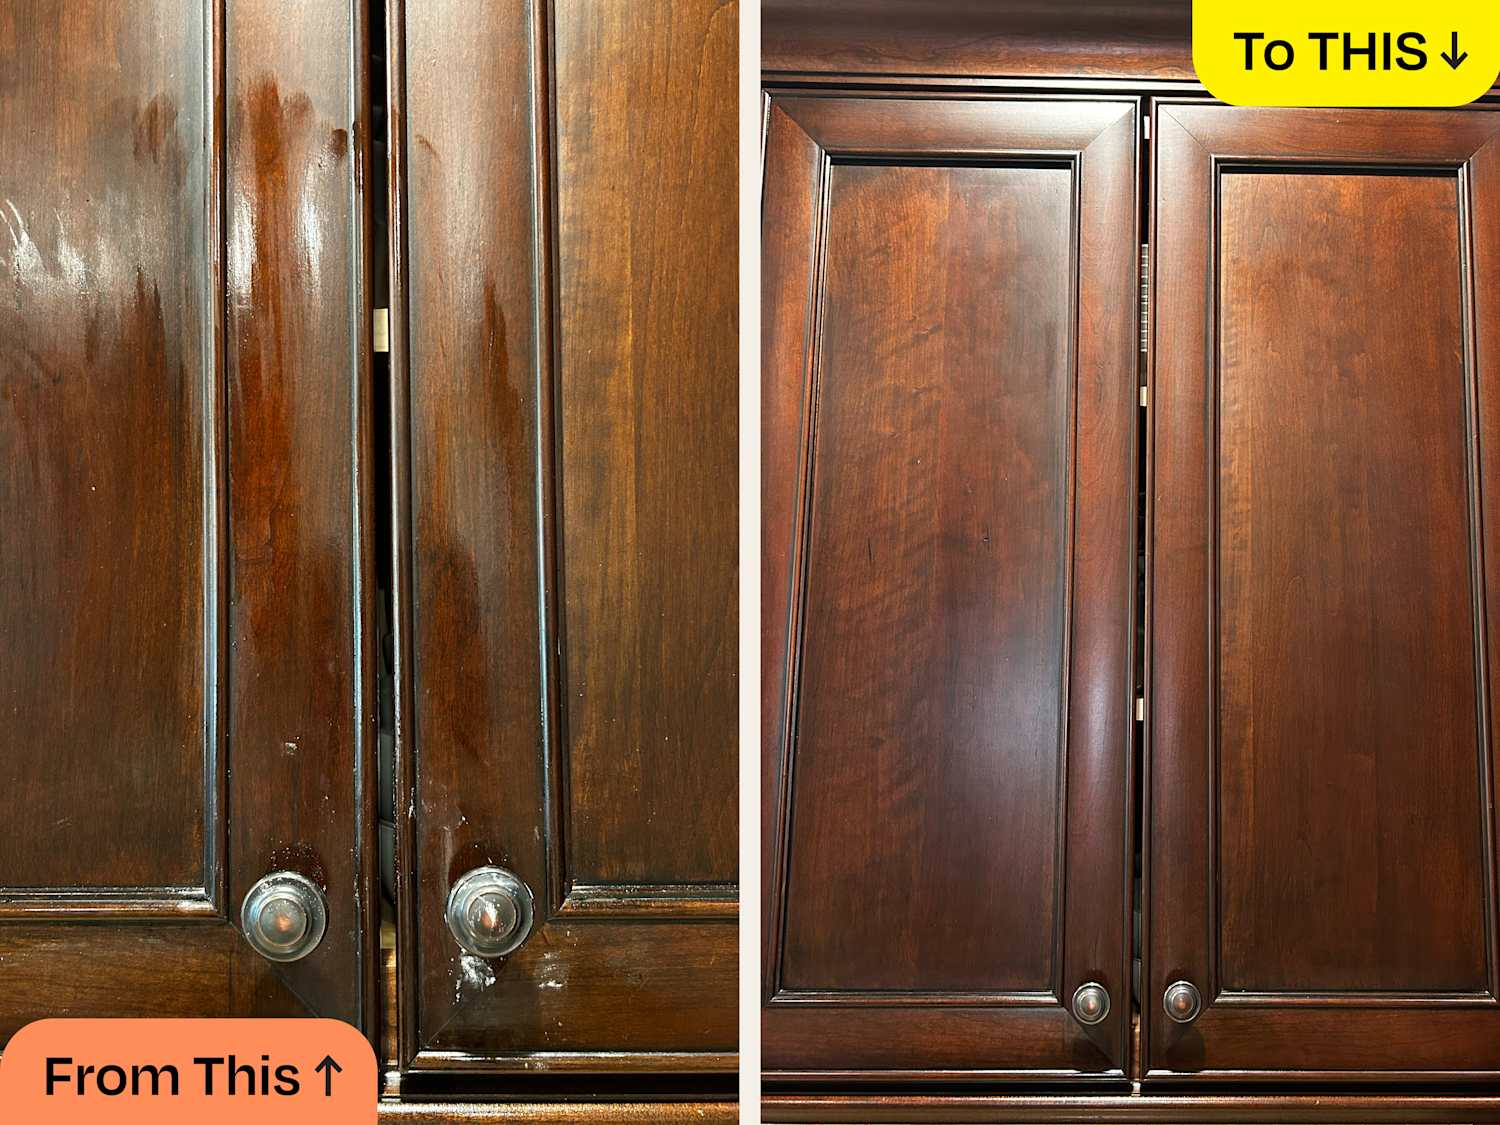
The answer could be as simple as chalk paint. Yes, you read that right—chalk paint can transform your kitchen cabinets without the hassle of sanding or priming. Imagine a kitchen that looks brand new, reflecting your personal style, all achieved with a straightforward painting process.
Before you dive into this DIY project, you probably have questions: Will chalk paint really hold up in a busy kitchen? How do you ensure a smooth finish? And what about the color options? Stick around as we unravel the secrets to successfully painting your kitchen cabinets with chalk paint, making your kitchen the heart of your home once more.
Benefits Of Chalk Paint For Cabinets
Transform kitchen cabinets with chalk paint for a smooth, matte finish. It offers easy application and quick drying. Ideal for a vintage or rustic look, chalk paint provides durable coverage, making it a popular choice for cabinet makeovers.
Painting kitchen cabinets can be a daunting task. However, chalk paint has gained popularity as a go-to solution, offering numerous benefits that make the job easier and more appealing. If you’re considering refreshing your cabinets, here’s why chalk paint might be the perfect choice for you.Easy To Use
Chalk paint is user-friendly, even for beginners. Its thick consistency allows for easy application without the need for extensive prep work. You can skip the sanding and priming, saving you time and energy.Quick Drying Time
Time is precious, especially in a busy household. Chalk paint dries quickly, enabling you to complete your project faster. You can apply multiple coats in a single day without waiting hours in between.Versatile Finish
Chalk paint offers a beautiful matte finish that suits various styles. Whether you prefer a vintage look or modern elegance, chalk paint adapts effortlessly. You can even create a distressed effect for added character.Adheres To Various Surfaces
One of chalk paint’s standout features is its ability to adhere to different surfaces. It works well on wood, laminate, and even metal. This versatility allows you to use it on various cabinet types without worrying about peeling or flaking.Low Vocs
Concerned about indoor air quality? Chalk paint is low in volatile organic compounds (VOCs), making it a safer choice for your home. You can paint your cabinets without the worry of harsh chemicals lingering in the air.Customizable Colors
Express your unique style with endless color possibilities. Chalk paint can be easily tinted to match your desired shade. Whether you want a bold pop of color or a neutral tone, customization is at your fingertips.Cost-effective
Transforming your kitchen doesn’t have to break the bank. Chalk paint is an affordable option that provides a high-quality finish. You can achieve a professional look without hiring a professional, saving you money. Isn’t it exciting to think about how a simple can of paint can breathe new life into your kitchen? With chalk paint, you’re not just painting cabinets; you’re making a creative investment in your home.Choosing The Right Chalk Paint
Painting kitchen cabinets with chalk paint offers a simple way to refresh your space. This paint requires minimal surface preparation and provides a matte finish. Ideal for a quick update without the need for extensive sanding or priming.
Choosing the right chalk paint for your kitchen cabinets is crucial. The paint you choose influences the final look and durability. Let’s explore how to make the best choice.Color Selection
Think about the mood you want in your kitchen. Bright colors can make the space feel cheerful. Neutral tones offer a classic, timeless look. Consider existing decor and appliances. These elements should complement the cabinet color. Test a small area first. This helps you see how the color looks in your lighting. It’s helpful to review color charts from different brands. Many brands offer a wide range of colors.Quality Considerations
Quality impacts the finish and longevity of your cabinets. High-quality chalk paints offer smooth application. They provide good coverage and require fewer coats. Look for paints with a strong reputation. Reviews can guide you in finding reliable brands. Consider the paint’s durability. Kitchen cabinets face frequent use. You need paint that withstands wear and tear. Some brands offer added protection against chips and scratches. Ensure the paint is easy to clean. This is important for maintaining fresh cabinets.Preparing Your Cabinets
Transform your kitchen by painting cabinets with chalk paint. This versatile paint requires minimal prep work and offers a smooth finish.
Preparing your cabinets for a fresh coat of chalk paint is a crucial step that can make all the difference in achieving a flawless finish. It’s about more than just slapping on some paint; it’s about setting the stage for a transformation. Whether you’re a seasoned DIY enthusiast or a novice looking to refresh your kitchen, these steps will guide you in prepping your cabinets for success.Cleaning And Degreasing
Start by thoroughly cleaning your cabinets. Dust, grime, and cooking residue can prevent the paint from adhering properly. Use a gentle cleaner or a mixture of warm water and mild dish soap to wipe down all surfaces. Don’t forget to pay special attention to handles, corners, and edges where dirt tends to accumulate. A degreaser can be invaluable for cutting through stubborn grease, especially around stoves or ovens. Rinse with clean water and let your cabinets dry completely. This ensures no residue is left behind that could interfere with the paint application.Sanding Techniques
Sanding might seem tedious, but it’s key for a smooth finish. Lightly sand your cabinets with a medium-grit sandpaper to create a surface that will hold paint well. Focus on areas with existing paint or finishes to ensure the new layer will adhere properly. If you’re dealing with intricate designs, consider using a sanding sponge for more precise control. After sanding, wipe away dust with a damp cloth. You might be tempted to skip this step, but removing dust ensures your paint won’t contain unsightly particles. Approaching these tasks with diligence can make your kitchen cabinets the centerpiece of your home. Are you ready to create a space that reflects your style and personality?Credit: www.tiktok.com
Application Techniques
Chalk paint has become a popular choice for kitchen cabinets. Its matte finish and ease of use appeal to many homeowners. Yet, applying it correctly is crucial for a good result. Different techniques can affect the final look and durability. Understanding these methods helps in achieving desired outcomes.
Using Brushes Vs. Rollers
Brushes offer detailed work. They reach corners and edges easily. A smooth bristle brush works best for chalk paint. It provides a clean finish without streaks. On the other hand, rollers cover large areas quickly. They give a more uniform look. Foam rollers are ideal for this purpose. They minimize texture on the surface.
Layering And Coverage
Layering is key in achieving the right coverage. Start with a thin coat. Let it dry completely. This helps the paint adhere better. Add more layers as needed. Each coat enhances the depth of color. Light sanding between coats can help smooth the surface. Use fine-grit sandpaper for this task.
Chalk paint often requires multiple layers. Especially if covering a darker color. Test a small area first. This ensures you like the finish before proceeding. Proper layering leads to a durable and appealing finish on your cabinets.
Finishing Touches
Once you’ve transformed your kitchen cabinets with chalk paint, the finishing touches are crucial to ensure durability and add character. These final steps not only protect your handiwork but also enhance the aesthetic appeal. Let’s delve into the nuances of waxing, sealing, and distressing your cabinets for a truly unique finish.
Waxing And Sealing
Waxing your chalk-painted cabinets can give them a soft, matte finish, while sealing adds a layer of protection against moisture and spills. Choose a clear wax for a subtle sheen or a dark wax to introduce a vintage vibe. Applying wax is straightforward—use a cloth or brush, and work it into the surface with circular motions.
For a more robust protective layer, consider a polyurethane sealant. This option is particularly useful for kitchen environments where moisture is a constant challenge. A sealant provides a glossy finish and ensures your cabinets withstand daily wear and tear.
Distressing For Effect
If you’re aiming for a rustic or shabby chic appearance, distressing is your friend. This technique involves lightly sanding edges and corners to reveal the wood or base paint beneath. It’s an artful way to showcase layers and depth, adding character to your kitchen space.
But how much distressing is too much? Start small and assess as you go. It’s easy to overdo it, but remember: subtlety often speaks louder than bold gestures. You want your cabinets to look naturally worn, not like they’ve been through a storm.
Have you ever considered how the finishing touches can transform the overall look of your kitchen? The right balance between waxing, sealing, and distressing can elevate the ordinary to extraordinary. Dive in, trust your instincts, and let your creativity shine.
Credit: www.facebook.com
Common Mistakes To Avoid
Painting kitchen cabinets with chalk paint can be tricky. Avoid skipping the prep work. Clean and sand the surfaces first. Not using a primer can lead to peeling. Apply thin coats for a smooth finish. Seal with a protective top coat to enhance durability.
Painting kitchen cabinets with chalk paint is a popular DIY project that can transform your kitchen space with minimal cost and effort. However, like any project, there are pitfalls to avoid to ensure your cabinets turn out beautifully. Understanding these common mistakes can save you time, money, and a lot of frustration.Skipping Surface Preparation
One of the biggest mistakes is not preparing the surface properly. Without cleaning and lightly sanding the cabinets, the paint might not adhere well. Always ensure your cabinets are clean, dry, and free of grease before you start painting.Ignoring The Need For Primer
While chalk paint is often marketed as requiring no primer, this isn’t always the best approach. Especially on darker or stained wood, a primer can prevent bleed-through and ensure a more even finish. Consider using a primer if your cabinets have a glossy finish or are made of a material prone to tannin bleed.Applying Thick Coats
It’s tempting to apply thick coats of paint to cover surfaces quickly, but this can lead to drips and an uneven finish. Thin, even coats are key to achieving a professional look. Be patient and allow each coat to dry thoroughly before applying the next.Neglecting To Seal The Paint
Chalk paint is porous and needs a protective finish to withstand the wear and tear of a kitchen environment. Skipping this step can lead to chipped and damaged paint. Use a clear wax or a polyurethane sealant to protect your cabinets and make them easy to clean.Choosing The Wrong Tools
The tools you choose can make a big difference. Using a high-quality brush or roller designed for chalk paint can help achieve a smooth finish. Cheap brushes may shed bristles and leave unsightly marks in your paint.Rushing The Process
Painting cabinets is not a task to rush through. Allow adequate time for each coat to dry and cure properly. Rushing can compromise the durability and appearance of your newly painted cabinets. Avoid these common pitfalls, and your chalk-painted kitchen cabinets will not only look fantastic but also stand the test of time. Have you encountered any of these mistakes before? How did you overcome them?Maintenance And Care
Chalk paint offers a smooth finish for kitchen cabinets without the need for primer. Regular cleaning and gentle care maintain its look. Avoid harsh chemicals to preserve the paint’s elegance.
Painting kitchen cabinets with chalk paint can transform your space with a rustic, chic vibe that’s both timeless and trendy. However, to keep them looking fresh and vibrant, proper maintenance and care are crucial. The good news is that chalk paint is relatively forgiving, and with a few simple steps, you can maintain its look and charm for years to come. Let’s dive into some practical tips on how to clean and touch up your chalk-painted cabinets.Cleaning Tips
Keeping your chalk-painted cabinets clean doesn’t require harsh chemicals. A soft cloth, some warm water, and mild soap are usually enough. Gently wipe the surfaces to remove any dust or grime. Avoid scrubbing hard to prevent damaging the finish. Consider using microfiber cloths as they are gentle and effective. They trap dirt and dust without scratching the paint. How often do you clean your cabinets? Regular cleaning will ensure they stay looking fresh.Touch-up Advice
Accidents happen, and sometimes your cabinets might get chipped or scratched. Luckily, touching up chalk paint is straightforward. Keep a small pot of the same paint color handy for touch-ups. Simply clean the area, lightly sand if necessary, and apply a fresh coat of paint. When applying touch-ups, remember to blend the edges to maintain a seamless look. Use a small brush for precision and allow the paint to dry thoroughly before using the cabinet again. Have you tried blending chalk paint before? You’ll find it’s quite forgiving and easy to work with.Credit: www.tiktok.com
Expert Insights
Chalk paint has become a popular choice for kitchen cabinets. Its matte finish and ease of use attract many DIY enthusiasts. But what do the experts say about using chalk paint on kitchen cabinets? Let’s dive into some expert insights.
Professional Recommendations
Experts suggest preparing cabinets well before painting. Clean the surfaces thoroughly to remove grease and grime. Sanding is often unnecessary with chalk paint, but it can help. Apply a primer if the cabinets are particularly glossy. This ensures better adhesion of the paint.
Use a high-quality brush or roller for application. Two coats are usually sufficient, but this can vary. Allow ample drying time between coats. Sealing the painted cabinets with a wax or topcoat is crucial. This protects the paint from moisture and stains.
Success Stories
Many DIY enthusiasts have shared their success stories with chalk paint. One homeowner transformed her dark oak cabinets into a bright white kitchen. She used two coats of chalk paint and a clear wax finish. The process took a weekend and dramatically changed her kitchen’s look.
Another user reported a successful makeover with a bold color. They chose a deep blue for their kitchen cabinets. The chalk paint adhered well, and the finish was smooth and even. The project took a few days, including drying time for each coat.
These stories show the versatility and appeal of chalk paint. With the right preparation, your kitchen cabinets can get a new lease on life.
Frequently Asked Questions
Is Chalk Paint Suitable For Kitchen Cabinets?
Yes, chalk paint is suitable for kitchen cabinets. It provides a matte finish and adheres well to surfaces. Chalk paint is versatile and requires minimal preparation. However, it is essential to seal the paint to protect against moisture and wear.
Using a wax or polyurethane topcoat can enhance durability.
Do I Need To Sand Cabinets Before Chalk Painting?
No, sanding is usually not necessary before using chalk paint. Chalk paint adheres well to most surfaces without extensive preparation. Light cleaning to remove grease and dirt is sufficient. However, sanding might be required for very glossy surfaces or if the cabinets have peeling paint to ensure better adhesion.
How Long Does Chalk Paint Last On Cabinets?
Chalk paint can last several years on kitchen cabinets with proper sealing. The durability depends on the type of sealant used and the level of kitchen usage. Regular maintenance, such as cleaning and touch-ups, can extend its lifespan. A high-quality topcoat can significantly improve durability and resistance to wear.
Can You Clean Chalk-painted Cabinets Easily?
Yes, chalk-painted cabinets can be cleaned easily with gentle methods. Use a soft cloth and mild soap to wipe down the cabinets. Avoid abrasive cleaners to prevent damaging the finish. Regular cleaning helps maintain the appearance and prolongs the lifespan of the paint.
Ensure cabinets are sealed for easier maintenance.
Conclusion
Painting kitchen cabinets with chalk paint offers a fresh look. It’s easy to apply and dries quickly. No need for primer. Just clean the surface well. Chalk paint gives a matte finish. Perfect for a rustic style. Try different colors to match your decor.
It’s budget-friendly and versatile. Minimal prep required. Enjoy a new kitchen vibe without major renovations. Experiment with techniques for unique effects. Add a protective topcoat for durability. Your kitchen can feel brand new. Chalk paint is a simple way to transform your space.
Consider it for your next DIY project.

Similar Posts