
Are your once-pristine kitchen cabinets now marred by unsightly paint splatters or an outdated color that just doesn’t do your space justice? Removing paint from kitchen cabinets can seem like a daunting task, but imagine the satisfaction of unveiling the beautiful wood beneath, ready to be transformed into a fresh, modern look.
You might be worried about damaging the wood or spending endless hours scrubbing away, but fear not. With the right techniques and a little patience, you can restore your cabinets to their former glory. In this guide, we’ll walk you through straightforward steps to effectively remove paint without the hassle, giving your kitchen the makeover it deserves.
Ready to unlock the secrets to fresh, beautiful cabinets? Let’s dive in.
Preparing The Workspace
Preparing the workspace is crucial before removing paint from kitchen cabinets. Lay down drop cloths to protect floors. Ensure proper ventilation by opening windows or using fans.
Preparing the workspace is vital for removing paint from kitchen cabinets. A well-organized area makes the task easier and safer. Proper preparation prevents damage to the kitchen and keeps the process smooth.Gather Essential Tools
Start by collecting necessary tools and materials. You will need paint scrapers, sandpaper, and a screwdriver. A drop cloth protects the floor from paint chips. Have a bucket and sponge ready for cleaning. Use gloves and safety goggles for protection. Keep all tools within reach to save time.Protect Surrounding Areas
Cover nearby countertops and appliances with plastic sheets. Secure the sheets with tape to keep them in place. Remove items from the cabinets and clear the workspace. Ensure adequate ventilation to avoid inhaling fumes. Open windows or use a fan to circulate air. This keeps the environment safe and comfortable.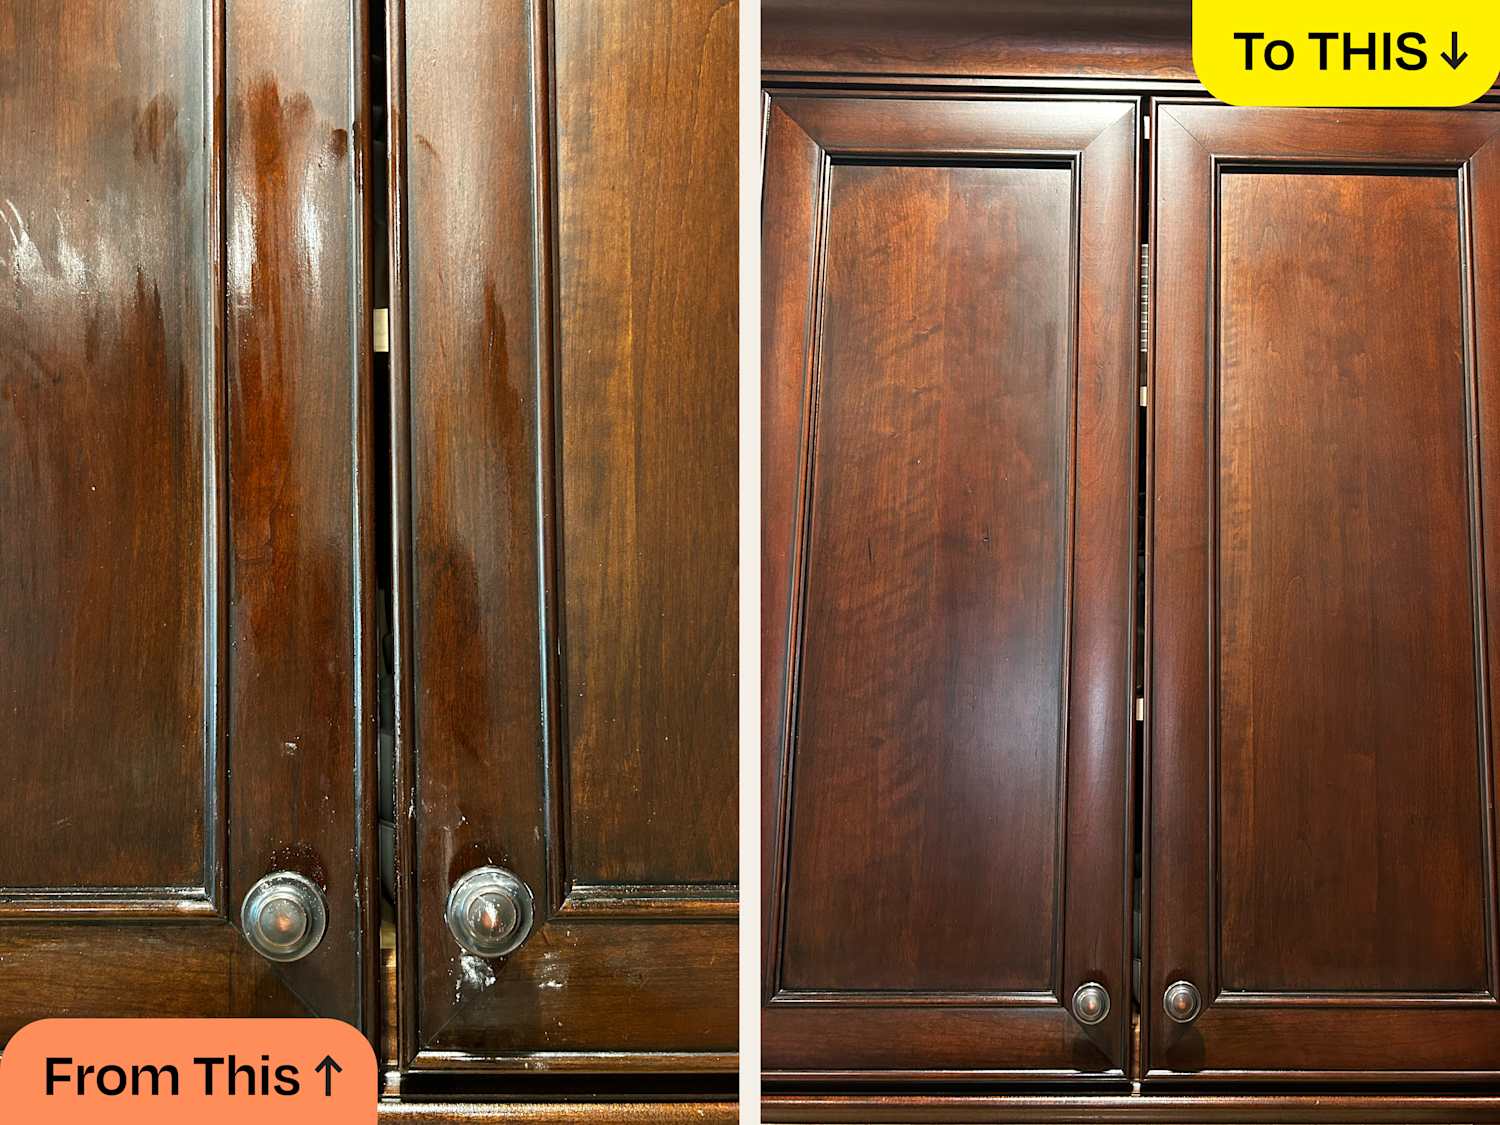
Credit: www.thekitchn.com
Choosing The Right Paint Remover
Choosing the right paint remover for your kitchen cabinets can be the key to achieving a smooth and flawless finish. With numerous options available, understanding the differences between chemical strippers and natural alternatives can greatly impact your results. Whether you’re tackling a DIY project or hiring professionals, knowing what works best for your cabinets is essential.
Chemical Strippers
Chemical strippers are powerful solutions designed to break down paint quickly. They come in liquid, gel, or paste forms, catering to different surfaces and paint types. These products often contain strong solvents, making them effective but sometimes harsh.
One advantage is their speed. If time is of the essence, chemical strippers can remove multiple layers of paint in a matter of minutes. However, they can also emit strong odors and require proper ventilation. Safety gear like gloves and masks should be used to protect your skin and respiratory system.
Consider the type of paint on your cabinets. Oil-based paint may require a different stripper than latex paint. Always test a small, inconspicuous area before applying broadly to ensure it doesn’t damage the wood.
Natural Alternatives
Natural alternatives offer a gentler approach, appealing to those who prefer eco-friendly solutions. These products typically contain less harmful chemicals, reducing health risks and environmental impact. Lemon juice, vinegar, and baking soda are common ingredients found in homemade paint removers.
These options may require more patience. Unlike chemical strippers, natural products often take longer to work, especially on stubborn or thick paint layers. Yet, they provide peace of mind with fewer fumes and irritants.
Natural paint removers can be a great choice for small projects or light touch-ups. If you’re worried about potential damage to delicate cabinet surfaces, these alternatives offer a safer route. Would you choose a slower, safer method for the sake of sustainability?
Safety Precautions
Wear gloves and goggles to protect skin and eyes from chemicals. Ensure proper ventilation to avoid inhaling fumes. Keep children and pets away from the work area.
Removing paint from kitchen cabinets requires care and attention. Safety precautions are essential for a smooth process. Protecting yourself and your surroundings is crucial. Wearing the right gear and ensuring proper ventilation makes the task safer. Let’s dive into the necessary safety steps.Protective Gear
Wearing protective gear is non-negotiable. It shields you from harmful chemicals. Start with safety goggles to protect your eyes. Chemical-resistant gloves are a must for hand protection. Wear a long-sleeved shirt and long pants. This prevents skin exposure. A dust mask or respirator is vital. It helps avoid inhaling harmful fumes.Ventilation Requirements
Good ventilation reduces exposure to toxic fumes. Open all windows in the kitchen. Use fans to circulate fresh air. Avoid working in closed spaces. Portable fans can help direct fumes outside. Keep doors open for cross ventilation. This ensures a constant flow of air. Fresh air keeps you safe and alert.
Credit: www.reddit.com
Step-by-step Paint Removal
Removing paint from kitchen cabinets involves simple steps. Begin by applying a paint remover to loosen the paint. Gently scrape off the softened paint with a putty knife. Finally, sand the surface for a smooth finish.
Removing paint from kitchen cabinets can transform your space, breathing new life into tired-looking surfaces. To help you tackle this project, here’s a straightforward, step-by-step guide. Follow these easy steps to efficiently strip paint off your kitchen cabinets and restore their natural beauty.Applying The Remover
Begin by selecting a high-quality paint remover suitable for your cabinet material. Ensure good ventilation in the kitchen by opening windows or using fans. Apply the remover generously using a paintbrush, covering the painted surface evenly. Give it time to work its magic—usually around 20-30 minutes—so the paint starts to bubble and lift.Scraping Off The Paint
Once the paint has loosened, use a plastic scraper to gently lift it away. Start at the edges and work your way inwards, taking care not to gouge the wood. For stubborn areas, reapply the remover and give it a few more minutes before trying again. Patience is key; rushing can damage the cabinets.Cleaning The Surface
After scraping, wipe down the surface with a damp cloth to remove any residual remover and paint flakes. Consider using a mild detergent mixed with water for thorough cleaning. Dry the cabinets with a clean towel to prevent moisture damage. Your cabinets are now ready for a fresh coat of paint or a new finish. By following these steps, you can confidently remove paint from your kitchen cabinets, enhancing their appearance and ensuring they stand out as a beautiful feature in your home. What will you do with your refreshed space?Dealing With Stubborn Spots
Removing paint from kitchen cabinets requires careful techniques. Try using a mixture of vinegar and water to gently scrub the surface. For tougher spots, consider using a baking soda paste to lift stubborn paint without damaging the cabinet.
Removing paint from kitchen cabinets can be a rewarding project, but what happens when you encounter those stubborn spots that just won’t budge? We’ve all been there, standing in the kitchen, staring at that small but defiant patch of paint that seems to mock our efforts. It’s time to tackle these tricky areas with some effective strategies. Here’s how you can deal with those stubborn spots, ensuring your cabinets look sleek and spotless.Using Heat Methods
Applying heat is a simple yet powerful technique to soften stubborn paint spots. Using a hairdryer or a heat gun, gently heat the area until the paint begins to loosen. Be cautious to avoid damaging the cabinet surface with excessive heat. Once the paint is softened, you can use a plastic scraper to peel it away smoothly. This method is ideal for those who want to avoid harsh chemicals.Sanding Techniques
Sanding is another effective way to deal with lingering paint spots. Start with a fine-grit sandpaper to gently rub over the painted area. Be patient and apply consistent pressure to ensure you remove the paint without scratching the cabinet surface. Consider using an electric sander for larger areas, but always test on a small section first to prevent over-sanding. Have you ever tried sanding to remove paint? It requires patience but often yields the best results for stubborn spots.
Credit: www.tiktok.com
Finishing Touches
Removing paint from kitchen cabinets requires patience and the right tools. Start by gently sanding to strip away layers. Next, use a paint stripper for stubborn spots, ensuring proper ventilation. Finish with a clean, damp cloth to wipe away residue, revealing the cabinet’s original beauty.
In the final stage of removing paint from your kitchen cabinets, attention to detail makes all the difference. These finishing touches not only bring out the beauty of your cabinets but also prepare them for a fresh coat of paint or a polished look. It’s about transforming the hard work you’ve done into a rewarding outcome. You might find this step particularly satisfying because it’s where everything comes together.Smoothing The Surface
Once you’ve stripped the paint, it’s crucial to smooth out the surface. This ensures your cabinets are free from any leftover residue or uneven patches. Start by using fine-grit sandpaper to gently sand down the cabinet surfaces. A sanding block can help you navigate the curves and edges effectively. Pay attention to corners and crevices where leftover paint might hide. After sanding, wipe the surface with a damp cloth to remove dust and particles. Consider running your hand over the surface to feel for any rough spots. If you find any, give them another gentle sand. This tactile check might reveal imperfections that aren’t visible. Smooth surfaces not only look better but also help new paint adhere properly.Prepping For New Paint
Before you dive into painting, prepping the cabinets is essential. Clean the surface with a degreasing agent to remove any oils or residues. This step ensures the primer and paint stick well. Apply a layer of primer to seal the surface and provide a smooth base. Make sure to use a primer suitable for kitchen environments to prevent moisture issues. Allow the primer to dry completely. This patience pays off with a better finish. Consider the color of your new paint. Light colors can brighten the space, while darker shades add depth and elegance. Think about your kitchen’s overall theme and how the cabinet color will complement it. Would a bold color make a statement or would you prefer something more subtle? This choice can transform your kitchen’s vibe significantly. Ultimately, these finishing touches set the stage for your cabinet’s new life, enhancing your kitchen’s overall appeal.Maintenance Tips
Removing paint from kitchen cabinets can be a manageable task with the right approach. Begin with gentle sanding to loosen paint layers, ensuring the cabinet’s surface remains smooth. Use a safe paint remover, following instructions carefully, to dissolve stubborn paint residues without damaging the cabinets.
Maintaining the pristine appearance of your kitchen cabinets can be a rewarding task. It not only extends the life of your cabinetry but also keeps your kitchen looking fresh and inviting. After removing paint, it’s essential to focus on proper maintenance to ensure they remain in top condition. These simple tips will help you preserve the beauty and functionality of your cabinets.Regular Cleaning
Regular cleaning is crucial for maintaining the look of your kitchen cabinets. Dust and grease can accumulate over time, dulling their appearance. Use a soft cloth or microfiber towel to gently wipe down the surfaces weekly. Consider using a mild detergent mixed with warm water for a deeper clean. Avoid harsh chemicals that can damage the finish or leave residues. A personal trick is to use a small brush to clean corners and edges where grime tends to collect. How often do you find yourself overlooking these tricky spots?Protective Coatings
Applying protective coatings can be a game-changer for cabinet longevity. They act as a shield against scratches and moisture, which are common in kitchen environments. A clear polyurethane finish can be an excellent choice for this purpose. You might want to explore wax or oil-based finishes for wooden cabinets, which offer a natural look and feel. Test a small area first to ensure compatibility with the cabinet material. Remember, protective coatings also make cleaning easier by reducing the adherence of dirt and stains. Isn’t it nice to have an extra layer of protection for peace of mind?Frequently Asked Questions
How Do I Start Removing Paint?
Begin by cleaning the cabinets with a mild detergent. Then, use a scraper or paint stripper to remove the paint. Always work in small sections to ensure thorough removal.
What Tools Are Needed For Paint Removal?
You’ll need a scraper, paint stripper, sandpaper, and protective gear. These tools ensure safe and effective paint removal from your kitchen cabinets. Always follow safety guidelines while using chemical strippers.
Can I Use Vinegar To Remove Paint?
Vinegar can help soften paint for easier removal. Apply it to the painted surface and let it sit. Scrape gently once the paint softens. It’s a natural and eco-friendly option.
Is Sanding Necessary After Paint Removal?
Sanding is recommended to smooth the surface and prepare it for new paint. It helps remove any remaining residue and ensures a clean finish. Use fine-grit sandpaper for best results.
Conclusion
Removing paint from kitchen cabinets isn’t hard with the right steps. Start with gentle methods. Sanding and heat guns work well for stubborn paint. Safety matters. Wear gloves and goggles. Ventilate your space. Patience pays off. Take your time for the best results.
Once clean, cabinets look fresh again. A little effort goes a long way. Your kitchen will shine bright and look renewed. Happy cleaning and enjoy your refreshed space!