How Do You Install Upper Kitchen Cabinets: Expert Guide
Are you ready to transform your kitchen space by installing upper cabinets? Imagine the satisfaction of having all your kitchen essentials neatly organized and within easy reach.
Installing upper kitchen cabinets can enhance both the functionality and aesthetics of your cooking space. You don’t need to be a professional to achieve a flawless installation—just the right guidance and a dash of confidence. You’ll discover step-by-step instructions that make the process straightforward and stress-free.
Picture your kitchen with perfectly aligned cabinets, and let’s turn that vision into a reality. Ready to get started? Dive in, and by the end, you’ll have the know-how to tackle this rewarding DIY project with ease.

Credit: www.youtube.com
Tools And Materials Needed
Installing upper kitchen cabinets requires tools and materials like a drill, screws, level, stud finder, measuring tape, and brackets. Ensure you have a helper for lifting and aligning the cabinets. Proper preparation ensures a smooth installation process.
Installing upper kitchen cabinets requires preparation. Proper tools and materials are essential. They ensure a smooth and efficient process. Below is a comprehensive guide to what you’ll need.Essential Tools
Gathering the right tools is crucial. You’ll need:- Measuring tape: To ensure accurate dimensions.
- Level: For proper alignment.
- Stud finder: To locate wall studs.
- Drill: For making holes in the wall.
- Screwdriver: To tighten screws securely.
- Clamps: To hold cabinets in place.
- Hammer: For minor adjustments.
- Safety glasses: To protect your eyes.
Necessary Materials
Alongside tools, certain materials are vital. These include:- Cabinets: Choose ones that fit your space and style.
- Wood screws: For securing cabinets.
- Shims: To level cabinets if needed.
- Caulk: For sealing gaps.
- Sandpaper: To smooth surfaces.
- Wall anchors: For added support.
Preparation Tips
Ensure your workspace is ready. Clear the area of any obstacles. Lay out tools and materials for easy access. Double-check measurements before starting. This preparation saves time and avoids mistakes.
Credit: www.create-enjoy.com
Preparing The Kitchen Space
Installing upper kitchen cabinets requires careful planning and preparation. Measure the space accurately to ensure a perfect fit. Secure the cabinets to the wall studs using brackets for stability.
Preparing the kitchen space for installing upper cabinets is a crucial first step in your renovation journey. It’s not just about ensuring everything fits, but also about setting the stage for success. Whether you’re a DIY enthusiast or tackling this with a friend, a well-prepared space can make all the difference.Measuring And Marking
Before you lift a single cabinet, precise measurements are your best friend. Use a tape measure to determine the exact height and width where your cabinets will hang. Make sure to mark these measurements clearly on the wall using a level to ensure straight lines. Consider the height of your ceilings and the space above your countertops. Standard upper cabinets are typically installed so that the bottom edge is 18 inches above the countertop. However, you may choose to adjust this depending on your kitchen’s unique layout. It’s smart to double-check your marks. A small error in measuring can lead to significant issues during installation.Ensuring Wall Readiness
Once your measurements are in place, it’s time to focus on the wall itself. Are the walls strong enough to support the weight of your cabinets? Check for studs using a stud finder, as you’ll want to anchor the cabinets securely into these for stability. If your wall has any damage, such as holes or weak spots, address these before installation. You wouldn’t want your freshly hung cabinet to bring down a piece of drywall with it. Consider what’s behind your walls too. Be cautious of electrical wires or plumbing that may interfere with your installation. Identifying and avoiding these can save you from costly repairs later. Preparing your kitchen space might seem like a meticulous task, but think of it as building a solid foundation for your cabinets. With these steps, you’re not just installing cabinets; you’re creating a kitchen that stands the test of time. Are you ready for the next step in your kitchen transformation?Locating Wall Studs
Locating wall studs ensures secure installation of upper kitchen cabinets. Use a stud finder to pinpoint their position. Mark the spots clearly before drilling.
Locating wall studs is crucial for installing upper kitchen cabinets. Properly secured cabinets are safe and durable. They support the weight of dishes, food, and more. Accurate stud location ensures your cabinets remain sturdy.Using A Stud Finder
A stud finder is a handy tool. It helps you locate studs behind the drywall. Turn on your stud finder and place it flat against the wall. Slowly slide it horizontally. Listen for beeps indicating a stud. Mark these spots for future reference.Marking Stud Locations
After finding studs, mark their locations. Use a pencil for clear visibility. Draw a vertical line along the stud’s center. This helps align cabinet screws accurately. Repeat for all studs in the installation area.Planning Cabinet Layout
Installing upper kitchen cabinets involves careful planning and precise measurements. Secure the cabinets to wall studs for stability. Ensure alignment and level positioning for a seamless look.
Planning Cabinet Layout Before you begin installing upper kitchen cabinets, it’s essential to have a well-thought-out plan. A clear layout ensures that your cabinets fit seamlessly and function efficiently. You want your kitchen to not only look good but also feel good to work in. Visualize your kitchen space. Consider where appliances, windows, and doors are located. These elements will influence where and how you place your cabinets. Think about the items you’ll store in each cabinet. This will help you decide on the height and depth of the cabinets. Aim for a balance between aesthetics and practicality.Aligning With Base Cabinets
Aligning upper cabinets with base cabinets creates a cohesive look. Measure carefully to ensure both sets of cabinets are in harmony. Misalignment can result in an awkward and unbalanced kitchen space. Use a level to ensure precision. Even a slight tilt can become a noticeable issue over time. Double-check measurements before drilling or fastening anything. Consider the visual flow. Cabinets should align not only in terms of width but also in depth. This alignment contributes to a streamlined and professional appearance.Establishing A Level Line
Creating a level line is a critical step in cabinet installation. It acts as your guide to ensure all cabinets are installed at the same height. This line prevents a domino effect of uneven cabinets. Mark a line on the wall where the bottom of the upper cabinets will sit. Use a laser level for accuracy. This tool can save you from making costly mistakes. Check the level line multiple times. Walls and ceilings may not be perfectly straight, so adjustments might be necessary. A consistent level line ensures that your cabinets will be both functional and beautiful. By planning your layout carefully, you set the stage for a successful installation process. Have you considered how your kitchen’s existing features will influence your cabinet placement? Proper planning can transform your kitchen into a space that’s both stylish and functional.Installing The First Cabinet
Accurately measure the space for your cabinets. Secure a ledger board on the wall for support. Carefully align each cabinet and screw them into place, ensuring stability and levelness.
Installing the first cabinet is a crucial step in your kitchen renovation journey. It’s the foundation that sets the tone for the rest of your project. Getting this right will ensure that the rest of your cabinets align perfectly and are securely mounted.Securing The Ledger Board
Before you even think about lifting that cabinet, you need to secure a ledger board. This temporary support is your best friend, acting as an extra pair of hands to keep the cabinet in place while you work. Cut a 1×3-inch piece of wood to the exact length of the cabinet you’re installing. Attach this ledger board to the wall using screws. Make sure it’s level and at the exact height where the bottom of the cabinet will sit. This will help prevent any mishaps and ensure the cabinet doesn’t slip while you’re fastening it.Mounting And Leveling
With the ledger board in place, it’s time to mount your first cabinet. Enlist a friend or family member to help lift the cabinet onto the board. Align the cabinet with the wall studs, which you should have marked beforehand. Use a level to ensure the cabinet is perfectly horizontal. Adjust as needed by inserting shims behind the cabinet until the bubble in the level sits between the lines. Once leveled, drive screws through the cabinet back into the wall studs, securing it firmly. Have you ever noticed how a slight tilt can make a world of difference in cabinet doors swinging open or staying shut? Leveling is key, not just for aesthetics but for functionality, too. Your countertops and backsplash will also align perfectly when you start with a leveled cabinet. Remember, patience and precision are your allies here. Take your time and double-check your work. A well-installed first cabinet sets a smooth path for the rest of the installation.Connecting Additional Cabinets
Begin by measuring and marking the wall for proper cabinet alignment. Secure the cabinets firmly to the studs. Use brackets for added stability.
Connecting additional cabinets brings harmony to your kitchen space. Proper alignment and secure fastening are key. These steps ensure seamless integration and stability.Aligning Adjacent Cabinets
Aligning adjacent cabinets requires attention to detail. Start by measuring the space. Ensure both cabinets are flush against the wall. Check the level of each cabinet. Use a spirit level for precision. If adjustments are needed, make them before proceeding. Proper alignment prevents gaps and uneven surfaces.Securing With Clamps
Securing cabinets with clamps holds them in place. Position clamps at the top and bottom. This keeps cabinets steady during installation. Tighten clamps gradually. Avoid over-tightening to prevent damage. Once secured, double-check the alignment. The clamps should hold until permanent fixtures are in place.Final Adjustments And Securing
After mounting the upper kitchen cabinets, the final adjustments and securing process is crucial for ensuring stability and a polished look. This phase involves fine-tuning the installation, ensuring everything is snug and aligned. These steps might seem minor, but they make a significant difference in the overall functionality and appearance of your kitchen.
Tightening Screws
Once your cabinets are in place, it’s time to ensure they are securely fastened. Begin by checking all the screws that hold the cabinet frames together. You might be surprised how often screws can loosen during installation, especially if you’re working alone or using power tools.
Grab a screwdriver and go over each screw, giving them a firm twist to tighten them properly. It’s not just about security; tight screws help maintain the cabinet’s structural integrity. Imagine the frustration of having your cabinet doors misalign over time due to loose screws. A simple tightening can prevent that.
Checking For Level And Plumb
Even if your cabinets look aligned at a glance, it’s essential to verify their level and plumbness. Use a spirit level to check both horizontally and vertically. This ensures that your cabinets are not tilted or skewed, which can affect their function and aesthetics.
Adjustments may be necessary—perhaps using shims to level the cabinets. This step is crucial, especially if you have uneven walls or floors. Have you ever opened a cabinet door only for it to swing back unexpectedly? Proper leveling prevents such issues, keeping everything in smooth working order.
As you finish these final adjustments, take a moment to admire your work. Are there any areas that could use a touch-up? Perhaps a slight realignment to make the cabinets look perfectly tailored to your kitchen space? These tweaks not only improve functionality but also add to the satisfaction of a job well done.

Credit: www.familyhandyman.com
Finishing Touches
Ensure cabinets are level and secure by using a stud finder to locate wall studs. Mark the desired height and attach a ledger board to support the cabinets during installation. Use screws to firmly secure the cabinets to the wall, checking alignment after each step.
Finishing touches are what transform your kitchen cabinets from mere storage units to beautiful design elements that complement your kitchen’s overall look. Think of this stage as adding personality to your cabinets. The process of installing upper kitchen cabinets doesn’t just end with putting them in place; it’s about refining them to perfection.Installing Cabinet Doors
Once your cabinet boxes are securely mounted, it’s time to add the doors. Begin by aligning the doors with the cabinet openings. Ensure that they are level and even with each other to maintain a seamless look. Use a screwdriver or a drill to attach the hinges to the doors. A friend shared how using a level during this process transformed their slightly crooked doors into perfectly aligned ones. It’s a small step that makes a big difference. Adjust the hinge screws for precision. This allows you to fine-tune the door alignment for a polished finish.Attaching Hardware
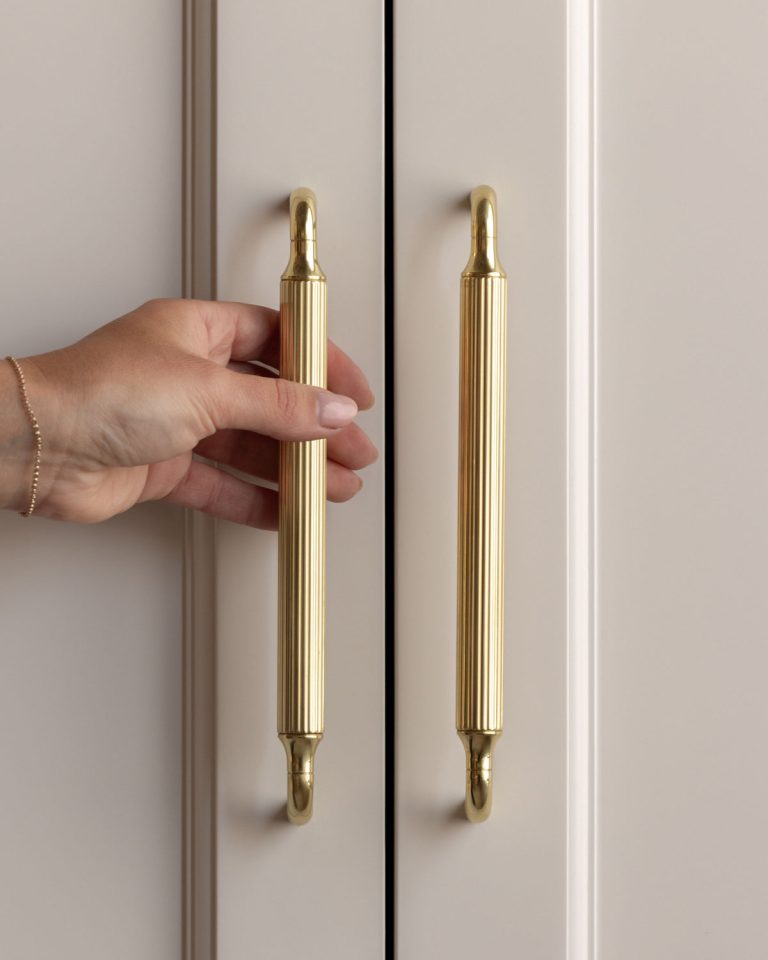
Cabinet hardware is like jewelry for your kitchen. Choose handles or knobs that reflect your style, whether it’s sleek modern or classic vintage. Position the hardware evenly on each door and drawer. A simple cardboard template can save time and ensure consistency. Secure the hardware with screws, making sure they’re tightly fastened. You might find yourself surprised at how such a small detail can elevate the entire look of your kitchen. As you step back and admire your handiwork, consider how these finishing touches have transformed your kitchen space. Are there any other elements you might add to enhance your kitchen’s aesthetic?Frequently Asked Questions
Do Upper Cabinets Need To Be Screwed Together?
Yes, upper cabinets should be screwed together for stability. This ensures a secure and uniform installation. Screwing them together helps align and support them, preventing sagging or shifting. Always use the appropriate screws and tools for the best results.
What Is The Average Price To Install Upper Cabinets?
Installing upper cabinets costs between $200 and $1,000 per linear foot. Prices vary based on materials and labor. Custom cabinets and professional installation can increase costs. Always get multiple quotes to ensure competitive pricing. Consider factors like cabinet size, design, and location for accurate estimates.
How To Install Kitchen Cabinets For Beginners Step By Step?
Start by measuring and marking cabinet positions. Assemble cabinets, ensuring they are level and square. Secure them to wall studs using screws. Attach doors and hardware. Finish by installing countertops and adjusting doors for perfect alignment.
Do You Install Upper Cabinets Before Countertops?
Yes, installing upper cabinets before countertops is standard practice. This order prevents potential damage to countertops. It also ensures easier access for installing cabinets securely. Always double-check measurements to guarantee a perfect fit for both components.
Conclusion
Installing upper kitchen cabinets is a straightforward task. Follow each step carefully. Measure and mark accurately to ensure perfect alignment. Use quality screws and anchors for stability. Work with a partner for safety and ease. Double-check levels for a neat finish.
Tidy up as you go for a clean workspace. Finally, admire your handy work. Your kitchen looks fresh and organized. Remember, patience leads to great results. With the right tools, you can transform your space. Enjoy your new cabinets and the added storage they provide.
Happy renovating!