How to Build a Kitchen Cabinet: Step-by-Step Guide
Are you dreaming of a kitchen that truly reflects your style and meets your needs? Imagine opening your cabinets to find exactly what you want, exactly where you want it.
Building your own kitchen cabinet might sound daunting, but it’s more achievable than you think. Not only will you save money, but you’ll also create a unique, customized space that’s perfect for your home. In this guide, we’ll walk you through every step of the process, making it simple and stress-free.
So, are you ready to transform your kitchen and impress everyone with your handiwork? Let’s dive in and uncover the secrets to crafting the perfect kitchen cabinet.
Tools And Materials
Building a kitchen cabinet requires essential tools like a drill, screwdriver, and measuring tape. Key materials include wood, hinges, and screws.
Building a kitchen cabinet is an exciting project. It requires the right tools and materials. This section covers the essentials. Let’s make sure you have everything you need.Essential Tools
To start, gather your essential tools. A tape measure ensures accurate dimensions. A circular saw cuts wood efficiently. Use a drill for making holes and driving screws. Sandpaper smooths rough edges and surfaces. A level checks that your cabinet is straight. Clamps hold pieces in place during assembly. A screwdriver tightens or loosens screws. Safety gear like goggles and gloves protect you. A pencil is handy for marking measurements.Necessary Materials
Now, let’s talk about materials. Choose quality plywood or MDF for the cabinet body. Solid wood works well for doors and frames. Hinges allow your doors to open and close smoothly. Handles add style and function. Wood glue ensures strong joints. Screws hold everything together securely. Paint or stain gives your cabinet a finished look. Shelving brackets support your shelves. Consider edge banding for a neat finish. Drawer slides make drawers easy to open.
Credit: www.youtube.com
Planning And Design
Creating a kitchen cabinet involves careful planning and design. Consider dimensions, materials, and functionality to ensure a perfect fit. Choose durable materials and plan for efficient storage solutions to enhance kitchen usability.
Planning and designing a kitchen cabinet involves thoughtful consideration. This stage sets the foundation for a functional and visually appealing space.Measuring The Space
Accurate measurements are crucial for a perfect fit. Use a measuring tape to record the width, height, and depth of your kitchen area. Consider any obstructions like pipes or electrical outlets. Take note of existing fixtures that might impact cabinet placement.Choosing A Cabinet Style
Cabinet style reflects your personal taste. Explore various styles such as modern, rustic, or traditional. Consider the color scheme and materials that complement your kitchen. Look at hardware options that match the overall design. Remember, style influences both appearance and functionality.Creating A Blueprint
A blueprint guides the construction process. Sketch the layout on paper or use design software. Include dimensions and placement for each cabinet piece. Add notes on materials and finishes for clarity. This visual plan ensures a smooth building process.Preparing The Workspace
Ensure a clean workspace to begin building your kitchen cabinet. Clear clutter and organize tools for easy access. Adequate lighting helps in precise measurements and assembly.
Preparing the workspace is a crucial first step when building a kitchen cabinet. An organized and efficient workspace sets the foundation for a smooth and enjoyable project. By taking the time to properly prepare, you can avoid unnecessary frustrations and ensure that your focus remains on crafting a beautiful cabinet.Clearing The Area
Start by selecting an area that offers ample space to move around comfortably. Ensure the surface is level to prevent any mishaps during assembly. Remove any clutter or distractions that might interfere with your workflow. Imagine trying to construct a cabinet while tripping over tools or searching for missing screws. It’s not just frustrating—it’s inefficient. By clearing the area, you create an environment that encourages focus and precision.Setting Up Tools
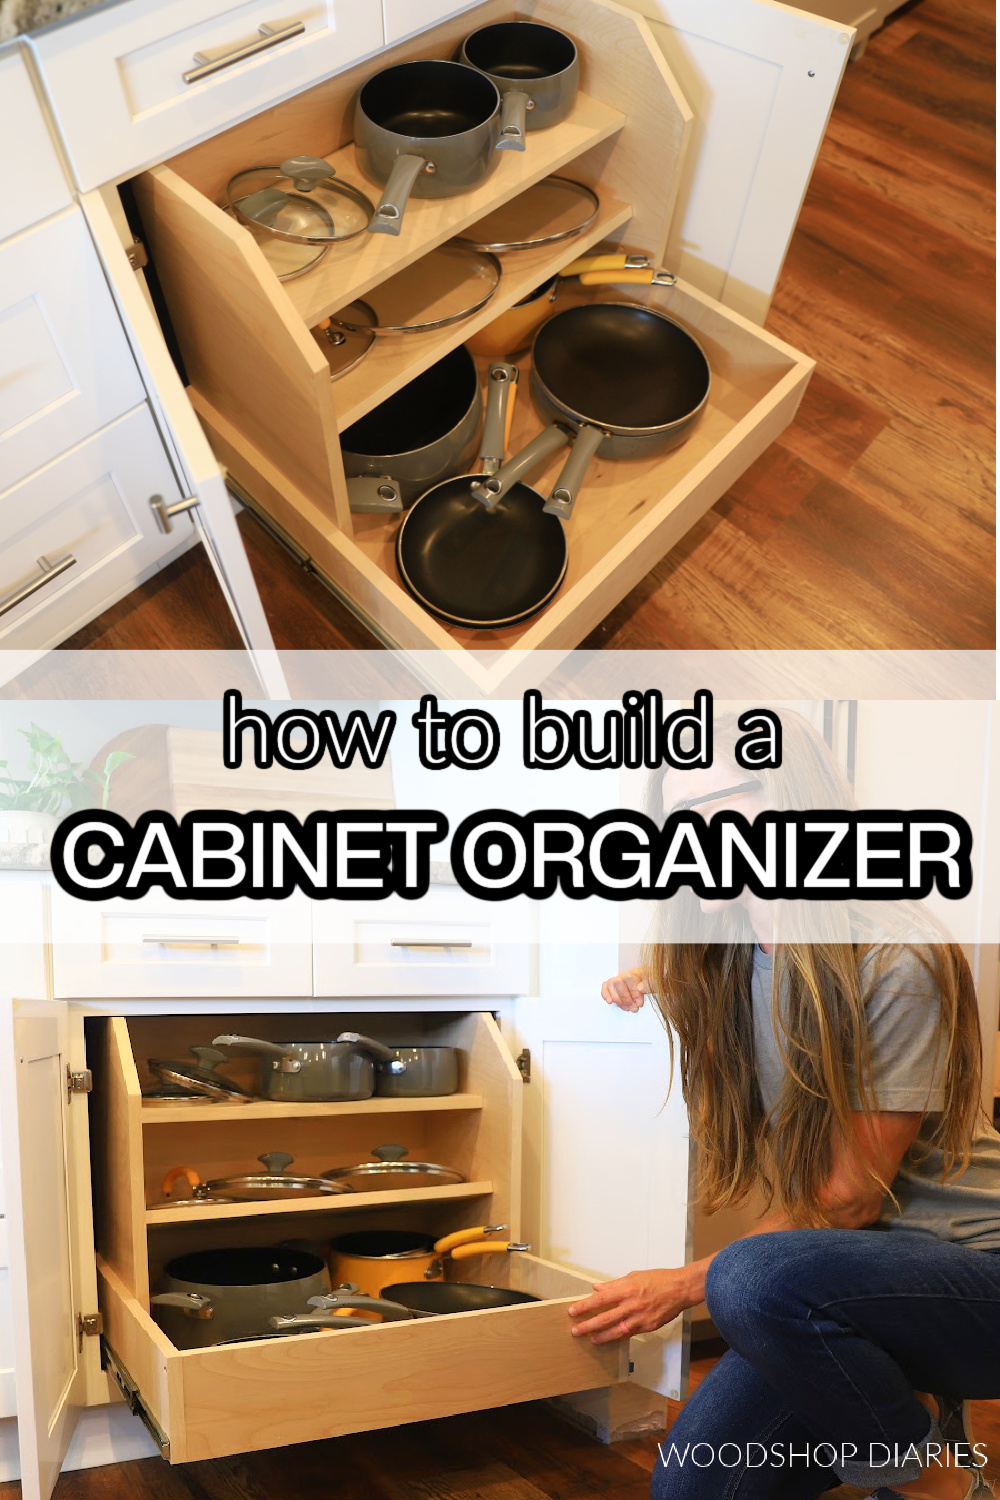
Gather all the tools you’ll need and place them within easy reach. Common tools include a drill, screwdriver, measuring tape, and clamps. If you have a workbench, it can serve as the central hub for your tools. Consider arranging your tools in the order you’ll use them. This approach not only saves time but also keeps the momentum going as you build. Have you ever noticed how a musician arranges their instruments before a performance? The same principle applies here—proper setup leads to a seamless execution. As you prepare your workspace, ask yourself: what adjustments can you make to enhance efficiency? By being proactive, you set yourself up for a rewarding and successful cabinet-building experience.
Credit: www.woodshopdiaries.com
Cutting The Wood
Embarking on the journey of building your own kitchen cabinet can be both exhilarating and rewarding. At the heart of this endeavor lies the crucial step of cutting the wood. It’s where precision meets creativity, transforming raw lumber into the essential components of your cabinet. Whether you’re a seasoned craftsman or a DIY enthusiast, understanding how to cut wood accurately is key to achieving a polished finish.
Selecting The Wood
Your choice of wood sets the foundation for the entire project. Consider factors like durability, grain pattern, and color. Hardwoods such as oak or maple are excellent for their resilience and aesthetic appeal. If you’re aiming for a more budget-friendly option, plywood offers versatility and strength without breaking the bank.
Reflect on the ambiance you want to create in your kitchen. Do you prefer the warm tone of cherry or the contemporary look of birch? Your selection not only affects the cabinet’s longevity but also its visual impact in the space.
Cutting Panels And Frames
Once you’ve selected your wood, it’s time to bring out the saws. Begin by measuring each panel and frame with meticulous care; accuracy here ensures everything fits snugly later. Remember, it’s always better to measure twice and cut once.
Utilize a table saw for straight cuts and a jigsaw for intricate shapes. Keep a steady hand and maintain focus—this is where your cabinet starts to take form. Are you using any special techniques to minimize waste or enhance the efficiency of your cuts?
Safety should never be an afterthought. Equip yourself with safety glasses and ear protection, ensuring your DIY adventure doesn’t come with unwanted accidents.
Assembling The Frame
Assembling the frame involves securing the sides and base of the kitchen cabinet together. Ensure accurate measurements for a perfect fit. Use screws or dowels to connect the pieces securely, creating a sturdy foundation for your cabinet.
Assembling the frame of your kitchen cabinet is a crucial step that sets the foundation for the entire structure. This part of the process requires precision and patience, as the frame is what holds everything together. When I first built my own kitchen cabinet, I realized how rewarding it was to see the pieces come together, forming the backbone of the cabinet. It’s like solving a puzzle that, once completed, provides a sense of accomplishment and functionality.Joining The Pieces
Start by laying out all the components on a flat surface. This helps you visualize the assembly and ensures you have everything needed. Use a carpenter’s square to check the alignment of each joint. Proper alignment is key to a stable cabinet. Apply wood glue to the edges of the pieces before joining them. This adds extra strength and durability to the frame. Secure the pieces with clamps to hold them in place while the glue dries. This step is crucial for a strong bond.Securing The Structure
Once the glue has set, reinforce the joints with screws or nails. This step ensures the frame can handle the weight of the cabinet doors and shelves. Consider using corner brackets for additional support at each corner. They provide extra stability, especially for larger cabinets. Double-check all connections for stability. Give the frame a gentle shake to test its sturdiness. If it wobbles, inspect the joints and tighten where necessary. Building a kitchen cabinet frame might seem daunting at first, but with careful assembly and attention to detail, you’ll create a solid foundation for your kitchen space. What challenges have you faced in your DIY projects, and how did you overcome them?Installing Shelves And Dividers
Installing shelves and dividers in kitchen cabinets enhances organization. It maximizes space and accessibility. Proper placement allows you to store items efficiently. Dividers help in categorizing utensils and cookware. Let’s explore how to position shelves and attach dividers effectively.
Positioning Shelves
Choose adjustable shelves for flexibility. Measure the interior space first. Ensure shelves fit snugly without gaps. Use a level tool for even placement. Mark positions with a pencil. Secure brackets at marked points. Opt for sturdy materials like wood or metal. These provide longevity and support.
Attaching Dividers
Decide the divider layout. Consider the size of items to store. Use dividers for separating plates, pans, or containers. Install them parallel to the cabinet walls. Use screws or adhesive for attachment. Ensure dividers are stable and firm. Adjust spacing based on storage needs. This creates a tidy and organized cabinet interior.
Attaching The Doors
Secure the hinges to the cabinet frame using screws. Align doors carefully for a smooth opening and closing. Double-check the fit and adjust if necessary to ensure the doors are level and aligned.
Attaching the doors to your kitchen cabinet is a crucial step. It completes the look and adds functionality. Proper installation ensures smooth operation and longevity. Let’s explore how to attach cabinet doors.Hinge Installation
Selecting the right hinges is important. They come in various types like concealed or surface-mounted. Once chosen, position the hinges on the door edge. Use a pencil to mark the spots for drilling. Keep the hinges aligned with the cabinet frame. Drill pilot holes carefully to avoid splitting wood. Secure the hinges with screws using a screwdriver. Ensure they are tightly fastened. This step prepares the door for attachment.Aligning And Securing Doors
Position the door against the cabinet frame. Align it with the top and bottom edges. Check the spacing around the door. Adjust if necessary for even gaps. Use a level to ensure the door hangs straight. Once aligned, attach the hinges to the cabinet. Use screws to secure them. Open and close the door to test its movement. Adjust hinges if needed for smooth operation. Proper alignment prevents binding and ensures easy use.Finishing Touches
Add the final touches by sanding the cabinet surfaces smoothly. Apply a coat of paint or varnish for protection and aesthetics. Finish by installing handles and hardware to complete the look.
Finishing touches give your kitchen cabinets their final look. They enhance the beauty and durability of the cabinets. This step ensures your hard work stands out and lasts longer.Sanding And Smoothing
Sanding prepares the wood for a smooth finish. Use fine-grit sandpaper to remove rough spots. Sand in the direction of the grain. This prevents scratches and gives a polished look. Pay attention to corners and edges. They often need extra care. Use a sanding block for even pressure. This helps achieve a uniform surface. After sanding, wipe the surface with a damp cloth. It removes dust and debris. This ensures a clean base for paint or stain.Applying Paint Or Stain
Choose a paint or stain that matches your style. Paint offers a solid color finish. Stain highlights the natural wood grain. Use a brush or roller for even application. Apply thin coats for best results. Let each coat dry completely. This prevents streaks and bubbles. For paint, consider a primer first. It helps the paint adhere better. For stain, use a sealer to protect the wood. Finish with a clear topcoat for added protection. This enhances the durability and shine of your cabinets.Installing The Cabinet
Installing cabinets involves aligning and securing them to the walls. Ensure accurate measurements for a snug fit. Use screws and brackets to stabilize each unit.
Installing the cabinet is a crucial part of building a kitchen cabinet. This step ensures your new cabinet is securely attached, leveled, and ready for use. Proper installation enhances the cabinet’s durability and functionality. Let’s dive into the details of mounting and leveling your cabinet.Mounting To The Wall
Mounting cabinets to the wall requires precision. Locate the studs using a stud finder. Mark these spots to ensure the cabinet is secured properly. Position the cabinet against the wall. Drill pilot holes through the cabinet’s back into the studs. Fasten the cabinet using screws. This keeps the cabinet stable and prevents it from shifting over time.Leveling And Securing
Leveling is essential for proper door alignment. Place a level on top of the cabinet. Adjust until perfectly horizontal. Insert shims beneath the cabinet base if needed. This helps achieve a level position. Secure the cabinet by tightening all screws. Check the doors and drawers for smooth operation. A well-leveled cabinet ensures easy access and functionality.
Credit: www.youtube.com
Frequently Asked Questions
Is It Cheaper To Build Your Own Cabinets?
Building your own cabinets can be cheaper if you have the skills and tools. DIY saves labor costs. Buying materials directly can also reduce expenses. Consider time investment and potential errors in your decision. For custom designs, DIY often proves more cost-effective than hiring professionals.
Can A Beginner Make Kitchen Cabinets?
Yes, a beginner can make kitchen cabinets with the right tools, materials, and guidance. Start with simple designs and follow detailed instructions or tutorials. Practice and patience are essential. Consider taking a woodworking class or watching online videos for additional support and tips.
How To Construct Kitchen Cabinets Step By Step?
To construct kitchen cabinets, gather materials and tools first. Measure and cut wood panels precisely. Assemble the cabinet box using screws. Attach hinges to doors, then install doors onto the box. Finally, sand and finish the cabinets for a polished look.
Ensure all components align perfectly.
What Type Of Wood Do I Use To Build Cabinets?
Choose hardwoods like oak, maple, or cherry for durable cabinets. Plywood offers affordability and stability. Consider MDF for a smooth finish.
Conclusion
Building a kitchen cabinet can be fun and rewarding. Start with a solid plan. Gather all the materials and tools. Follow each step carefully. Take your time to ensure accuracy. Sand the wood for a smooth finish. Paint or stain for a personal touch.
Assemble with care, double-checking every joint. Install the cabinet securely. Enjoy the satisfaction of creating something useful. Share your craftsmanship with friends and family. With patience, you’ll have a beautiful cabinet. A perfect addition to your kitchen space. Happy building!