How to Build a Kitchen Island With Cabinets: Expert Guide
Executive Chef & Lead Commercial Kitchen Specialist at Daily Kitchup Test Lab
Imagine transforming your kitchen into a functional and stylish space without breaking the bank. A kitchen island with cabinets and seating can be that game-changer for your home.
Not only does it offer extra storage, but it also provides a perfect spot for family and friends to gather. Whether you’re sipping coffee in the morning or helping the kids with homework, this versatile addition can make your kitchen the heart of your home.
Are you ready to unleash your inner DIY guru and create something truly special? In this guide, you’ll discover simple steps to build a kitchen island that combines practicality with a touch of elegance. Let’s turn your kitchen dreams into reality!
Planning Your Kitchen Island
Designing a kitchen island with cabinets and seating enhances both functionality and style. Consider layout, materials, and space optimization for a practical and inviting area. Proper planning ensures a seamless integration into your kitchen’s existing design.
Planning a kitchen island involves several key steps. It serves as a focal point in your kitchen. It provides extra storage, seating, and workspace. Before you begin building, consider all the important aspects. Thoughtful planning will ensure your kitchen island meets your needs.Assessing Space And Size
Evaluate your kitchen’s layout. Measure the available space carefully. Ensure there’s enough room to move around. A kitchen island should not block pathways. Allow at least 36 inches of clearance on all sides. This ensures easy access and movement. Consider the island’s purpose. Do you need more storage? Seating for meals? Decide the size based on your needs. A larger island offers more features. But it requires more space.Design And Style Considerations
Think about the design of your kitchen. Choose an island style that complements it. Modern kitchens suit sleek, minimalist islands. Traditional kitchens may favor detailed, ornate designs. Consider materials and finishes. Wood, marble, or granite are popular choices. Match the island’s color with your kitchen theme. Consider the seating arrangement. Bar stools work well for casual dining. Ensure the island height is comfortable for seating. Add features like shelves or drawers for storage. Think about lighting. Pendant lights can enhance the island’s look and functionality.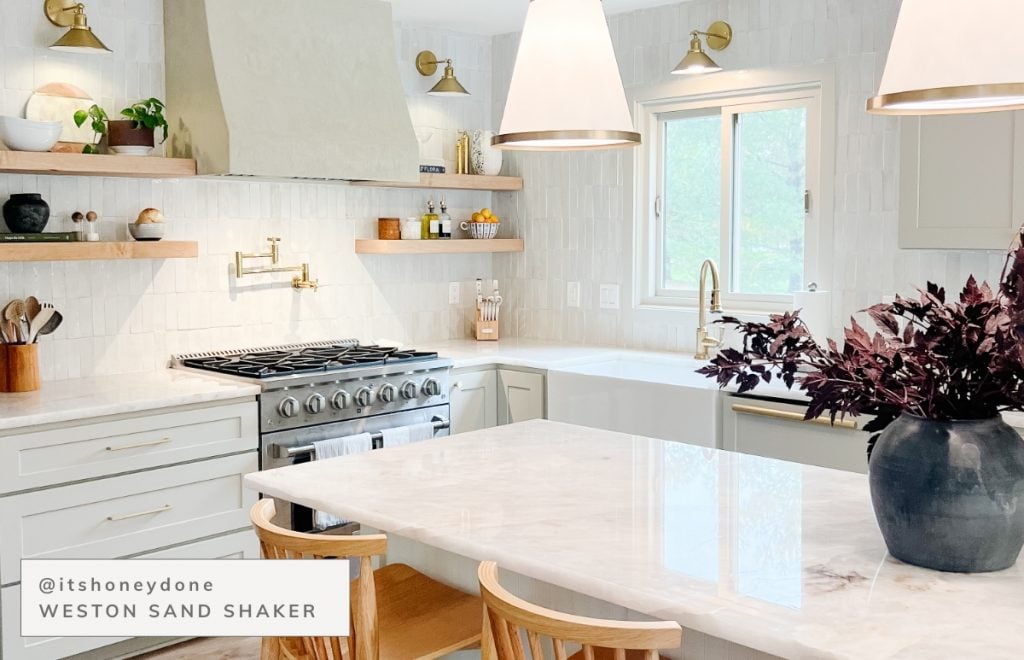
Credit: www.rtacabinetstore.com
Choosing Materials
Selecting materials for your kitchen island is crucial for durability and style. Opt for sturdy wood or sleek metal for cabinets. Choose countertop materials like quartz or granite that withstand daily use and complement your design.
Choosing the right materials is key to building a beautiful kitchen island. Materials affect both the look and functionality of your island. Your choices impact durability, maintenance, and style. Let’s explore the best options for wood and countertops.Wood Types And Finishes
Wood is a popular choice for kitchen islands. It’s warm, durable, and versatile. Select a wood type that matches your kitchen style. – Maple: Known for its strength and smooth grain. It suits modern and traditional kitchens. – Oak: Offers a classic look with visible grain patterns. It’s highly durable. – Cherry: Adds a rich color and ages beautifully over time. – Pine: A budget-friendly option with a rustic charm. Finishes play a big role in the final look. – Stain: Highlights the natural grain of the wood. Choose from light to dark tones. – Paint: Offers endless color options. Ideal for a custom look. – Varnish: Provides a glossy finish and extra protection.Countertop Options
The countertop is the centerpiece of your island. It should be both functional and appealing. – Granite: Durable and heat-resistant. Available in various colors and patterns. – Quartz: Non-porous and low maintenance. Offers consistent patterns. – Butcher Block: Warm and inviting. Needs regular sealing for longevity. – Laminate: Affordable and versatile. Comes in many colors and designs. Each material has its pros and cons. Consider your kitchen’s usage and your lifestyle. Choose a countertop that fits your needs and budget.Essential Tools And Supplies
Building a kitchen island with cabinets and seating requires essential tools and supplies. These include a drill, saw, measuring tape, wood screws, and quality wood. Proper planning and precise measurements ensure a sturdy and stylish island.
Building a kitchen island with cabinets and seating adds style and function. It becomes the heart of your kitchen. Before diving into construction, gather essential tools and supplies. This ensures a smooth building process.Tool Checklist
Gathering the right tools is crucial for a successful project. Here’s what you need:- Measuring tape
- Power drill
- Level
- Hammer
- Screwdriver set
- Jigsaw
- Clamps
- Safety goggles
- Work gloves
Purchasing Materials
Choosing the right materials is vital for durability and aesthetics. Consider these materials:- Plywood sheets
- Wood screws
- Wood glue
- Paint or stain
- Sandpaper
- Cabinet handles
- Hinges
- Seating stools
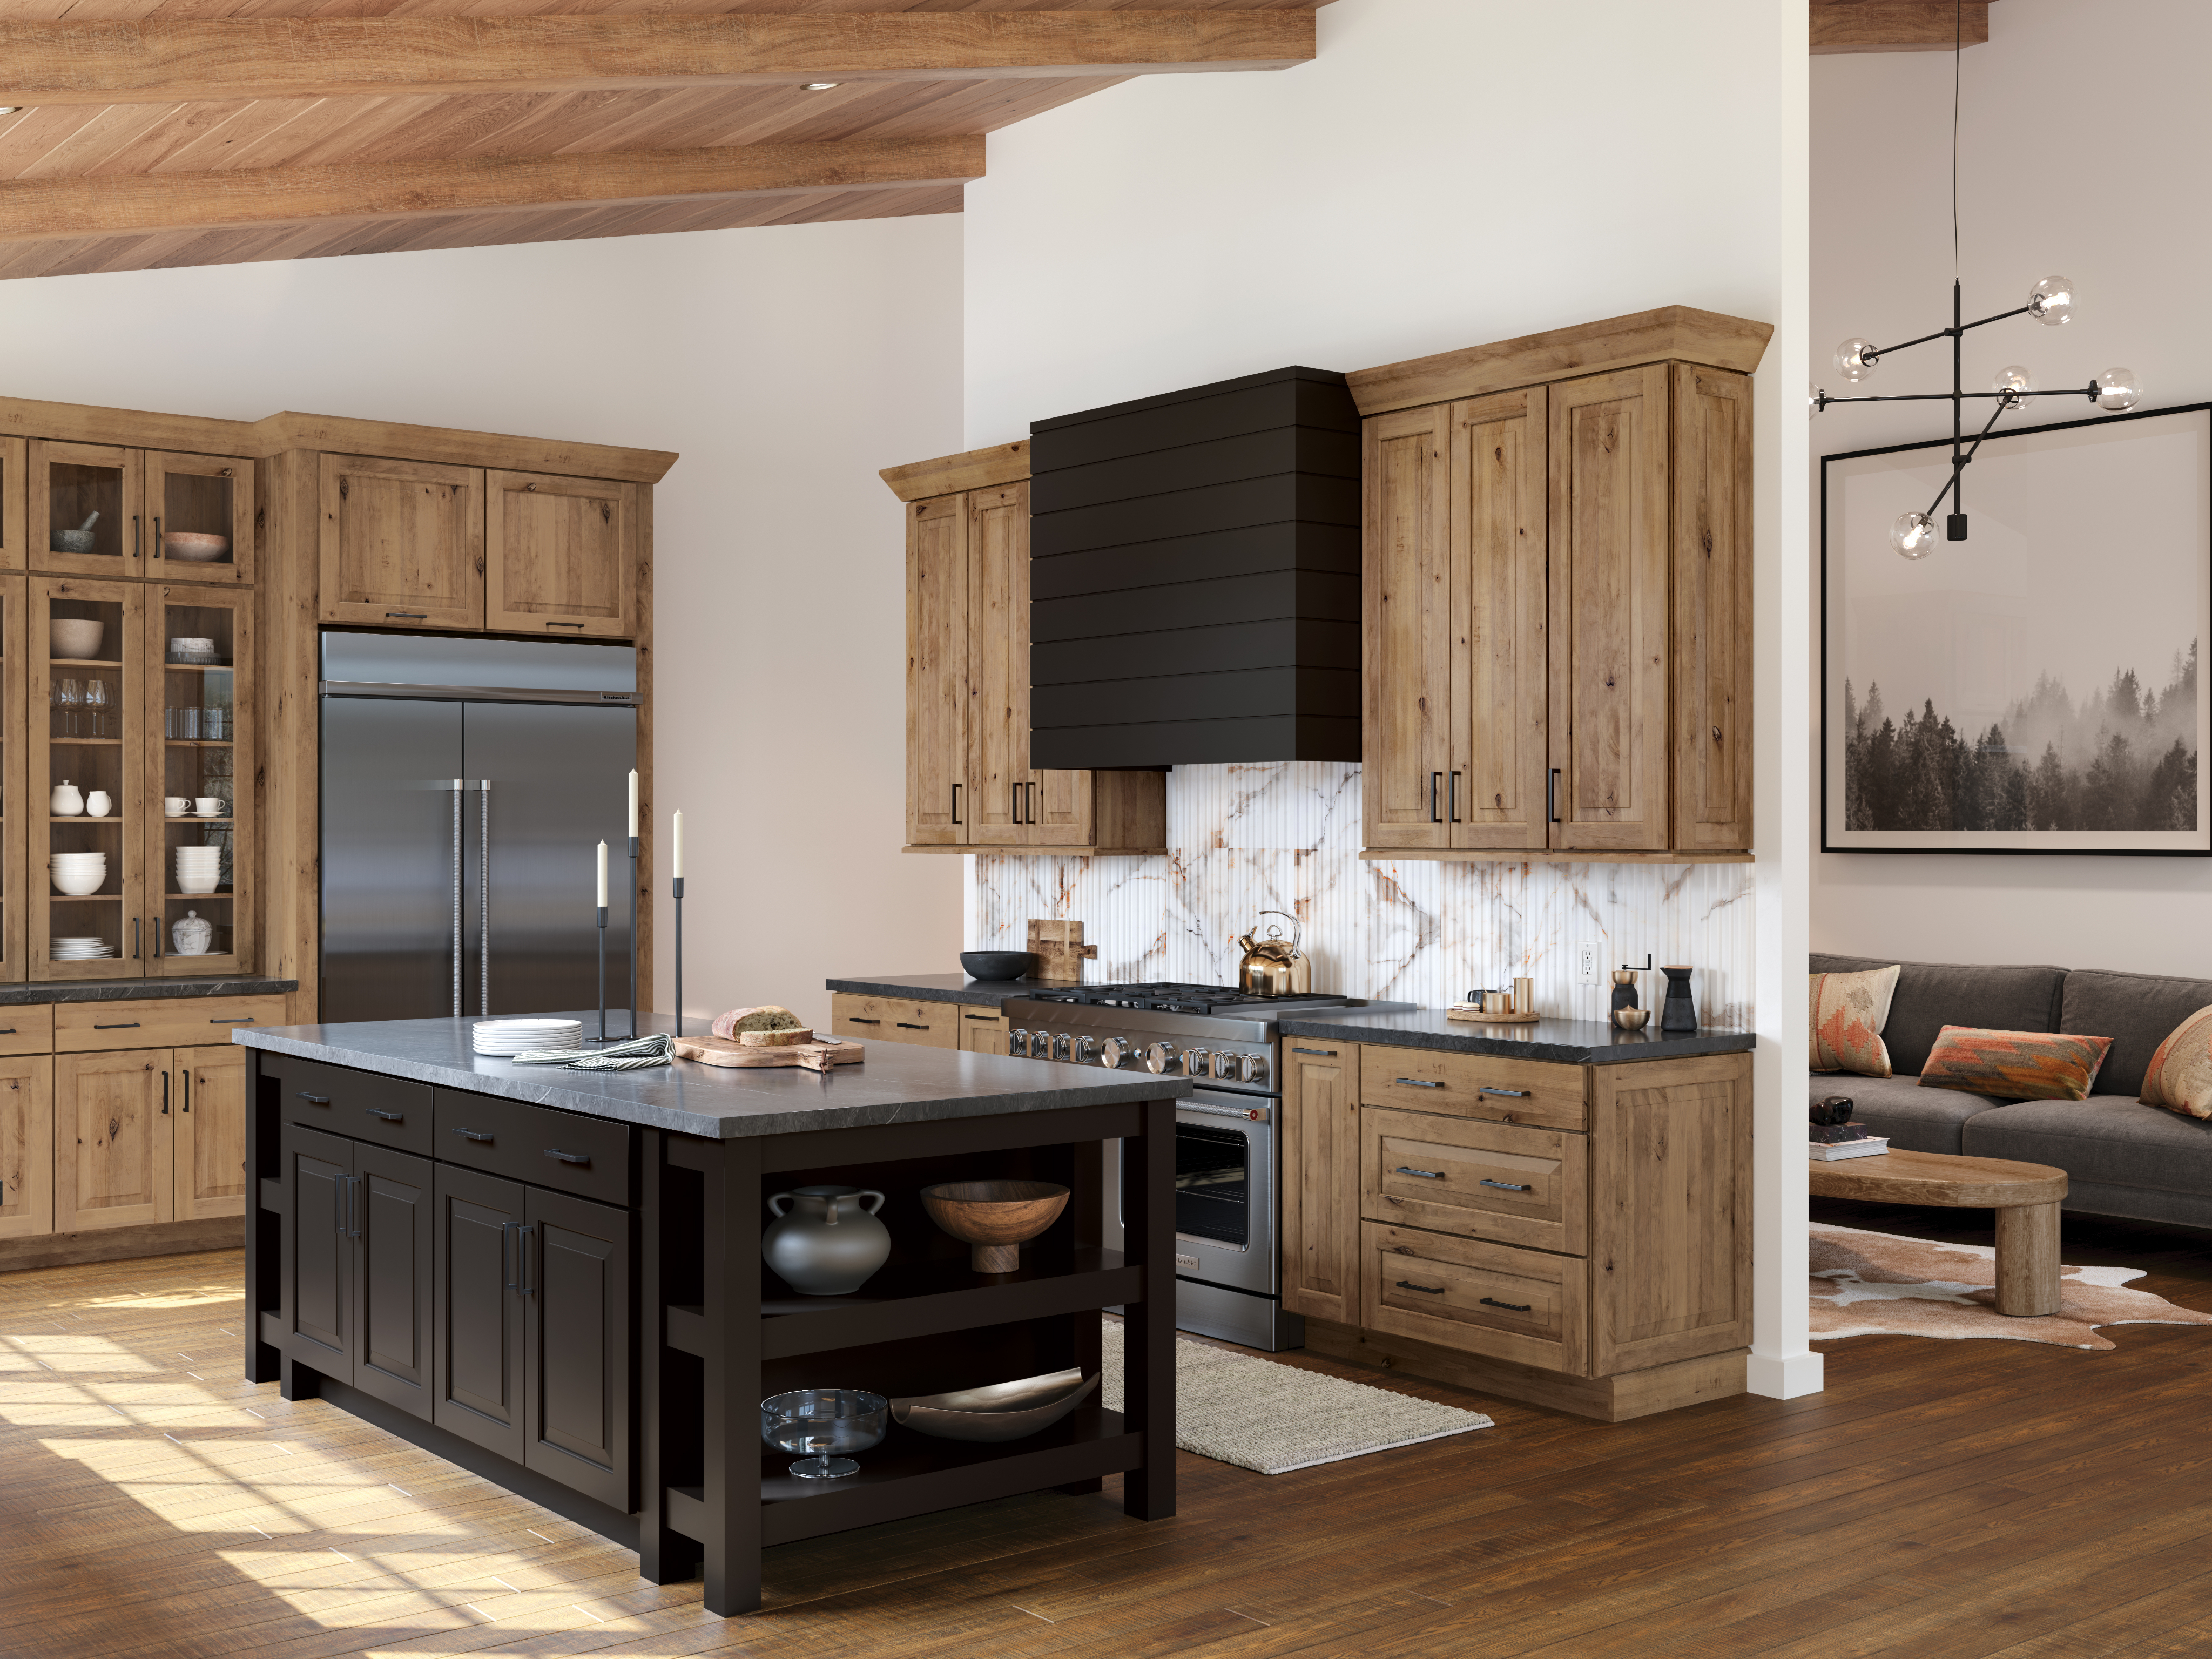
Credit: www.kraftmaid.com
Building The Base
Building the base of your kitchen island is where the magic begins, transforming your vision into tangible reality. This foundational step sets the stage for both functionality and style, ensuring your island is sturdy and ready to support cabinets and seating. Whether you’re a seasoned DIY enthusiast or a curious beginner, crafting the base is a rewarding process that will give your kitchen a new heart.
Cutting And Assembling The Frame
Start by measuring the space where your island will sit. Precise measurements are crucial, so double-check to avoid any hiccups later. Once you have the dimensions, cut your wooden pieces to size.
Using a saw, carefully cut each piece according to your measurements. Keep safety in mind—always wear protective gear. With your pieces ready, begin assembling the frame using screws and a drill.
Align each piece, ensuring they’re square and level. This is not the time to rush; patience will pay off in the form of a sturdy base. As you work, visualize your completed island, inspiring you to get each detail right.
Installing Support Beams
The support beams are vital for the stability and longevity of your kitchen island. Choose durable materials like oak or pine that can withstand daily use. Think of these beams as the backbone of your structure.
Position the beams strategically along the frame, focusing on weight distribution. A well-supported island prevents sagging and adds peace of mind. Secure each beam with brackets, double-checking their alignment.
Imagine your island bustling with activity—friends gathered, meals prepared. These support beams ensure it can handle the load, keeping your kitchen functional and inviting. Have you considered how much weight your island will need to support?
Installing Cabinets
Crafting a kitchen island with cabinets and seating adds function and style. Begin by measuring the space for precise planning. Assemble the cabinets securely, ensuring ample storage and seating comfort.
Installing cabinets is a pivotal step in building a kitchen island with both functionality and style. This task requires precision and attention to detail to ensure your kitchen island not only looks great but also serves its purpose efficiently. By taking the time to measure accurately and secure the cabinets properly, you can create a kitchen island that will be the centerpiece of your kitchen.Measuring And Positioning
Before you start drilling and hammering, grab your tape measure and take accurate measurements of your space. Measure the length, width, and height of the area where you plan to install the cabinets. Make sure there’s enough room for seating and movement around the island. Consider the flow of your kitchen. Will the cabinets obstruct any pathways? Will they allow easy access to other kitchen areas? Use these questions to guide your positioning. Once you have your measurements, mark the position of each cabinet on the floor with painter’s tape. This visual guide will help you visualize the final layout and make any necessary adjustments before you start the installation.Securing Cabinets To The Base
After positioning, it’s time to secure the cabinets. Begin by placing the first cabinet in its designated spot. Use a level to ensure it’s perfectly vertical and horizontal. Drill pilot holes through the base of the cabinet and into the floor. This prevents the wood from splitting. Secure the cabinet to the floor using screws that are long enough to anchor it firmly but not too long to go through the floor. Repeat the process for each cabinet, ensuring they align perfectly with each other. Use clamps to hold the cabinets together while you secure them. This ensures a seamless look and prevents any gaps. Have you ever noticed how a well-installed cabinet can change the entire look of a kitchen? It’s all in the details and patience during installation. Are you ready to transform your kitchen with a stunning island?Adding Countertops
Enhance your kitchen by adding countertops to your island with cabinets and seating. Choose durable materials for a lasting finish. Proper installation ensures functionality and style in your kitchen space.
Adding countertops to your kitchen island transforms its functionality and aesthetics. Countertops provide a practical space for meal preparation, dining, and socializing. Choosing the perfect countertop involves balancing style, durability, and budget. With the right fit and proper installation, your kitchen island becomes a versatile centerpiece.Selecting The Right Fit
Evaluate your kitchen’s style and color scheme. Countertop materials range from granite to butcher block. Granite offers a sleek, modern look with durability. Butcher block adds warmth and a classic touch. Consider the maintenance needs of each material. Some require regular sealing, while others need simple cleaning. Measure your island’s dimensions carefully. Accurate measurements ensure a perfect fit. Choose a thickness that complements your cabinets and seating. Thicker countertops provide a more substantial appearance.Proper Installation Techniques
Ensure a sturdy base before installing your countertop. Cabinets must be level and secure. Use shims if necessary. Secure the countertop to the cabinets using brackets or adhesive. This prevents shifting and adds stability. Follow the manufacturer’s guidelines for installation. Each material may have specific requirements. Seal any joints or gaps to prevent moisture damage. Proper sealing extends the lifespan of your countertop. Regularly inspect the installation for any signs of wear or damage. Maintenance ensures longevity and functionality.Finishing Touches
As you approach the final stages of building your kitchen island with cabinets and seating, you’ll want to add those finishing touches that transform it from a mere structure into a centerpiece of your kitchen. These touches not only enhance the aesthetic appeal but also add to the functionality of your island. Let’s dive into two crucial elements: painting and staining, and installing hardware.
Painting And Staining
Your choice of paint or stain can dramatically alter the look of your kitchen island. Consider the overall style of your kitchen. Do you prefer a rustic look with warm, earthy tones, or a sleek, modern vibe with bold, contrasting colors?
Painting offers a world of color choices and can be an excellent way to tie the island into your kitchen’s existing palette. You might choose a classic white for a clean, timeless look or go bold with a deep navy or emerald green for a pop of color.
Staining, on the other hand, enhances the natural beauty of the wood grain. If your cabinets are made from a beautiful hardwood, staining can bring out the richness of the wood and add depth to the space. Remember, a well-applied finish will not only beautify your island but also protect it from spills and scratches.
Installing Hardware
The hardware you choose can make a significant impact on the overall look and functionality of your kitchen island. Think about the style that resonates with you. Do you prefer sleek, modern handles or vintage knobs with intricate details?
Hardware installation is where practicality meets style. Consider the ergonomics – are the handles comfortable to grip, and do they complement the cabinetry design? This is your chance to add a personal touch that sets your kitchen island apart.
Don’t underestimate the power of matching or contrasting hardware finishes. Whether it’s chrome, brass, or matte black, the right choice can unify your kitchen’s look or add a striking contrast. What impression do you want your island to leave on your guests?
With these finishing touches, your kitchen island will be ready to serve as a stylish and functional hub in your home. What color and hardware style will you choose to reflect your personality and complement your space?
Safety And Maintenance
Ensure proper installation of cabinets to prevent tipping and injuries. Regularly check and tighten screws to maintain stability.
Creating a kitchen island with cabinets and seating is a rewarding project. It provides extra storage and a cozy place to sit. But safety and maintenance are crucial. A well-maintained island lasts longer and stays sturdy. Here are important tips to ensure your kitchen island remains safe and well-kept.Ensuring Stability
Stability is key for a safe kitchen island. Start by using a strong base. Ensure the island is level and secured to the floor. This prevents tipping or wobbling. Use high-quality screws and brackets for assembly. Check them regularly for any signs of wear. Make sure the seating is sturdy. It should not wobble or shift easily. Consider adding non-slip pads to the legs of stools or chairs.Regular Care Tips
Regular maintenance keeps your island looking new. Clean the surfaces with mild soap and water. Avoid harsh chemicals that might damage finishes. Wipe spills immediately to prevent stains. Inspect the cabinets and seating monthly. Tighten any loose screws or handles. Oil any squeaky hinges. Use coasters and mats to protect the surface from heat and scratches. Dust the island weekly to keep it shiny and clean.
Credit: www.familyhandyman.com
Frequently Asked Questions
Is It Cheaper To Buy Or Build A Kitchen Island?
Building a kitchen island often costs less if you have DIY skills. Buying one can be pricier due to labor and material costs. Consider your budget, skills, and desired features to decide. Customization usually increases costs, while pre-made options might offer savings.
How Wide Does The Kitchen Need To Be For An Island With Seating?
A kitchen should be at least 12 feet wide for an island with seating. This allows comfortable movement. Ensure 42-48 inches of clearance around the island. This space accommodates seating and ensures smooth kitchen workflow. Adequate space enhances functionality and comfort.
How Much Would It Cost To Build Your Own Kitchen Island?
Building your own kitchen island can cost between $300 to $3,000. Costs vary based on materials and size. DIY can save money, while hiring professionals increases expenses. Custom designs and high-end materials will raise the price. Consider budget, style, and functionality for accurate cost estimation.
What Is The Rule Of Thumb For A Kitchen Island?
A kitchen island should have at least 36 inches of clearance on all sides for efficient movement. Ensure it’s proportionate to the kitchen size, typically 2-3 feet wide and 4-5 feet long. Consider seating space, storage needs, and functionality for optimal design.
Conclusion
Building a kitchen island with cabinets and seating is rewarding. It adds style and function to your space. You can customize it to fit your needs. Choose materials and design wisely for durability. With careful planning, the island can be a centerpiece.
It becomes a place for cooking and gathering. Invite friends and family to enjoy it. Your kitchen will feel more inviting and practical. Enjoy the process and the end result. Create a space that reflects your taste. A well-designed island enhances your home.
It makes daily life easier and more enjoyable.

Similar Posts