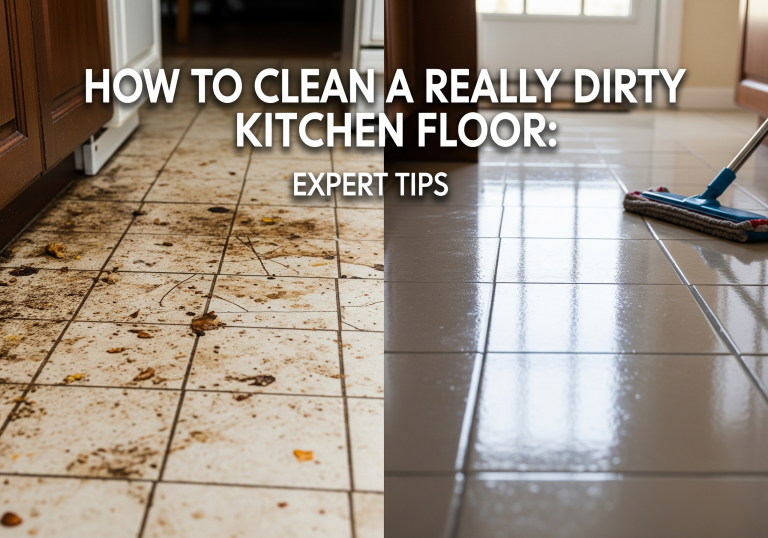
How to Clean Kitchen Tile Floor With Grout: Expert Tips
Are you tired of the grime and stains on your kitchen tile floor, especially those stubborn grout lines that just won’t budge? You’re not alone.
Many homeowners find themselves frustrated with dirty tile floors that seem impossible to clean. But don’t worry; there’s a solution! In this guide, you’ll discover simple, effective methods to transform your kitchen floor from grimy to gleaming. Imagine walking into your kitchen, feeling proud of how spotless and inviting it looks.
With the right techniques and a little bit of elbow grease, you can achieve just that. Ready to reveal the true shine of your kitchen tile floor? Let’s dive in and explore how you can easily clean those tiles and grout, making your kitchen sparkle like never before.
Choosing The Right Cleaning Supplies
Choosing the right cleaning supplies makes cleaning kitchen tile floors with grout easy. Use a mild detergent and a soft brush to scrub grout lines gently. Rinse thoroughly for a sparkling clean finish.
Choosing the right cleaning supplies for your kitchen tile floor can make all the difference between a quick clean and hours of scrubbing. Whether your tiles are ceramic, porcelain, or natural stone, each type demands specific attention to ensure they remain spotless and undamaged. The grout, often overlooked, can be particularly tricky and requires special care. So, what should you have on hand to tackle this task effectively?Essential Tools
A sturdy broom or vacuum cleaner is your first line of defense against dirt and debris. These tools help clear the surface, making the actual cleaning process much easier. A mop with a microfiber head is ideal for tile floors, as it efficiently picks up dirt without scratching the surface. Consider investing in a grout brush. Its narrow bristles are perfect for getting into those tight spaces and scrubbing away stubborn grime.Best Cleaning Agents
A gentle pH-balanced cleaner is crucial for tiles, especially for natural stone, to prevent damage. Many options are available, but ensure they’re specifically formulated for tile floors. For grout, a mixture of baking soda and vinegar can work wonders. This natural solution not only cleans but also disinfects, making it a popular choice among homeowners. If you prefer commercial products, look for a grout cleaner that targets stains without harsh chemicals. Always test it on a small area first to ensure compatibility with your tiles. What’s in your cleaning arsenal? Sometimes, the simplest tools and agents can be the most effective when used correctly.Preparing The Floor
Preparing your kitchen tile floor for cleaning is an essential step that sets the stage for a successful and satisfying scrub. It’s not just about making the task easier, but about ensuring the longevity and cleanliness of your tiles and grout. Let’s dive into the preparatory steps that will make cleaning more efficient and perhaps even enjoyable!
Clearing The Area
Start by removing any items or furniture from the floor. This might include chairs, mats, and small appliances. Clearing the area allows you to access every corner and crevice, ensuring no spot is left untouched. Plus, it prevents anything from getting damaged or dirty during the cleaning process.
Think about what you can do to make this task quicker. Can someone help you move things around? Perhaps stack chairs on top of the table or temporarily relocate a small appliance to the countertop. It’s all about making the space as accessible as possible.
Sweeping And Vacuuming
Once the area is clear, it’s time to tackle the loose dirt and debris. Grab a broom or vacuum cleaner and start by sweeping the entire floor. Pay special attention to the corners and edges where dust tends to accumulate. This step is crucial because it prevents dirt from mixing with water and cleaning solutions, which can make the cleaning process messier.
Using a vacuum can be particularly effective, especially for grout lines, as it can suck up fine particles that a broom might miss. If you’re using a vacuum, ensure that it’s set to a hard floor setting to avoid scratching your tiles. By removing the loose dirt first, you’ll make the upcoming scrubbing much easier.
Have you ever skipped this step, thinking it wouldn’t make a difference, only to find cleaning took twice as long? Skipping the sweep might save a few minutes now, but it’ll cost you in the long run when that dirt turns into stubborn grime. So, embrace the broom or vacuum, and set the stage for a cleaner, brighter kitchen floor.
Cleaning The Tile Surface
Cleaning kitchen tile floors with grout requires simple steps. Use a mild detergent and warm water. Scrub gently with a soft brush, focusing on grout lines for best results.
Cleaning the tile surface is essential for maintaining a sparkling kitchen floor. Tiles can accumulate grime and stains over time. Proper cleaning techniques can restore their shine and keep them looking great. It’s important to choose the right method for the type of dirt you’re dealing with.Using Homemade Solutions
Homemade solutions can be effective and safe for tile surfaces. Mix equal parts of water and vinegar. This solution breaks down dirt and disinfects the surface. Baking soda paste can tackle tough stains. Combine baking soda with a little water to form a paste. Apply it to stubborn spots. Let it sit for a few minutes before scrubbing. Lemon juice is another natural cleaner. The acid in lemon juice helps remove stains. Combine lemon juice with water for a powerful cleaning solution. Apply it directly to the tiles. Use a soft cloth or sponge to scrub gently.Applying Commercial Cleaners
Commercial cleaners offer convenience and efficiency. Choose a cleaner specifically designed for tile floors. These products often contain powerful cleaning agents. Follow the instructions on the label for best results. Spray the cleaner evenly across the tiles. Let it sit for the recommended time. Use a mop or soft cloth to wipe away the cleaner. Ensure all residue is removed to prevent slipperiness. For extra shine, use a tile polish after cleaning. Tile polish enhances the gloss and protects the surface. Always ventilate the area well when using commercial cleaners.Tackling Stubborn Grout
Stubborn grout requires gentle scrubbing with a mixture of baking soda and vinegar. Rinse thoroughly with warm water. Dry the surface to prevent future stains.
Tackling stubborn grout can be a daunting task, especially when you’re aiming for a spotless kitchen tile floor. Grout often becomes a magnet for dirt and grime, turning your once pristine floors into a dingy eyesore. But don’t worry—restoring your grout to its original glory is entirely possible with the right approach and tools.Grout Cleaning Solutions
The first step in battling stubborn grout is choosing the right cleaning solution. You might be tempted to try every cleaner on the market, but sometimes the best solutions are already in your pantry. Consider using a simple mixture of baking soda and vinegar. This combo creates a powerful fizzing action that helps lift dirt from the grout. Alternatively, hydrogen peroxide mixed with baking soda forms a paste that can tackle even the toughest stains. Apply it to the grout, let it sit for a few minutes, and then scrub away. For those who prefer store-bought options, look for cleaners specifically designed for grout. Ensure they are safe for your tile material to avoid any damage.Using A Grout Brush
Once you’ve selected your cleaning solution, it’s time to grab your grout brush. A toothbrush can work in a pinch, but a brush specifically designed for grout is more effective. The stiff bristles of a grout brush can reach deep into the crevices, providing a thorough clean. Scrubbing might require some elbow grease, but the results are worth it. Remember to work in sections, focusing on small areas to ensure every inch of grout receives attention. Rinse the brush frequently to prevent spreading grime from one area to another. As you scrub, you might notice immediate results, but for deeply set stains, multiple applications might be necessary. Be patient and persistent. Are you ready to transform your grout and bring back the sparkle to your kitchen floor? With these tips, you can tackle stubborn grout with confidence and achieve gleaming results.Dealing With Tough Stains
Cleaning kitchen tile floors with grout can be challenging. Begin by sweeping to remove dirt. Use a mixture of warm water and mild detergent to scrub tiles gently, focusing on grout lines. Rinse thoroughly to prevent residue build-up, ensuring sparkling tiles and clean grout.
Dealing with tough stains on your kitchen tile floor can feel overwhelming. These stubborn marks don’t just tarnish the beauty of your space, but also resist traditional cleaning efforts. The good news is, with the right approach, you can effectively tackle even the most persistent stains, restoring your kitchen floor to its original glory.Natural Stain Removers
Harness the power of nature to combat those pesky stains. Baking soda is a household hero; mix it with water to form a paste, apply it to the stain, and let it sit for 15 minutes before scrubbing with a brush. Vinegar is another natural wonder. Spray a solution of equal parts vinegar and water onto the stain, let it sit, then scrub gently. This not only cleans but also disinfects your floor. Lemon juice, combined with salt, can tackle stains with its natural bleaching properties. Rub the mixture over the stain and let it stand for a few minutes, then rinse thoroughly.Chemical Stain Treatments
Sometimes, natural methods might not do the trick, and it’s time to bring in the big guns. Commercial grout cleaners are specifically designed for tackling tough stains on tile floors. Follow the instructions carefully for the best results. Oxygen bleach is another effective option. It’s safer than chlorine bleach and works wonders on stubborn stains. Mix it with water according to the package directions, apply it to the stain, and let it sit for about 10 minutes before scrubbing. If you’re dealing with extremely tough stains, consider using a steam cleaner. The heat and moisture can penetrate and lift the stains effectively, leaving your tiles spotless.
Credit: www.tilemountain.co.uk
Rinsing And Drying
Rinse the tile floor thoroughly with clean water to remove any soap residue. Use a soft cloth or mop to dry the surface completely, ensuring no water spots or streaks remain.
Cleaning kitchen tile floors with grout can be a rewarding task. Proper rinsing and drying are crucial steps. They ensure that your tiles look their best. Rinsing removes leftover cleaning solution and debris. Drying prevents water stains and keeps tiles shiny.Proper Rinsing Techniques
Use clean water for rinsing. Fill a bucket with warm water. Dip a clean mop into the water. Wring out excess water before rinsing the floor. Move the mop in gentle, circular motions. This helps lift any leftover residue. Change the water if it becomes cloudy. Fresh water ensures a thorough rinse.Effective Drying Methods
Drying tiles is important. It stops water spots and streaks. Use a microfiber cloth or towel. Begin by blotting the wet areas. Blotting absorbs most of the moisture. Follow with a dry mop or towel. Wipe the tiles in straight lines. This technique leaves a polished finish. Fans and open windows speed up drying. Air circulation helps remove moisture quicker.Preventative Maintenance
Cleaning kitchen tile floors with grout requires a gentle approach. Begin by sweeping to remove loose debris. Next, scrub grout lines with a mixture of baking soda and water using a toothbrush.
Preventative maintenance is key to keeping kitchen tile floors looking fresh. Regular upkeep prevents dirt buildup and extends the life of your grout. By adopting simple habits, you can avoid costly repairs and keep your tiles sparkling.Regular Cleaning Schedule
Establishing a regular cleaning routine is crucial. Sweep or vacuum daily to remove loose dirt. Mop weekly using a gentle cleaner suitable for tiles. This prevents grime from settling into the grout. Make sure to dry the floor after mopping to avoid water spots. Consistent cleaning stops stains and discoloration over time.Protective Measures
Protect your tile floors with simple strategies. Use rugs or mats in high-traffic areas to minimize wear. These prevent scratches and reduce the amount of dirt tracked onto your tiles. Make sure to place coasters under heavy furniture to avoid indentation marks. Consider applying a grout sealer every year. This adds a protective layer, making grout less susceptible to stains. Regular sealing keeps moisture and dirt from penetrating the grout lines.:max_bytes(150000):strip_icc()/spr-stardrops-the-pink-stuff-marisa-viglione-08-f6d92394a1cf490c932fe891704520cd.jpeg)
Credit: www.thespruce.com

Credit: www.bakerbros.com
Frequently Asked Questions
What Is The Best Way To Clean Tile Floors With Grout?
Use a mixture of baking soda and vinegar to scrub grout. Rinse with warm water. For stubborn stains, apply hydrogen peroxide. Dry thoroughly to prevent mold. Regular cleaning maintains shine and hygiene.
What Should You Not Clean Tile Floors With?
Avoid cleaning tile floors with bleach, oil-based cleaners, wax, ammonia, or abrasive scrubbing pads. These can damage tiles and grout, leading to discoloration or scratches. Use mild detergent or pH-balanced cleaners for safe maintenance. Regular sweeping and mopping with warm water helps preserve their shine and durability.
How To Clean The Grout On Kitchen Tiles?
Use baking soda and vinegar to clean grout effectively. Apply baking soda paste, then spray vinegar. Scrub gently with a brush and rinse with water. For tough stains, use a commercial grout cleaner. Regular cleaning prevents dirt buildup. Always ensure proper ventilation while using cleaning products.
Does Dawn Dish Soap Clean Tile Grout?
Yes, Dawn dish soap can clean tile grout effectively. Mix it with baking soda or vinegar for better results. Scrub the grout using a brush to remove dirt and stains. Rinse thoroughly with water to ensure a clean finish. Always test a small area first.
Conclusion
A clean kitchen tile floor brings joy and peace. Regular cleaning prevents dirt buildup. Use gentle cleaners to protect tiles and grout. Remember to rinse well to avoid residue. Dry the floor to keep it shiny. Cleaning tools matter; choose them wisely.
Avoid harsh chemicals for safety. Practice these steps for a spotless kitchen. Enjoy a fresh, welcoming space. A little effort makes a big difference. Your kitchen deserves care and attention. Keep it tidy for happy moments. Feel proud of your sparkling clean floor.
It’s worth the time and energy.