How to Distress Kitchen Cabinets: Transform Your Space
Executive Chef & Lead Commercial Kitchen Specialist at Daily Kitchup Test Lab
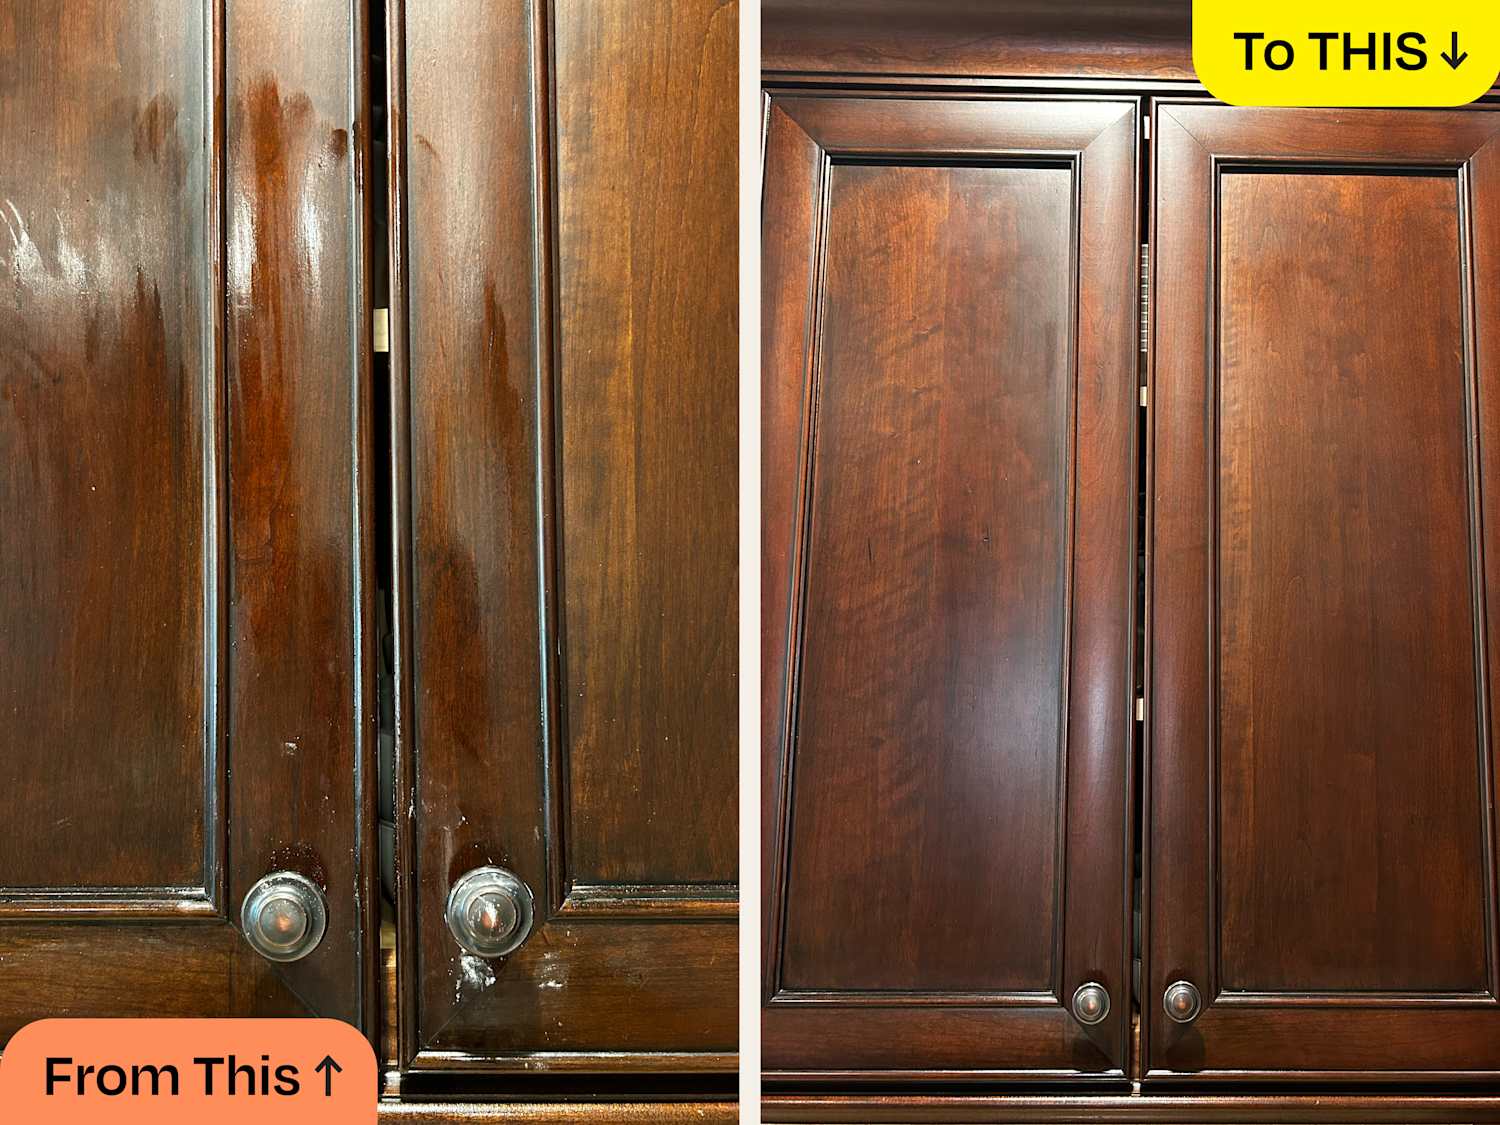
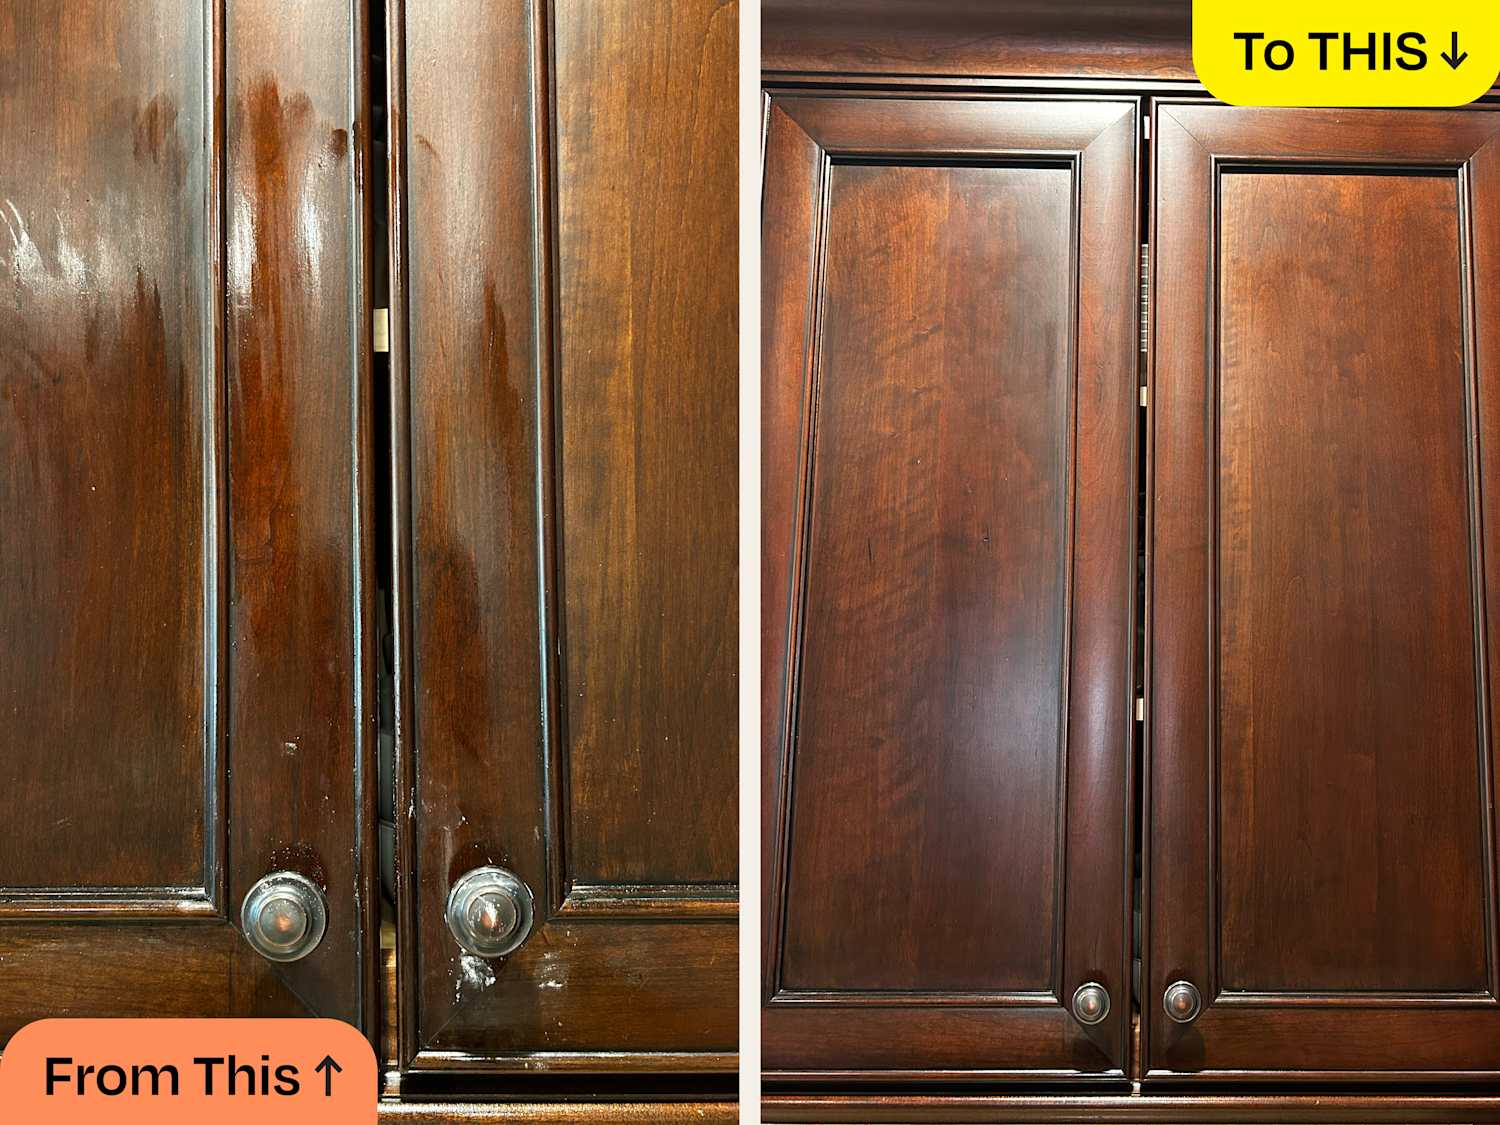
Imagine walking into your kitchen and feeling a sense of warmth and charm that only a cozy, vintage style can offer. You can achieve this delightful ambiance by transforming your kitchen cabinets to look beautifully distressed.
If you’ve ever admired the rustic charm of aged cabinets but thought it was out of reach, think again. This guide is designed just for you, to make this project easy and enjoyable. With each step, you’ll discover how simple materials and techniques can breathe new life into your space.
Picture yourself proudly showcasing your handiwork to friends and family, who will be amazed at how professional your cabinets look. You’ll not only enhance the aesthetic appeal of your kitchen but also create a space that feels uniquely yours. Stay with us, and you’ll learn the secrets to turning your kitchen into a stunning masterpiece that reflects your personal style.
Choosing The Right Cabinets
Distressing kitchen cabinets adds a rustic charm to any space. Use sandpaper to gently rub edges and corners. Paint, then wipe off some areas for a worn look.
Choosing the Right Cabinets Transforming your kitchen with distressed cabinets can breathe new life into the heart of your home. But before you start distressing, it’s crucial to choose the right cabinets. The type of wood, material, and the current condition of your cabinets play a vital role in determining how successful your distressing project will be.Types Of Wood And Material
The kind of wood you select greatly impacts the outcome of your distressed look. Softwoods like pine are more susceptible to wear and give a rustic appearance. Hardwoods such as oak or maple provide a more refined finish. Consider the material of your cabinets as well. Laminate or MDF (Medium-Density Fiberboard) might not take distressing techniques as well as natural wood. If your cabinets are made from these materials, you might want to reconsider or opt for a different technique. Think about the grain and texture you want to highlight. Some woods have unique patterns that can add character when distressed.Assessing Current Cabinet Condition
Before you start the distressing process, take a close look at the current state of your cabinets. Are they structurally sound? If not, you might need to fix or replace parts before proceeding. Check for any existing finishes or coatings. These might need to be stripped away to allow for proper distressing. A well-prepared surface ensures the new look will last longer. Evaluate any previous damage. Sometimes, old scratches or dents can add to the distressed look, but significant damages might need repair. As you assess, ask yourself: Do these cabinets have a story worth highlighting, or will distressing hide their imperfections? This reflection will guide your approach and ensure your project is both practical and beautiful.Credit: www.tiktok.com
Gathering Necessary Tools
Begin by collecting essential tools like sandpaper, paintbrushes, and a screwdriver. Ensure you have a clean cloth for wiping. Gathering these items simplifies the process of distressing kitchen cabinets.
Gathering the right tools is crucial before distressing kitchen cabinets. Proper tools ensure a smooth process and quality finish. With the right equipment, you can achieve a rustic look without hassle.Essential Tools And Supplies
To begin, collect key tools and materials. Sandpaper, in various grits, is vital. It helps remove the cabinet’s finish for a worn look. A sanding block or electric sander makes the job easier. Paintbrushes or foam brushes are necessary for applying paint or stain. Choose a quality brush for a smooth application. A putty knife is also handy for scraping paint or adding texture. Stain or paint is another must-have. Choose colors that suit your desired look. Protective topcoat or wax seals the finish. It enhances durability and appearance.Safety Equipment
Safety is a priority when working on cabinets. Always use gloves to protect your hands from chemicals and splinters. Safety goggles shield your eyes from dust and debris. A dust mask or respirator is essential. It prevents inhalation of harmful particles. Proper ventilation is crucial in a well-ventilated area. This ensures a safe working environment. Lastly, wear old clothing. Distressing can get messy, and it’s best to avoid ruining good clothes. With the right tools and safety gear, you’re ready to transform your cabinets.Preparing Cabinets For Distressing
Begin by cleaning the cabinets thoroughly to remove dirt and grease. Sand the surface lightly to create texture. Apply a primer to ensure paint adhesion, then paint with a chosen color before distressing for a rustic look.
Preparing your kitchen cabinets for distressing is a crucial first step that sets the stage for a successful transformation. It’s not just about picking up a paintbrush; it’s about ensuring the cabinets are ready to embrace their new, rustic look. By investing time in preparation, you’ll make the distressing process smoother and more effective, leading to a stunning end result.Cleaning And Sanding
Start by giving your cabinets a thorough cleaning. Use a mixture of warm water and a mild dish soap to remove grease and grime, which can prevent paint from adhering properly. Don’t skip this step; clean surfaces are key to a flawless finish. Once clean, it’s time to sand. Use medium-grit sandpaper to lightly sand the surface, focusing on areas with any glossy finish. Sanding helps the paint stick better and creates a perfect base for distressing.Removing Hardware
Take off all hardware, including knobs, handles, and hinges. Store them in labeled bags to avoid any mix-up later. Removing hardware not only makes painting easier but also ensures you don’t accidentally damage them during the process. Consider replacing old hardware with new pieces to complement your cabinets’ new distressed look. This simple change can dramatically update the overall appearance of your kitchen. Have you ever thought about how much the little details can change the big picture? By focusing on preparation, you’re not just distressing cabinets—you’re enhancing the heart of your home.
Credit: cut2size.ca
Distressing Techniques
Transform your kitchen cabinets with distressing techniques to create a charming, vintage look. Begin by lightly sanding the surface to remove the finish, then apply paint or stain. Finally, use sandpaper to gently rub edges and corners, revealing the wood underneath for a worn effect.
Distressing kitchen cabinets can add charm and character to your home. It gives them a vintage, rustic feel that many people love. There are several techniques you can use to achieve this look. Each method offers a unique finish, so you can choose the one that suits your style best.Sanding For A Worn Look
Sanding is a simple way to create a distressed appearance. Use sandpaper to gently rub the edges and corners of your cabinets. This technique mimics the natural wear that occurs over time. Focus on areas that would naturally see more use. It adds authenticity to the worn look. Use different grit sandpapers to vary the texture. This makes the cabinets look more naturally aged.Using A Hammer And Nails
A hammer and nails can create small dents and scratches. Lightly tap the cabinet surface to make imperfections. This method gives the cabinets a rustic, lived-in look. Be careful not to damage the structure of the cabinet. Randomly placing marks helps to achieve a more natural appearance. This technique can be combined with sanding for a varied texture.Applying Paint And Stain
Paint and stain can add depth and color to distressed cabinets. Apply a base coat of paint and let it dry. Use a contrasting stain over the paint to create an antique look. Wipe off excess stain to reveal the underlying color. This technique highlights the grain and texture of the wood. Experiment with different colors for unique effects.Finishing Touches
Transform kitchen cabinets with a distressed look by sanding edges and corners. Apply a light coat of paint and wipe off excess for a vintage effect. Finish with a clear sealant to protect the surface and enhance the rustic charm.
As you near the end of your kitchen cabinet distressing journey, the finishing touches are what transform your hard work into a masterpiece. These final steps ensure your cabinets not only look amazing but also stand the test of time. By taking the time to seal the cabinets and reattach the hardware, you bring the entire project to a satisfying close, making your kitchen an inviting, personalized space.Sealing The Cabinets
Sealing your distressed cabinets is crucial to protect them from spills, scratches, and everyday wear. Choose a clear, water-based polyurethane for a durable, non-yellowing finish. Apply the sealant with a brush or a foam roller in thin, even coats. Allow each coat to dry fully before applying the next. Typically, two to three coats will suffice. Lightly sand between coats with fine-grit sandpaper for a smooth finish. Have you ever noticed how a glossy finish can elevate the entire look of your kitchen? A satin finish can add elegance without overpowering the rustic charm of your distressed cabinets.Reattaching Hardware
Now it’s time to reattach the hardware, a step that can significantly influence your kitchen’s aesthetic. Clean each piece thoroughly before reattaching to ensure no dirt or debris remains. Consider updating your hardware for a refreshed look that complements your new cabinet style. If you’re reusing the original hardware, tighten any loose screws and ensure everything is aligned properly. Misaligned handles or knobs can detract from the overall appearance. Ask yourself: would a contrasting hardware color add a modern twist to your rustic cabinets? This small change could make a big impact, providing a unique blend of vintage and contemporary styles in your kitchen.Maintaining Distressed Cabinets
Transform kitchen cabinets with a distressed look using sandpaper and paint. Focus on edges for a natural worn effect. Seal with varnish for lasting durability and charm.
Maintaining distressed kitchen cabinets involves preserving their unique charm and character. These cabinets require specific care to keep them looking appealing over time. Regular maintenance helps retain their rustic elegance and ensures their durability. Let’s explore some practical tips for keeping your distressed cabinets in top condition.Cleaning Tips
Cleaning distressed cabinets needs gentle care. Use a soft cloth to wipe surfaces regularly. Avoid harsh chemicals that might damage the finish. A mild soap solution works best for cleaning. Dry them immediately after wiping to prevent water spots. This routine keeps cabinets looking fresh.Handling Wear And Tear
Distressed cabinets naturally show signs of wear. This adds to their charm. Address deeper scratches with touch-up kits. They blend marks with existing finishes. Regularly check for loose hardware and tighten screws as needed. Proper handling preserves their unique look longer.Creative Ideas For Distressed Cabinets
Transform kitchen cabinets with creative distressing techniques. Sand edges for a worn look, or try chalk paint for a vintage vibe. Use glaze to enhance textures, adding character and depth effortlessly.
Creative Ideas for Distressed Cabinets Distressed kitchen cabinets bring character and charm to your home. They add a vintage feel and warmth. There are several creative ways to achieve this look.Incorporating Color
Using color creatively can transform your cabinets. Consider muted shades like soft blues or warm grays. These colors enhance the distressed look with subtle charm. Try painting just the edges or corners for a worn effect. Use a contrasting color for added depth. Experiment with layers of different colors. Sand some areas to reveal underlying hues. This technique creates a timeworn appearance.Adding Decorative Elements
Decorative elements can elevate your distressed cabinets. Install vintage-style handles or knobs for a classic touch. Choose metal finishes like brass or copper. They add elegance and antiquity. Add stencils or decals for unique designs. Patterns like flowers or geometric shapes work well. Consider adding beadboard panels for texture. These elements give your cabinets a rich, detailed look.
Credit: cut2size.ca
Frequently Asked Questions
How To Make Your Cabinets Look Distressed?
To distress cabinets, sand edges lightly for a worn look. Apply a crackle glaze or antique wax. Paint with chalk paint and sand again for a rustic finish. Use a dry brush technique for added texture. Seal with a clear matte finish to protect the look.
How To Distress Kitchen Cabinets With Sandpaper?
Start by cleaning the cabinets thoroughly. Use medium-grit sandpaper to gently sand the surface. Focus on edges and corners for a natural worn look. Wipe away dust with a damp cloth. Seal with a clear finish for durability. Enjoy your newly distressed kitchen cabinets!
How To Make A Modern Cabinet Look Vintage?
To make a modern cabinet look vintage, apply a distressed paint finish. Add antique hardware for authenticity. Use sandpaper to create a worn effect on edges. Consider using a dark wax or glaze for an aged appearance. Decorate with vintage-style accessories for a complete transformation.
How To Rough Up Cabinets?
To rough up cabinets, use sandpaper to gently scuff the surface. Start with 120-grit, then finish with 220-grit for a smooth yet textured finish. Clean off dust with a damp cloth before painting or staining. This prepares the surface for better paint adhesion.
Conclusion
Transforming your kitchen can be simple with distressed cabinets. This project offers a rustic charm. Plus, it adds character to any kitchen space. You now have the tools and steps. Sanding, painting, and finishing are key parts. Be patient and enjoy the process.
Each stroke and layer is unique. This personal touch makes it special. Your kitchen will reflect your style. So, gather your materials and start today. Enjoy the beauty of a DIY project. Your kitchen awaits its new look.

Similar Posts