How to Install a Kitchen Countertop: Step-by-Step Guide
Thinking of giving your kitchen a fresh, stylish update? Installing a new countertop can transform the heart of your home, adding both beauty and functionality.
But before you dive into this exciting project, you might be wondering if you can tackle it on your own. The good news is, with a little guidance, you can absolutely take charge of this DIY adventure. Imagine the satisfaction of admiring your handiwork every time you step into your kitchen.
In this guide, you’ll discover step-by-step instructions and insider tips to make the installation process a breeze. Ready to roll up your sleeves and create a stunning centerpiece in your kitchen? Let’s get started!
Choosing The Right Material
Selecting the right material is key for a durable kitchen countertop. Consider granite for its strength or quartz for a non-porous option. Each material offers unique benefits and styles to match your kitchen’s design.
Choosing the right material for your kitchen countertop is crucial. It affects not only the look but also the functionality of your kitchen. Different materials offer various benefits and drawbacks. Consider durability, maintenance, and style before making your choice. Let’s dive into some popular options.Granite
Granite is a natural stone. It offers a unique pattern with each slab. This material is known for its durability and strength. Granite can withstand heat and scratches. It requires sealing to prevent stains. Regular maintenance will keep it looking new. It’s a great choice for a luxurious feel.Quartz
Quartz countertops are engineered. They are made from crushed stone mixed with resin. This makes them very durable and non-porous. Quartz is easy to clean and maintain. It resists stains and bacteria. Choose quartz for a consistent look and less upkeep. It offers a modern vibe.Laminate
Laminate countertops are budget-friendly. They are available in many colors and patterns. Laminate is easy to install and lightweight. It’s resistant to stains but can scratch easily. Regular care will extend its life. Consider laminate for an affordable and versatile option.Butcher Block
Butcher block countertops are made of wood. They provide a warm and natural appearance. They are perfect for cutting and chopping directly. Butcher block needs regular oiling to prevent drying. It’s prone to scratches and dents. Choose this material for a rustic and cozy kitchen feel.
Credit: www.youtube.com
Essential Tools And Materials
Installing a kitchen countertop is a rewarding DIY project, but it demands precision and the right toolkit. Before you dive into the installation, you need to gather essential tools and materials to ensure a smooth process. These tools are the backbone of your project, and having them at your disposal can make the difference between a flawless finish and a frustrating experience.
Measuring Tape
Your measuring tape is your best friend in this process. Accurate measurements are crucial for a perfect fit. Measure twice to avoid costly mistakes. Consider this: a small miscalculation can lead to gaps or overhangs. You wouldn’t want to cut your countertop only to find it’s too short or too long, right?
Level
A level is indispensable for ensuring your countertop is perfectly horizontal. An uneven countertop can lead to issues later, such as sliding items or water pooling. Make sure to check your level throughout the installation. It’s not just about aesthetics; it’s about functionality and ease of use in your kitchen.
Saw
The saw is your tool for cutting the countertop to the desired size. Depending on the material, you might need a specific type of saw, like a circular saw or jigsaw. Ensure the blade is suitable for the material to prevent chipping. Can you imagine cutting through granite with a wood saw? Not a good idea!
Adhesive
The right adhesive secures the countertop in place. Choose an adhesive that suits your countertop material, whether it’s laminate, stone, or wood. A strong bond ensures your countertop stays put, even under heavy use. Avoid using too much adhesive, as it can ooze out and create a mess.
With these tools and materials at hand, you’re well-equipped to tackle your kitchen countertop installation. Are you ready to transform your kitchen space into your dream culinary hub?
Preparing The Area
Clear the area by removing old fixtures and ensuring a clean surface. Measure the space carefully for a perfect fit. Assemble tools and materials nearby to streamline the installation process.
Preparing the area for a new kitchen countertop is a crucial step that sets the foundation for a successful installation. By taking the time to properly prepare, you’ll ensure a smooth process and avoid unexpected challenges. Let’s dive into the essential tasks that will make your countertop installation a breeze.Clearing The Space
Before you begin, make sure the entire area is free from clutter. Remove all appliances, utensils, and any other items on or near the countertop space. This not only gives you a clean slate to work with but also prevents accidental damage. Consider this: have you ever tried painting a wall without moving the furniture? It’s cumbersome and inefficient. The same principle applies here—clear the space for ease and efficiency.Ensuring Level Cabinets
A level foundation is crucial for a secure countertop fit. Use a spirit level to check the cabinets for any unevenness. If they aren’t level, adjust them using shims until they are perfectly flat. This might seem like a meticulous task, but imagine placing a countertop on uneven cabinets. It could lead to cracks or misalignment. Taking the time to ensure level cabinets now saves time and frustration later.Removing Old Countertop
Taking off the old countertop requires care. Start by disconnecting any plumbing or electrical connections. Then, gently pry the old countertop away from the cabinets using a pry bar. It’s a satisfying moment when the old countertop is removed, revealing the bare cabinets ready for their new upgrade. However, remember to wear protective gloves to avoid any injuries from sharp edges. By meticulously preparing the area, you set the stage for a seamless kitchen countertop installation. This step may not be the most glamorous, but it’s undoubtedly one of the most important. Are you ready to take the first step towards your dream kitchen?Measuring And Cutting
Accurate measurements are crucial for fitting kitchen countertops. Carefully mark the dimensions and use a reliable saw for precise cuts. This ensures a seamless installation and a polished finish.
Installing a kitchen countertop can transform your cooking space into a sleek and functional area. Before you dive into the installation, the key to a successful countertop project lies in precise measuring and cutting. These steps ensure the countertop fits seamlessly, avoiding awkward gaps or uneven edges that can detract from your kitchen’s aesthetic. Let’s explore the essentials of measuring and cutting, which are foundational in achieving that perfect fit.Taking Accurate Measurements
Getting the measurements right is crucial. Start by measuring the length and width of the area where the countertop will sit. Use a tape measure for accuracy, and record the dimensions carefully. Double-check your numbers to avoid any costly mistakes. Have you ever tried fitting a puzzle piece into the wrong spot? That’s what mismatched measurements feel like. Ensuring precision from the start saves you from future headaches.Marking Cut Lines
Once you have your measurements, it’s time to mark your cut lines on the countertop material. Use a pencil or masking tape to trace the exact dimensions you need. This step is where attention to detail really pays off. Consider doing a dry fit first, where you place the countertop on top to see if the lines are in the right place. Think of it as a dress rehearsal; you wouldn’t want to make the final cut without knowing it’s perfect.Using The Right Saw
Choosing the right saw for the job can make all the difference. For laminate countertops, a circular saw with a fine-tooth blade is ideal. For granite or quartz, a wet saw is necessary to prevent chipping and achieve a smooth finish. Using the wrong tool can lead to jagged edges and a frustrating experience. Ask yourself: do you have the right saw for your countertop material? It’s a decision that impacts the quality and appearance of your finished project.Dry Fitting The Countertop
Place the countertop on cabinets to ensure a perfect fit. Adjust for any gaps or uneven surfaces. This step helps avoid errors during final installation.
Dry fitting your kitchen countertop is a critical step in the installation process. It ensures that everything fits perfectly before any permanent adjustments are made. This step can save you a lot of time and headaches in the long run. It’s like trying on a new pair of shoes before buying them—you want to make sure they’re the right fit and comfortable. So, grab your measuring tape and get ready for some hands-on work.Checking Fit And Alignment
Begin by placing the countertop on your cabinets without any adhesives or fasteners. Ensure the countertop extends evenly over the cabinet edges. Use a level to check the evenness across the surface. This will help prevent any unwanted surprises like a wobbly toaster or a sliding fruit bowl. Have you ever noticed how a slightly tilted table can drive you nuts? It’s the same with countertops. If the countertop isn’t sitting flush, it might indicate that your cabinets aren’t level. Don’t panic—it’s quite common and fixable.Making Necessary Adjustments
Once you’ve identified any misalignments, you may need to make some adjustments. If the countertop is too large, you’ll need to trim it down. A circular saw with a fine-toothed blade works well for this task. Always double-check your measurements before cutting. Remember the old adage, “measure twice, cut once.” It’s a simple yet powerful reminder to avoid costly mistakes. If there’s a gap between the countertop and wall, consider using a scribe tool to mark the contour of the wall on the countertop. This ensures a snug fit against uneven walls. Have you ever thought about how a slight misfit can affect the overall look of your kitchen? Addressing these small details can make a significant difference in the final appearance. After making the necessary adjustments, place the countertop back to ensure it fits perfectly. Take a moment to admire your handiwork and feel free to pat yourself on the back for a job well done. By dry fitting, you gain a clear understanding of what adjustments are needed, ensuring a seamless final installation. Now, you’re one step closer to enjoying your beautiful, functional kitchen space.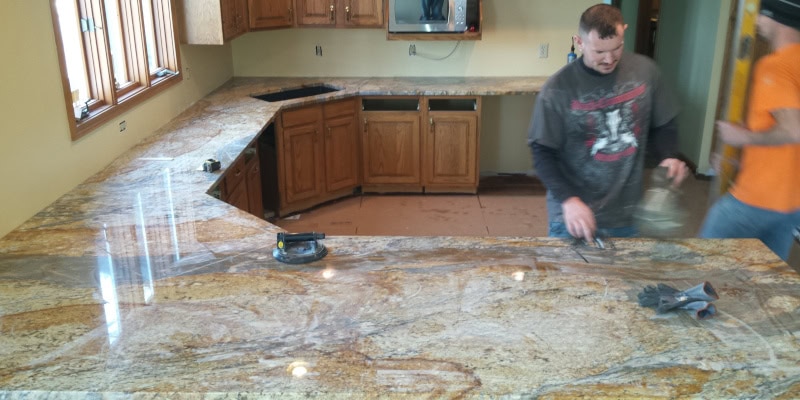
Credit: thegraniteguy.us
Securing The Countertop
Ensure the countertop is level and secure to prevent movement. Use brackets or adhesive to fasten it firmly. Check alignment with cabinets for a seamless finish.
Securing the countertop is a crucial step in the installation process, ensuring that your kitchen workspace is both safe and durable. It’s not just about making sure the countertop stays put; it’s about guaranteeing a lasting fit that supports all your culinary adventures. Let’s dive into the practical steps that will help you achieve this.Applying Adhesive
Start with a high-quality adhesive designed specifically for countertops. Apply it generously along the edges where the countertop meets the cabinetry. Ensure even coverage by using a caulking gun or a similar tool. Press the countertop firmly into place, allowing the adhesive to bond securely. Take a moment to check that everything is aligned. This step can save you time and frustration later.Fastening With Screws
Once the adhesive has been applied, reinforce the bond with screws. Use screws that are appropriate for your countertop material, such as wood screws for wooden countertops. Drill pilot holes to prevent the wood from splitting. Fasten the screws into the brackets under the countertop, ensuring they’re tight but not overly forceful. Double-check each screw to confirm it’s securely fastened. This added security is worth the extra few minutes.Sealing Joints
Sealing the joints is essential to prevent moisture from seeping into the seams. Choose a waterproof sealant that complements your countertop’s material. Apply the sealant along the joints and edges, using a steady hand for a smooth finish. This creates a barrier against spills and humidity. Regularly inspect the seals over time. Maintaining them can prolong the life of your countertop and keep your kitchen looking pristine. Taking these steps ensures that your countertop is both secure and functional. What will you create in your kitchen with the peace of mind that everything is firmly in place?Installing Backsplash
Installing backsplash is a simple way to enhance your kitchen countertop. Measure the area, apply adhesive, and place tiles. Finish by sealing the edges for a polished look.
Installing a backsplash is a crucial step in countertop installation that adds both functionality and style. It’s not just about protecting your walls from splashes; it’s an opportunity to express your design taste and enhance the overall aesthetic of your kitchen. Whether you opt for sleek tiles or rustic stones, the right backsplash can transform your kitchen into a culinary haven.Choosing Material
The choice of material for your backsplash can set the tone for your entire kitchen. Do you prefer the clean lines of subway tiles or the warmth of natural stone? Consider the durability and maintenance of each option. Glass tiles, for instance, are easy to clean but might not offer the rustic charm of slate or granite. Think about how the colors and textures will complement your countertop and cabinets. This decision can make all the difference in achieving the kitchen vibe you’re aiming for.Cutting To Size
Precision is key when cutting your backsplash material to fit. Measure twice, cut once—this old saying holds especially true here. Use a tile saw for precise cuts, especially if you’re working with ceramic or stone. A utility knife might suffice for peel-and-stick options. Remember, an accurate fit around outlets and corners can save you time and prevent the frustration of having to redo sections. A ruler and a pencil can be your best friends in this task.Attaching Securely
Attaching your backsplash securely is crucial for long-term durability. Use adhesive or mortar, depending on your material choice. Ensure that the surface is clean and dry before application. Press each tile firmly to avoid gaps. You might find a tile spacer helpful to keep everything aligned. Think about the future—will you regret not ensuring each piece is attached perfectly when you’re cooking a big family meal? Proper installation now ensures your backsplash won’t budge when subjected to everyday kitchen activities.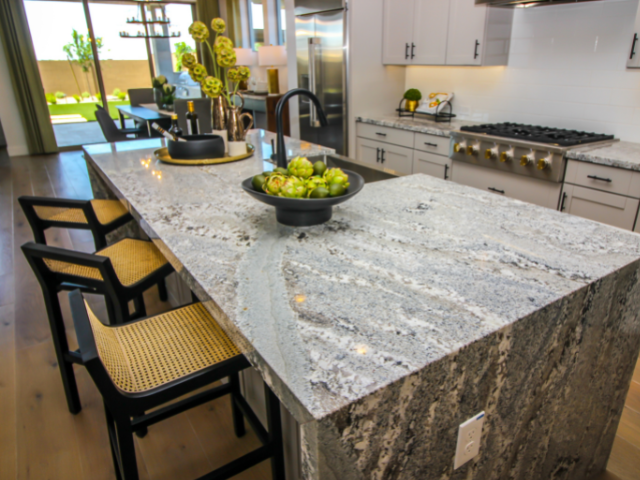
Credit: granitenations.com
Finishing Touches
Ensure the countertop fits perfectly by measuring the area. Secure it using adhesive and screws for stability. Finally, seal the edges to prevent water damage and give it a polished look.
When you’re installing a kitchen countertop, the final steps are just as crucial as the initial ones. Finishing touches ensure that your countertop not only looks pristine but also stands the test of time. Paying attention to detail can transform your kitchen space from ordinary to extraordinary. Let’s dive into these essential finishing touches.Cleaning The Surface
Once your countertop is securely in place, the first step is to clean the surface. Use a soft cloth and a mild cleaner to remove any dust or adhesive residue. This not only enhances the countertop’s appearance but also prepares it for the next steps. It’s surprising how much difference a clean surface can make. A spotless countertop highlights its material and design, making it a focal point in your kitchen.Inspecting For Flaws
After cleaning, take a moment to inspect the countertop for any flaws. Look for chips, scratches, or uneven areas. It’s easier to address these issues now rather than later. Have you ever noticed a tiny scratch that grows more annoying over time? Catching these early ensures that your countertop remains in perfect condition. A thorough inspection can save you future hassle and maintain the aesthetic appeal of your kitchen.Applying Sealant
The final step is applying a sealant to protect your countertop. A good sealant acts as a barrier against stains and moisture. Use a brush or roller to apply it evenly across the surface. Consider the peace of mind knowing your countertop is protected from everyday kitchen mishaps. Let the sealant dry completely before using your countertop. This step not only preserves your work but also enhances its longevity, keeping your kitchen looking fresh and inviting.Troubleshooting Common Issues
Troubleshooting common issues during kitchen countertop installation involves checking for misalignments, ensuring a level surface, and securing fixtures properly. Address gaps or uneven edges by adjusting supports or using filler materials.
Troubleshooting common issues during kitchen countertop installation can save time and frustration. Installing a countertop may seem straightforward, but problems can arise. Understanding these issues and how to address them ensures a smoother process.Dealing With Uneven Surfaces
An uneven surface can cause the countertop to wobble or sit improperly. First, assess the level of the cabinets using a spirit level. If the surface is uneven, use shims to balance it. Place shims under the countertop until it sits level. This simple adjustment prevents future problems. Always check the level from multiple angles to ensure accuracy.Correcting Misaligned Cuts
Misaligned cuts can be a headache during installation. Measure twice before cutting to avoid errors. If a cut is off, don’t panic. Use a sander or file to adjust the edges. For larger discrepancies, consider cutting a new piece. Ensure all cuts match the measurements perfectly. Proper alignment guarantees a seamless fit and a professional finish.Frequently Asked Questions
Can I Install Kitchen Countertops Myself?
Yes, you can install kitchen countertops yourself. Ensure you have the right tools and skills. Follow manufacturer guidelines for best results. Consider professional help for complex installations.
How Is A Kitchen Countertop Attached?
Installers secure kitchen countertops using screws, brackets, or adhesives. They ensure stability by fastening to cabinets. Precise measurement guarantees a snug fit. Proper attachment prevents shifting and provides durability. Always follow manufacturer guidelines for best results.
Are Countertops Supposed To Be Glued Down?
Yes, countertops are usually glued down for stability. Adhesive ensures they stay securely in place. Proper installation prevents movement and damage. Use recommended adhesive types for best results. Secure countertops enhance functionality and durability in kitchens and bathrooms. Always follow manufacturer guidelines for installation.
How Do You Secure A Countertop To A Cabinet?
Secure the countertop using brackets or screws from underneath into the cabinet. Ensure alignment and level before fastening. Use adhesive for extra stability if required. Check manufacturer’s instructions for specific installation details.
Conclusion
Installing a kitchen countertop is a rewarding project. With careful planning, it becomes manageable. Follow the steps closely for best results. Choose the right materials for your needs. Ensure measurements are precise to avoid surprises. Tools should be ready before starting.
Double-check everything for safety and quality. A successful installation boosts kitchen functionality and style. Enjoy the satisfaction of a job well done. Share your new skills with friends and family. They might want tips for their own projects. Your kitchen will look fresh and inviting.
Happy renovating!