How to Make Cabinets for Kitchen: Expert DIY Guide
Imagine walking into your kitchen and feeling a sense of pride every time you see the cabinets. These aren’t just any cabinets; they’re ones you crafted with your own hands.
Making cabinets for your kitchen not only saves you money but also allows you to create a space that truly reflects your style. You’ll discover a rewarding challenge that speaks to your creativity and practical skills. In this guide, we’ll simplify the cabinet-making process for you.
Whether you’re an experienced DIY enthusiast or a curious beginner, this step-by-step plan will empower you to transform your kitchen. Let’s dive in and unlock the secrets to making cabinets that will impress every guest and bring joy to your everyday life.

Credit: www.youtube.com
Choosing Materials
Choosing the right materials for kitchen cabinets is crucial. It affects durability and style. Quality materials can enhance the kitchen’s look and longevity. This section will guide you through selecting the best materials for your kitchen cabinets.
Wood Selection
Wood is a popular choice for kitchen cabinets. It offers a classic and warm feel. Consider options like oak, maple, and cherry. Each wood type has its unique grain and color. Oak is sturdy and has a pronounced grain. Maple is smooth and light-colored. Cherry darkens over time, adding a rich color.
Think about the kitchen’s style. Rustic kitchens suit oak well. Modern kitchens benefit from maple’s clean look. Cherry fits traditional designs beautifully. Understand the maintenance needs. Some woods require regular sealing. Ensure your choice matches your lifestyle.
Hardware Options
Hardware adds function and flair to cabinets. Choose handles and knobs that complement the cabinet style. Stainless steel offers a sleek, modern look. Brass provides a vintage touch. For a classic feel, consider ceramic knobs.
Think about durability. High-quality hardware lasts longer. Look for smooth operation in hinges. Soft-close hinges reduce noise and wear. Consider the ease of cleaning. Some finishes show fingerprints easily. Choose hardware that balances beauty and practicality.
Finishing Touches
Finishes protect and beautify cabinets. Paint offers a uniform color and easy cleaning. It suits contemporary designs well. Stain highlights natural wood grain. It enhances the rustic or traditional vibe.
Consider adding varnish for protection. It adds shine and resists water. Matte finishes provide a soft, understated look. Glaze adds depth and character. It can accentuate details in cabinet doors. Choose a finish that aligns with your kitchen’s overall theme.

Credit: food52.com
Essential Tools
Creating kitchen cabinets requires essential tools like saws, drills, and measuring tapes for precision cutting and assembly. Reliable clamps and sanders ensure smooth surfaces and secure joints. Quality tools make the process efficient and the results durable.
Crafting your own kitchen cabinets can be an incredibly rewarding project. However, to achieve professional results, you’ll need the right tools. The right combination of hand tools, power tools, and safety equipment will not only make the process smoother but also ensure your cabinets stand the test of time. Let’s dive into the essential tools you’ll need to bring your dream cabinets to life.Hand Tools
Hand tools are the backbone of any woodworking project. They offer precision and control that power tools sometimes can’t. A quality tape measure is essential for accurate measurements. You’ll also need a set of chisels for fine detailing and adjustments. Consider investing in a sturdy hammer and nails for assembling your cabinet frames. A carpenter’s square is crucial for ensuring your angles are perfectly aligned, preventing future headaches.Power Tools
Power tools can significantly speed up the cabinet-making process. A circular saw is indispensable for cutting large sheets of plywood to size. If you want smooth, clean edges, a router is your best friend. An electric drill will help you quickly assemble pieces and install hardware like hinges and handles. Don’t forget a sander to give your cabinets a professional finish, making them smooth and ready for painting or staining.Safety Equipment
Safety should always be a priority when using tools. Protective eyewear is a must to shield your eyes from flying debris. Gloves can protect your hands from cuts and splinters, but make sure they fit well to maintain dexterity. A dust mask will protect your lungs from harmful particles while sanding or cutting wood. Ear protection is also a wise choice, especially when using loud power tools for extended periods. With the right tools and safety equipment, you are well-equipped to tackle your kitchen cabinet project. What tools do you find indispensable in your DIY projects?Design Planning
Design planning helps create functional kitchen cabinets tailored to your space. Consider measurements, materials, and style preferences. Thoughtful planning ensures efficient use of space and enhances kitchen aesthetics.
Design planning is the foundation of creating kitchen cabinets that are both functional and stylish. This crucial phase involves careful consideration of space, style, and how you use your kitchen daily. A well-thought-out design plan ensures that your cabinets will meet your storage needs while complementing the overall aesthetic of your kitchen.Measuring The Space
Accurate measurements are key to a successful cabinet design. Begin by measuring the height, width, and depth of the area where the cabinets will be installed. Don’t forget to measure the space between appliances, windows, and doors. Consider any obstacles such as plumbing or electrical outlets that might affect the cabinet layout. A laser measuring tool can help you achieve precision, but a tape measure will also work if you double-check your figures.Creating A Blueprint
Once you have your measurements, sketch a blueprint of your kitchen layout. Use graph paper or digital tools for a clear and detailed plan. Include the placement of cabinets, appliances, and any other features you want to incorporate. Visualize your daily kitchen activities. Do you need extra space for cookware or pantry items? Adjust your blueprint to cater to these needs, ensuring both functionality and accessibility.Style And Functionality
Choosing the right style for your cabinets involves balancing aesthetics with practicality. Do you prefer modern, sleek designs, or are you drawn to rustic charm? Decide on materials and finishes that align with your personal taste. Think about functionality. Soft-close hinges and pull-out shelves can enhance your kitchen experience. Consider how the style of your cabinets will interact with your existing kitchen decor. Will they blend in seamlessly or stand out as a focal point?Cutting And Assembly
Begin by measuring the space and cutting wood panels to size. Assemble the cut pieces using screws and glue for sturdy kitchen cabinets.
Crafting kitchen cabinets from scratch can be an incredibly rewarding endeavor. It allows you to personalize the heart of your home and ensures every detail matches your vision. While the initial design phase sets the foundation, cutting and assembly are where your skills truly shine. Precision in these stages will determine not only the appearance but also the functionality of your cabinets. Let’s dive into the steps that will help you achieve professional results.Cutting Techniques
The first step is to ensure your cuts are accurate. Begin by measuring twice and cutting once—this age-old advice saves time and resources. Use a table saw for straight cuts; its stability offers unmatched precision. Consider using a miter saw for angled cuts. This is especially useful for creating unique designs or fitting pieces into tricky spaces. Always wear safety goggles and gloves. Protecting yourself is key to a successful project.Assembling Frame
Once your pieces are cut, it’s time to assemble the frame. Lay out all the pieces to verify that everything fits together seamlessly. This step helps catch any errors before assembly. Use clamps to hold the pieces in place while you fasten them. They ensure the structure remains sturdy and aligned. Employ screws and wood glue for added stability. The combination offers strength that lasts for years.Attaching Doors
With the frame in place, focus on the doors. Decide if you prefer inset or overlay doors—they each offer a distinct look. Inset doors sit flush with the frame, while overlay doors cover the frame edges. Use high-quality hinges for smooth operation. Soft-close hinges add a touch of luxury, preventing slams and wear over time. Test each door’s movement. Adjust hinges as necessary to ensure perfect alignment and ease of use. Are you ready to take your kitchen to the next level with custom cabinets? Share your thoughts or questions below!Finishing Techniques
Creating kitchen cabinets involves choosing suitable finishing techniques for durability and style. Options include staining, painting, or varnishing to enhance appearance and protect wood surfaces. Selecting the right finish ensures cabinets complement kitchen decor while withstanding daily wear.
Finishing your kitchen cabinets is a crucial step in ensuring they not only look stunning but also stand the test of time. Whether you’re going for a sleek modern vibe or a cozy rustic charm, the finishing techniques you choose can make all the difference. It’s where the magic happens, transforming raw wood into a polished piece of art. Embarking on this journey, you’ll find yourself asking: what’s the best way to achieve that flawless finish?Sanding Process
Sanding is the foundation of a great finish. Start with a coarse grit sandpaper to smooth out any imperfections and gradually move to finer grits for a polished surface. Always sand in the direction of the wood grain to avoid scratches. You’d be amazed at how a little patience during sanding can lead to a silky-smooth cabinet surface. Don’t rush this step. It’s all about patience and precision.Painting Or Staining
Deciding between paint and stain can be a tough call. Paint offers a bold, uniform finish, perfect for a modern kitchen. Stain, on the other hand, enhances the natural beauty and texture of the wood. Before applying paint or stain, test it on a scrap piece of wood to ensure it matches your vision. You wouldn’t want to end up with a color that clashes with your kitchen decor. Apply thin, even coats and let each layer dry thoroughly. This prevents drips and ensures a smooth finish.Sealing And Protecting
Sealing is the unsung hero of cabinet finishes, offering protection against moisture, stains, and everyday wear. Choose a sealant based on your kitchen’s needs—polyurethane for durability or a natural oil finish for eco-friendliness. Apply the sealant with a soft brush, following the wood grain. This not only enhances the finish but also adds a layer of protection. Remember, the right sealant can extend the life of your cabinets, keeping them looking new for years. Have you considered how much wear and tear your kitchen cabinets endure daily? A good sealant can be their shield.Installation Process
Once you’ve crafted your beautiful kitchen cabinets, the next step is all about the installation process. It’s the moment when your vision starts taking shape in your actual kitchen. This phase requires precision and patience, but don’t worry—it’s easier than it sounds, and you might even find it fun. Whether you’re a DIY enthusiast or a first-timer, following these steps can make the task straightforward and rewarding.
Mounting Cabinets
The first action is mounting the cabinets securely to the walls. Begin by locating the studs in your kitchen wall using a stud finder. This ensures your cabinets have a strong foundation to hold them up. Next, align the top of the cabinet with your designated height, usually around 54 inches from the floor for wall-mounted units. Using screws, attach the cabinets to the studs, and ensure they’re level by adjusting as needed. Remember, accuracy here sets the tone for a seamless installation.
Aligning Doors
Aligning doors may seem like a small detail, but it makes a big difference in achieving a polished look. Start by attaching the hinges to the cabinet doors, positioning them at equal distances from the top and bottom. Hang the doors on the mounted cabinets and adjust them until they sit evenly. A pro tip: use a small piece of cardboard as a spacer to maintain uniform gaps. Ever struggled with uneven doors in your home? It’s all about those tiny adjustments that create harmony.
Securing Fixtures
Once the doors are perfectly aligned, it’s time to secure the fixtures. This includes knobs, handles, and any additional hardware. Select fixtures that complement your kitchen style, whether that’s sleek stainless steel or rustic wood. Use a screwdriver to attach them firmly, ensuring they’re tightly fastened. Think about the functionality—do the handles feel comfortable in your hand? Your kitchen is a space where practicality meets design, and securing fixtures is the final touch that marries the two.
How do you feel about the installation process? Is there a part you dread or look forward to the most? Share your thoughts and experiences. Completing this step not only enhances your kitchen’s aesthetic but also brings a sense of accomplishment. Happy installing!
Troubleshooting Tips
Building kitchen cabinets can be rewarding. Yet, it comes with its challenges. Sometimes, things don’t go as planned. That’s where troubleshooting tips help. Below are practical tips to solve common cabinet problems.
Common Mistakes
Many DIY enthusiasts encounter similar issues. Misaligned doors are a frequent problem. Ensure measurements are accurate. Check twice before cutting. Also, avoid over-tightening screws. This can damage the wood. Use a level to keep surfaces straight. This prevents future adjustments.
Adjusting Hinges
Cabinet doors may not close properly. Adjusting hinges often solves this. Start by loosening the screws slightly. Shift the door to the desired position. Tighten the screws again. Repeat until the door aligns well. Test by opening and closing the door. Ensure it swings smoothly.
Repairing Damages
Scratches and dents are common. Sandpaper can smooth minor scratches. For deeper dents, use wood filler. Apply it with a putty knife. Let it dry completely. Sand the area for a smooth finish. Paint or stain to match the rest of the cabinet.

Credit: www.youtube.com
Maintenance Advice
Craft kitchen cabinets with precision by choosing quality wood and proper tools. Regularly clean surfaces to maintain shine and avoid damage. Check hinges and handles for wear to ensure functionality.
Keeping your kitchen cabinets looking fresh and functional is just as important as choosing the right design and materials. Proper maintenance can significantly extend their lifespan and maintain their aesthetic appeal. Below, you’ll find practical advice to ensure your cabinets remain in top condition for years.Cleaning Techniques
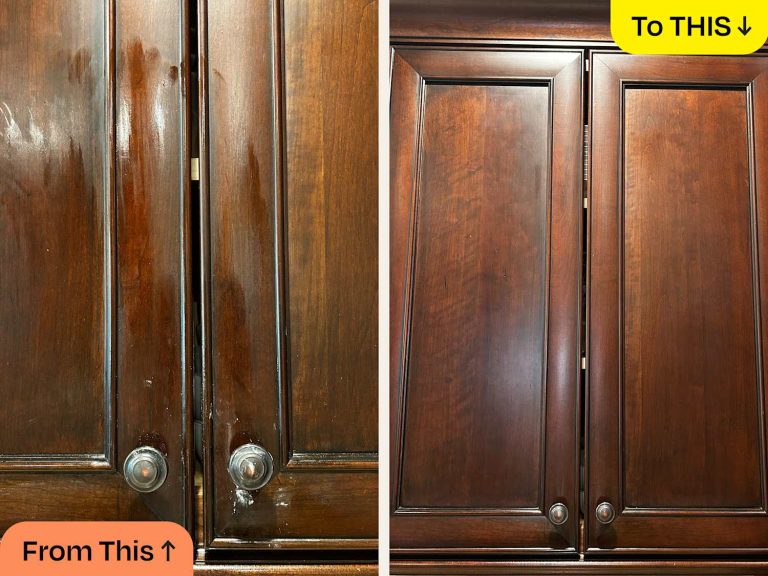
Regular cleaning is essential for maintaining the beauty and functionality of your kitchen cabinets. Use a mild soap solution and a soft cloth to wipe down surfaces. Avoid harsh chemicals that can damage the finish. Grease and grime can accumulate quickly, especially on cabinets near the stove. You might be surprised how a simple mix of vinegar and water can effectively cut through the grease. Do you remember the last time you cleaned above your cabinets? It might be time for a quick wipe-down.Preventive Care
Preventive care can save you from costly repairs down the line. Consider using liners inside your cabinets to protect against spills and stains. Ensure cabinet doors and drawers close properly to avoid unnecessary wear and tear. Loose hinges? Tighten them before they cause further damage. Ever noticed water rings on your cabinet surfaces? Use coasters and trivets to prevent moisture damage.Longevity Tips
Want your cabinets to last a lifetime? Regularly check for signs of wear like scratches or fading. Touch up small imperfections with a matching wood stain or paint. Ensure proper ventilation in your kitchen to prevent moisture build-up, which can warp wooden cabinets. Think about the last time you organized your cabinets. Overloading them can stress hinges and shelves, leading to premature wear. Redistribute weight for balanced storage. By implementing these practical tips, you can enjoy a kitchen that not only functions well but also looks stunning for years to come.Frequently Asked Questions
What Tools Are Needed To Make Kitchen Cabinets?
To make kitchen cabinets, essential tools include a circular saw, drill, measuring tape, and sander. You’ll also need clamps, a level, and safety gear like goggles and gloves. These tools help ensure precision and safety during construction, making the process smoother and more efficient.
How Long Does It Take To Build Cabinets?
Building cabinets can take anywhere from a few days to a few weeks. The duration depends on your skill level, the complexity of design, and availability of materials. Planning ahead and organizing your workspace can significantly reduce time and ensure a more efficient process.
Can Beginners Make Kitchen Cabinets?
Yes, beginners can make kitchen cabinets with proper guidance and tools. Starting with simple designs and following detailed instructions can help. Taking a woodworking class or watching online tutorials can also be beneficial. With practice, beginners can improve their skills and tackle more complex projects.
What Materials Are Best For Cabinets?
The best materials for cabinets include hardwoods like oak, maple, and cherry. Plywood is also popular for its durability and cost-effectiveness. Choose materials based on your budget, aesthetics, and durability needs. High-quality materials ensure longevity and enhance the overall appearance of your kitchen.
Conclusion
Creating kitchen cabinets can be a rewarding task. You now have the skills to build unique cabinets. These steps help in crafting durable and stylish designs. Remember to measure accurately for a perfect fit. Choose quality materials for lasting beauty.
Your kitchen will look fresh and organized. Enjoy the satisfaction of using cabinets made by you. Take pride in your work and creativity. Share your experience with friends and family. Inspire others to try new projects. Happy building and enjoy your new kitchen space!