How to Make Kitchen Sink Cookies: Ultimate Guide
Executive Chef & Lead Commercial Kitchen Specialist at Daily Kitchup Test Lab
Imagine biting into a cookie that has everything you love: chocolate chips, nuts, pretzels, and even a hint of sea salt. It’s a delightful explosion of flavors and textures, all in one bite.
These are kitchen sink cookies, and they’re unlike any treat you’ve ever tasted. Why settle for ordinary when you can have extraordinary? You’re about to uncover the secrets of creating these irresistible goodies right in your own kitchen. Whether you’re looking to impress guests or simply treat yourself, this guide will walk you through every step.
Get ready to surprise your taste buds with a cookie that’s truly unforgettable. Dive into the recipe and see how you can transform simple pantry ingredients into a masterpiece of flavor. Ready to get started? Let’s make some magic happen in your kitchen!
Ingredients Essentials
Kitchen Sink Cookies are the ultimate treat for those who love a little bit of everything in their dessert. Imagine a cookie bursting with flavors and textures that make each bite a surprise. To achieve this delightful chaos, understanding the essentials of the ingredients is key. Are you ready to gather your kitchen staples and some creative add-ins?
Core Ingredients
Every great cookie begins with a solid foundation. Start with the basics:
- Flour:All-purpose flour is your go-to. It gives the cookie its structure.
- Sugar:A mix of brown and white sugar creates that perfect balance of sweetness and chewiness.
- Baking Soda:This helps your cookies rise and achieve that light texture.
- Butter:Unsalted butter brings richness and flavor. Always use it at room temperature for easy mixing.
- Eggs:They bind the ingredients and add moisture. Fresh eggs are best for the fluffiest cookies.
- Vanilla Extract:A splash of vanilla enhances the overall flavor profile.
Optional Add-ins
Here’s where the fun begins. What will you toss into the mix to make these cookies uniquely yours?
- Chocolate Chips:A classic choice, but consider trying dark or white chocolate for a twist.
- Nuts:Walnuts or pecans add crunch. Toast them for deeper flavor.
- Dried Fruits:Think raisins, cranberries, or apricots for a sweet surprise.
- Oats:For texture and heartiness. Rolled oats work best.
- Coconut Flakes:A tropical hint that pairs wonderfully with chocolate.
- Seeds:Sunflower or chia seeds for a nutritional boost.
Have you ever found yourself experimenting with unexpected ingredients in your cookies? Maybe you’ve tried adding pretzels or potato chips for a salty kick. The beauty of kitchen sink cookies lies in their versatility. You can tailor the ingredients to your taste or even to what you have on hand.
Next time you’re in the mood for baking, why not let your creativity shine? Which add-ins will you choose to make your kitchen sink cookies unforgettable?
Credit: thebakermama.com
Baking Tools Needed
Gather a large mixing bowl, measuring cups, and spoons for precise ingredient portions. Use a sturdy spatula for blending the dough. A baking sheet and parchment paper ensure even baking for your kitchen sink cookies.
When preparing to make kitchen sink cookies, having the right baking tools is essential. These cookies are a delightful mix of various ingredients, making it necessary to equip your kitchen with both basic and specialty tools.Basic Baking Tools
- Mixing Bowls:Use different sizes for mixing and combining ingredients.
- Measuring Cups and Spoons:Accurate measurements ensure delicious cookies.
- Baking Sheets:Essential for evenly baking cookies.
- Spatula:Perfect for mixing and scraping bowls.
- Wire Cooling Rack:Helps cookies cool evenly after baking.
Specialty Tools
- Cookie Scoop:Creates uniform cookie sizes effortlessly.
- Silicone Baking Mat:Prevents sticking and promotes even baking.
- Stand Mixer:Offers convenience for mixing heavy dough.
- Food Processor:Useful for chopping ingredients finely.
- Parchment Paper:Ensures cookies release easily from baking sheets.
Preparation Steps
Gather ingredients like flour, sugar, chocolate chips, and nuts. Mix them in a bowl. Preheat the oven and prepare baking sheets. Scoop dough onto sheets, leaving space between cookies. Bake until golden brown, then cool on wire racks. Enjoy your homemade kitchen sink cookies.
Preparing kitchen sink cookies involves several steps. Each step is crucial to achieve delicious and chewy cookies. From measuring ingredients to mixing techniques, every detail counts. Let’s dive into the preparation steps.Measuring Ingredients
Accurate measurement is essential. Use a kitchen scale for precision. A measuring cup can also work. Ensure all dry ingredients are level. This means no heaping over the top. For liquids, use a liquid measuring cup. Eye level is key for accuracy. Check flour by spooning it into the cup. Then level it off with a knife.Mixing Techniques
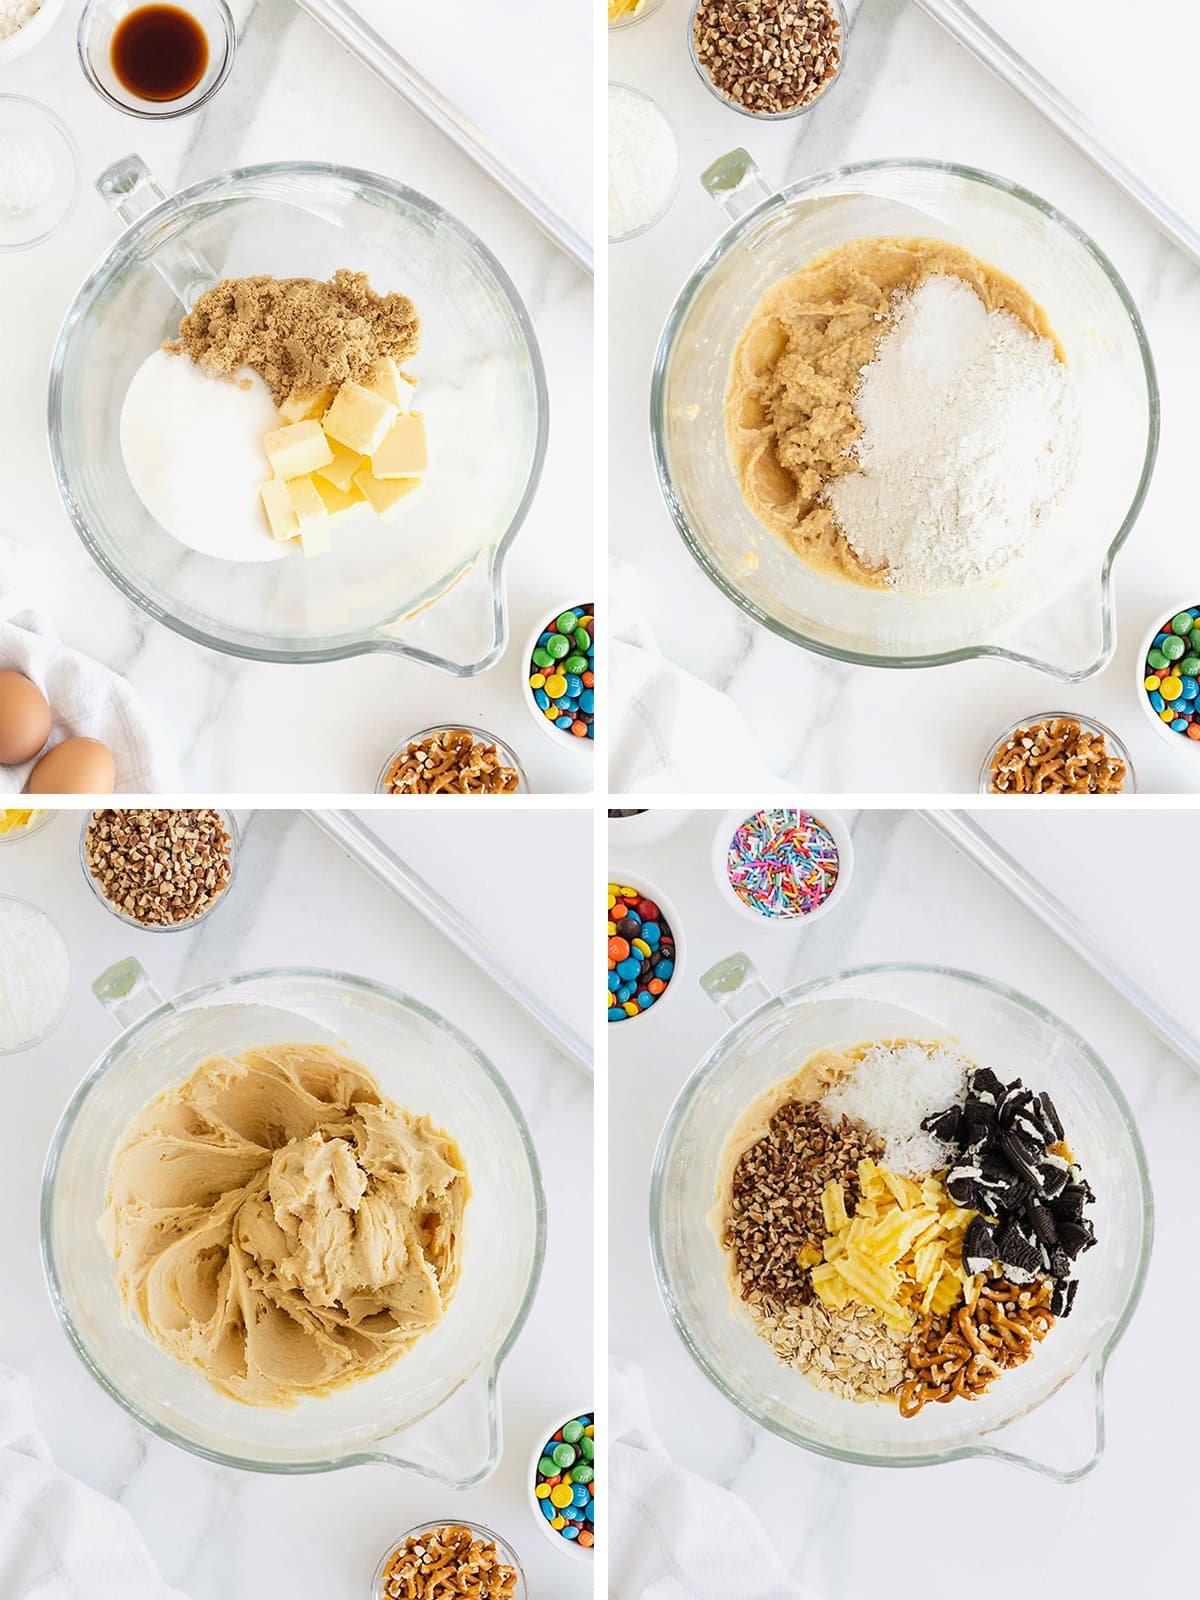
Start by creaming butter and sugar. Use a mixer on medium speed. Beat until light and fluffy. Add eggs one at a time. Mix well after each addition. Next, add vanilla extract. Stir until just combined. Gradually add dry ingredients. Mix on low speed to avoid overmixing. Stir in mix-ins like chocolate chips. Use a spatula for even distribution. Your dough is now ready to bake.
Credit: homemadeheather.com
Baking Process
Gather your favorite ingredients and mix them into a dough. Scoop onto a baking sheet and bake until golden. Enjoy the delightful blend of flavors in every bite of these kitchen sink cookies.
The baking process is crucial for kitchen sink cookies. It ensures that each cookie achieves the perfect balance of chewy and crispy. This stage is where all your ingredients come together, transforming into delightful treats. Careful attention during baking guarantees the best results.Preheating The Oven
Always start by preheating your oven. Set it to 350°F (175°C). This ensures even baking for your cookies. Preheating helps cookies cook uniformly. Cold ovens can make cookies spread too much. This step sets the stage for baking success.Cookie Placement
Space the cookie dough evenly on the baking sheet. Use parchment paper to prevent sticking. Leave about 2 inches between each scoop. This allows cookies room to spread without merging. Crowded cookies bake unevenly. Proper spacing ensures perfect texture.Cooling And Storing
Let cookies cool on a wire rack to keep them crispy. Store them in an airtight container to maintain freshness.
Cooling and storing kitchen sink cookies is crucial for maintaining their delightful taste and texture. Proper cooling ensures they remain crispy on the outside and soft inside. Storing them correctly keeps them fresh for several days. Let’s explore the best techniques to cool and store your cookies effectively.Cooling Techniques
Let cookies rest on the baking sheet for five minutes. This helps them set. Then, move them to a wire rack. The wire rack allows air to circulate around the cookies. This prevents sogginess. Ensure they cool completely before storing. Warm cookies might get mushy when stored.Storage Tips
Use an airtight container for storing cookies. This keeps them fresh longer. Layer them with parchment paper to prevent sticking. Store them at room temperature for up to a week. For longer storage, freeze them. Place cookies in a freezer-safe bag or container. They will stay fresh for up to three months in the freezer. When ready to eat, let them thaw at room temperature. Enjoy the deliciousness of your cookies anytime.
Credit: entertainingwithbeth.com
Customization Ideas
Kitchen sink cookies are a delightful treat. They mix various flavors and textures in one bite. The best part? You can customize them to fit your taste. This section will explore some creative customization ideas. Make your cookies unique and delicious.
Flavor Variations
Experiment with different flavor combinations. Swap chocolate chips for white chocolate. Add a handful of dried cranberries. Try chopped nuts like almonds or walnuts. Sprinkle in a touch of cinnamon or nutmeg. For a tropical twist, mix in shredded coconut. The possibilities are endless.
Texture Adjustments
Texture plays a crucial role in cookies. Do you like your cookies chewy or crunchy? For a chewier texture, add a bit more brown sugar. Want a crunchier bite? Bake them for a few extra minutes. Stir in oatmeal for a hearty texture. Add pretzel pieces for a salty crunch. Choose ingredients that match your desired texture.
Troubleshooting Tips
Baking perfect kitchen sink cookies can be tricky. Ensure all ingredients are at room temperature for even mixing. Adjust baking time slightly if cookies are too soft or hard.
Troubleshooting Tips Finding the perfect balance for kitchen sink cookies can be a challenge. Sometimes, the cookies might spread too much or turn out too hard. To ensure every batch is delightful, it’s crucial to understand common pitfalls and how to address them. Below are troubleshooting tips for kitchen sink cookie enthusiasts.Common Mistakes
- Overmixing the dough leads to tough cookies.
- Using cold butter causes uneven spreading.
- Adding too many mix-ins makes cookies crumble.
- Incorrect oven temperature results in underbaked cookies.
- Skipping chilling time results in flat cookies.
Quick Fixes
- Mix the dough until ingredients just combine.
- Use room temperature butter for even spreading.
- Measure mix-ins carefully to prevent crumbling.
- Preheat the oven for accurate baking.
- Chill dough for at least 30 minutes to avoid flat cookies.
Serving Suggestions
Pair kitchen sink cookies with a scoop of vanilla ice cream for a delightful treat. Serve them with a warm cup of coffee for a cozy afternoon snack. These cookies complement a glass of milk, creating a classic and comforting combination.
When you’ve just baked a batch of kitchen sink cookies, you’re likely pondering the best ways to serve them. These delightful treats, packed with everything but the kitchen sink, deserve thoughtful presentation and pairing to elevate your enjoyment. Let’s dive into some creative serving suggestions to make your cookie experience even more memorable.Pairing With Beverages
Pairing your kitchen sink cookies with the right beverage can enhance the flavors and make your treat even more enjoyable. Consider a steaming cup of coffee or a frothy cappuccino. The bitterness of the coffee complements the sweetness of the cookies, balancing the taste perfectly. For those who prefer something cool, a glass of cold milk is a classic choice. The creamy texture of milk pairs well with the rich and varied textures of the cookies. If you’re feeling adventurous, try a spiced chai tea or a fruity herbal tea; these can add unique notes that will surprise your taste buds.Presentation Ideas
When serving kitchen sink cookies, presentation can turn your simple snack into a delightful experience. Arrange the cookies on a rustic wooden board for a cozy, homey feel. Add some scattered chocolate chips or nuts around the cookies for an inviting look. For a more elegant touch, stack the cookies in a tiered stand. Place some fresh fruits like strawberries or slices of orange on the tiers to add a pop of color. If you’re hosting a gathering, consider wrapping individual cookies in parchment paper and tying them with a piece of twine. This not only looks charming but also makes it easy for guests to take a cookie home. How do you like to serve your cookies? Try experimenting with different pairings and presentations to find your perfect combination. Whether it’s for a quiet afternoon or a lively party, these ideas will make your kitchen sink cookies shine.Frequently Asked Questions
What Does The Kitchen Sink Cookie Have In It?
A kitchen sink cookie includes chocolate chips, pretzels, caramel, toffee bits, and sometimes nuts. These cookies blend sweet and salty flavors, creating a unique taste experience. Each bite offers a delightful mix of textures and tastes, making them a popular treat for those who enjoy diverse flavors.
What Are The Ingredients In Panera Kitchen Sink Cookies?
Panera kitchen sink cookies include chocolate chips, caramel pieces, pretzels, and sea salt. The dough consists of butter, sugar, eggs, flour, vanilla extract, baking soda, and salt. Enjoy the perfect blend of sweet and salty flavors in every bite!
Why Do They Call Them Kitchen Sink Cookies?
Kitchen sink cookies get their name because they include various ingredients, “everything but the kitchen sink. ” Bakers use leftover nuts, chocolate, and candies, making each batch unique. This playful name reflects the cookie’s diverse and creative ingredient mix, resembling a delightful culinary experiment.
What Is In Kitchen Sink Crumbl Cookies?
Kitchen Sink Crumbl Cookies contain chocolate chips, pretzels, toffee bits, and a sprinkle of sea salt. This delightful mix provides a sweet and salty flavor experience. Perfectly baked, these cookies offer a satisfying crunch and gooey texture. Enjoy a unique treat with every bite.
Conclusion
Kitchen sink cookies mix flavors and textures perfectly. Every bite surprises with something new. Baking them is simple and fun. Gather your favorite ingredients. Mix them together. Bake until golden. Enjoy the delicious aroma filling your kitchen. Share with friends and family for smiles all around.
Experiment with different add-ins each time. Create a cookie unique to your taste. These cookies make a cozy treat for any occasion. Perfect for a snack or dessert. Now, it’s your turn. Bake and savor the delightful results. Happy baking!

Similar Posts