How to Open the Kitchen Sink Drain: Quick DIY Guide
Executive Chef & Lead Commercial Kitchen Specialist at Daily Kitchup Test Lab
Are you tired of standing ankle-deep in water every time you wash the dishes? A clogged kitchen sink drain is more than just a nuisance—it’s a call to action.
You might think fixing it requires a plumber’s magic touch, but the truth is, you can tackle this problem yourself with a few simple steps. Imagine the satisfaction of watching the water flow freely down the drain, knowing it was you who made it happen.
This guide will show you exactly how to open the kitchen sink drain, saving you both time and money. Ready to restore your sink’s functionality and regain control of your kitchen? Let’s dive in!
Tools And Materials Needed
Gather a wrench, pliers, and a bucket to catch water. Ensure you have towels for cleaning spills. Prepare replacement parts like washers or gaskets if needed.
Opening your kitchen sink drain can be a straightforward task if you have the right tools and materials. Whether you’re dealing with a stubborn clog or simply want to clean out accumulated debris, knowing what you need beforehand can save time and effort. Having the correct items on hand ensures you’re prepared for any surprises that might pop up along the way. Let’s dive into the essentials you’ll need to tackle this task efficiently.Required Tools
- Plunger:An essential tool for loosening blockages in the drain. A sink-specific plunger works best for creating a seal and providing adequate pressure.
- Pliers:Handy for loosening nuts and fittings under the sink. Choose adjustable pliers for versatility.
- Wrench:A pipe wrench is ideal for gripping and turning pipes. It offers the leverage needed for stubborn fittings.
- Drain Snake:A flexible tool designed to reach deeper clogs. This is especially useful for persistent blockages that a plunger can’t clear.
Necessary Materials
- Bucket:Essential for catching any water or debris that might spill when opening the drain.
- Cleaning Cloth:Useful for wiping down surfaces and cleaning up residue after the drain is opened.
- Rubber Gloves:Protect your hands from grime and potential sharp edges. They also provide a better grip on tools.
- Baking Soda and Vinegar:Natural cleaning agents that can help dissolve minor clogs. They are safe and environmentally friendly options.
Safety Considerations
- Protective Eyewear:Wear goggles to shield your eyes from splashes, especially when dealing with chemical cleaners.
- Ventilation:Ensure the area is well-ventilated if using chemical products to avoid inhaling fumes.

Credit: www.familyhandyman.com
Safety Precautions
Ensure safety by wearing gloves and goggles before opening the kitchen sink drain. Keep tools like a wrench and plunger handy, and clear the area of any obstacles to prevent accidents.
Before diving into the task of opening your kitchen sink drain, it’s crucial to prioritize safety. Your kitchen sink is a hub of activity, and addressing any issues requires a careful approach to avoid injury or further damage. By taking the right precautions, you ensure a smooth and safe process.Wear Protective Gear
Always start by wearing protective gear. Rubber gloves protect your hands from sharp objects and harsh chemicals. Safety goggles can shield your eyes from splashes, especially if you’re using strong cleaning agents.Turn Off Water Supply
Ensure the water supply to your sink is turned off before starting. This prevents unexpected water flow and potential flooding. It’s a simple step that can save you from a lot of hassle.Use Proper Tools
Using the right tools is essential for safely opening the drain. A plunger, plumber’s snake, or a wrench might be needed, depending on the issue. Avoid makeshift tools that could break or cause damage to the plumbing.Avoid Chemical Drain Cleaners
Chemical drain cleaners can be harmful and often cause more damage than good. They can erode pipes and create hazardous fumes. Opt for mechanical methods or natural solutions like baking soda and vinegar.Have A Bucket Ready
Keep a bucket nearby to catch any water or debris. This helps maintain a clean workspace and prevents water from spilling on your floor. It’s a simple preparation that can make the cleanup process much easier. Remember, safety isn’t just a checklist; it’s a mindset. By taking these precautions, you protect yourself and ensure your kitchen remains a safe, functional space. Have you ever had a mishap with a home repair that could have been avoided with a bit more caution?Identifying The Problem
Identifying the problem with your kitchen sink drain is crucial for a quick fix. Knowing the signs and causes helps you address the issue effectively. Let’s explore how to spot a clogged drain and understand what might be causing the blockage.
Signs Of A Clogged Drain
Recognizing the signs of a clogged drain is essential. Slow drainage is a common indicator. Water pooling in the sink points to a problem. Unpleasant odors are another sign of a blockage. Gurgling sounds from the drain signal trapped air. Watch for these symptoms to catch clogs early.
Common Causes Of Blockages
Understanding the causes of blockages can prevent future issues. Food particles often cause clogs. Grease build-up is another frequent culprit. Soap residue can also block drains. Hair and foreign objects may obstruct the flow. Knowing these causes helps maintain a smooth-running drain.
Removing The Sink Stopper
Opening the kitchen sink drain often requires removing the sink stopper. Twist and pull the stopper gently. If it’s stuck, use pliers to grip and turn it. This will clear the way for water to flow smoothly.
Removing the sink stopper is often the first step in unclogging the kitchen sink drain. This task might seem daunting, but it is simpler with a little guidance. A clean and functioning sink is vital for a smooth cooking experience. Different types of stoppers require different removal techniques. It is essential to identify the stopper type before attempting removal.Types Of Sink Stoppers
Understanding the type of sink stopper is crucial. Here are common types:- Lift-and-Turn Stoppers:These stoppers have a knob on top. You twist the knob to open or close.
- Push-and-Pull Stoppers:Similar to lift-and-turn, but you push or pull instead.
- Pop-Up Stoppers:Operated by a lever, usually located behind the faucet.
- Toe-Touch Stoppers:You press the stopper with your toe to open or close.
Steps To Remove A Stopper
Removing a sink stopper can be straightforward. Follow these simple steps:- Identify the stopper type by examining its mechanism.
- For lift-and-turn stoppers, turn the knob counter-clockwise. Unscrew the stopper.
- Push-and-pull stoppers require pulling up while twisting.
- Pop-up stoppers need the lever pulled up. Remove the stopper manually.
- Toe-touch stoppers demand pressing to release. Unscrew the stopper base.
- Clean the stopper thoroughly before reinstallation.
Clearing The Drain Manually
Clearing the Drain Manually First, remove any visible debris from the sink strainer. Next, use a plunger to dislodge blockages. If the clog persists, consider using a drain snake to break it up.
Clearing the kitchen sink drain manually can solve many clog problems. It’s an effective way to remove blockages without harsh chemicals. With a few tools and some patience, you can restore your sink’s flow.Using A Plunger
A plunger is a simple tool for clogged drains. It uses suction to dislodge blockages. Here’s how to use it: – Fill the sink with enough water to cover the plunger’s cup. – Place the plunger over the drain, ensuring a tight seal. – Push and pull the plunger rapidly for about 20 seconds. – Lift the plunger to check if the water drains. This method can clear minor blockages with ease.Utilizing A Drain Snake
A drain snake reaches deeper clogs that plungers can’t. It’s flexible and can navigate through pipes. Follow these steps: – Insert the snake into the drain until you feel resistance. – Turn the handle to break up the clog. – Pull the snake out and clean any debris from its tip. – Run water to see if the blockage is cleared. Using a drain snake is effective for stubborn clogs. Both methods help maintain a smoothly running kitchen sink.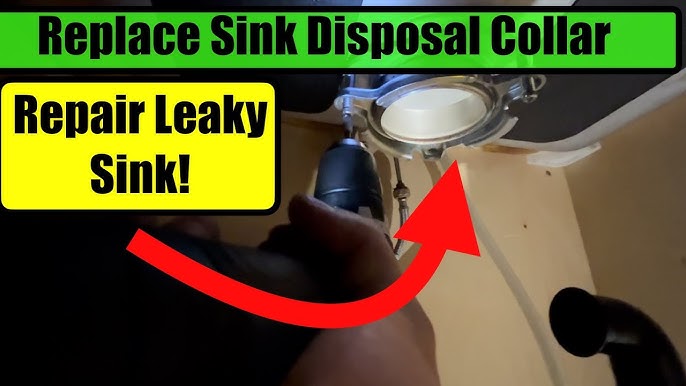
Credit: www.youtube.com
Cleaning The P-trap
The P-trap is a crucial part of your kitchen sink. It prevents sewer gases from entering your home. Over time, it can get clogged with debris and food particles. Cleaning it can restore proper drainage and eliminate odors. This task is simple and requires basic tools. Follow these steps to get your kitchen sink back to working order.
Detaching The P-trap
Before you start, place a bucket under the sink. This will catch any water or debris when you detach the P-trap. Use a wrench to loosen the slip nuts on both ends of the P-trap. Carefully remove the P-trap. Let any trapped water flow into the bucket below.
Cleaning And Reattaching
Empty the contents of the P-trap into the bucket. Use a bottle brush or old toothbrush to scrub the interior. Ensure all debris is removed. Rinse the P-trap with warm water. Once clean, reattach the P-trap by tightening the slip nuts. Ensure they are secure to prevent leaks. Test the sink by running water to check for any leaks.
Using Natural Cleaners
Clear the kitchen sink drain using natural cleaners like baking soda and vinegar. Pour baking soda down the drain, followed by vinegar. Let the mixture fizz for a few minutes, then flush with hot water to clear debris.
Opening your kitchen sink drain doesn’t always require harsh chemicals. Natural cleaners are not only effective but also safe for your home and the environment. Plus, they’re easy to find in your pantry. Let’s explore some simple techniques that harness the power of natural ingredients to get your kitchen sink drain flowing freely again.Baking Soda And Vinegar Method
Baking soda and vinegar create an effervescent reaction that can help dislodge stubborn clogs. Start by pouring half a cup of baking soda down the drain. Follow it with a cup of vinegar and immediately cover the drain with a plug or cloth. This helps direct the fizz downward into the pipes. Let the mixture sit for about 15 minutes. You might notice some bubbling up, which is perfectly normal. Afterward, flush the drain with hot water. This combination not only clears the blockage but also deodorizes your drain, leaving it smelling fresh. Have you tried this method before? It’s surprising how such common kitchen staples can work magic on clogged pipes.Salt And Boiling Water Technique
Salt is a natural abrasive that can help break up debris in your drain. Begin by pouring half a cup of salt down the drain. Next, boil a kettle of water. Slowly pour the boiling water over the salt in the drain. The hot water helps dissolve grease and wash away any loose particles. Wait a few minutes to see the results. You might be amazed at how quickly this simple duo can clear a blockage. If the drain is still sluggish, repeat the process. Using salt and boiling water is not only effective but also incredibly straightforward. It’s a technique worth trying when you’re in a pinch and need a quick solution. Could this be the simplest method to tackle stubborn clogs? Give it a try and see for yourself.Testing The Drain
Testing the Drain First, remove the sink stopper by twisting and pulling it out. Next, use a wrench to loosen the drain pipe nut. Finally, pull out the drain pipe gently to clear any blockages.
Testing the drain is crucial after attempting to open it. This step ensures everything functions smoothly and prevents future blockages. By testing, you confirm the drain’s efficiency and cleanliness. This guide will help you perform the test effectively.Check Water Flow
Run water into the sink. Observe how quickly it drains. A fast drain means the blockage is cleared. If slow, further action may be needed.Listen For Strange Sounds
Strange noises can indicate a problem. Listen for gurgling or bubbling sounds. These noises suggest air trapped in the pipes.Look For Leaks
Examine the pipes under the sink. Ensure there are no drips or puddles. Leaks can cause damage if not addressed promptly.Test With Different Temperatures
Run both hot and cold water. Observe any change in drainage speed. Consistent flow at different temperatures is a good sign.Use A Natural Drain Cleaner
Consider a natural cleaner for extra assurance. Baking soda and vinegar work well. Pour the mixture down and let it sit. This helps clear minor residue.Repeat The Process If Necessary
If issues persist, repeat the cleaning process. This may be required for stubborn blockages. Persistence often leads to a clear drain.Maintaining A Clear Drain
Maintaining a clear kitchen sink drain is essential for a smooth-running kitchen. Blocked drains can lead to unpleasant odors and slow draining water. Regular upkeep helps prevent these issues, keeping your kitchen functional and fresh.
Regular Cleaning Tips
Cleaning the drain regularly prevents buildup. Pour boiling water down the drain weekly. This helps dissolve grease and other residues. Use a mixture of vinegar and baking soda monthly. This combination breaks down stubborn particles. Scrub the drain cover with a brush. Remove any visible debris.
Preventive Measures
Preventive actions reduce the risk of clogs. Avoid pouring oil or grease into the sink. They solidify and cause blockages. Install a drain screen to catch food particles. Dispose of food scraps in the trash. Run cold water while using the garbage disposal. This aids in flushing waste effectively.

Credit: www.youtube.com
Frequently Asked Questions
How To Unlock A Kitchen Sink Drain?
Use a plunger to dislodge debris blocking the drain. Pour boiling water mixed with baking soda and vinegar. Use a drain snake to clear stubborn clogs. Regular maintenance prevents future blockages.
How To Get A Sink Drain Open?
Use a plunger to dislodge debris. Pour boiling water to clear minor blockages. Try a baking soda and vinegar solution. Use a drain snake for stubborn clogs. Remove the trap and clean it if necessary.
How To Remove The Drain Cover From A Kitchen Sink?
Loosen the screws securing the drain cover with a screwdriver. Gently lift the cover using a flat tool. If stuck, apply lubricant to ease removal. Clean the area after removing the cover to prevent clogs. Always handle tools with care to avoid damaging the sink.
How To Unscrew A Kitchen Sink Drain Pipe?
Turn off water supply and place a bucket under the drain. Use a wrench to loosen the pipe nuts. Twist counterclockwise to unscrew the pipe. Ensure to remove all water and debris. Dispose of old pipe properly.
Conclusion
Opening your kitchen sink drain doesn’t have to be complicated. With simple tools and a little patience, you can do it yourself. Remember to have a bucket ready to catch any water. Follow the steps carefully to avoid damage. Regular maintenance helps keep your kitchen sink draining smoothly.
Cleaning the pipes occasionally can prevent clogs. If you face any issues, don’t hesitate to call a professional. Taking action early can save you from bigger problems later. Keep your kitchen running efficiently with these tips. You’ll enjoy a clean and functional sink in no time.

Similar Posts





















