How to Paint Kitchen Cabinets That are Stained: Expert Tips
Are your kitchen cabinets looking tired and worn-out, yet you can’t bear to part with them? If you’ve been dreaming of a fresh look without the hefty price tag of a full kitchen renovation, you’re in the right place.
Painting your stained kitchen cabinets is a cost-effective way to breathe new life into your space. This guide will walk you through each step, ensuring that you achieve a professional finish that will make your kitchen the envy of all your friends.
Imagine the delight of transforming your cooking space into a haven of style and functionality, all by yourself. Ready to dive in? Let’s unlock the secrets to a stunning kitchen makeover that you’ll love for years to come.
.jpg)
Credit: www.architecturaldigest.com
Choosing The Right Materials
Painting stained kitchen cabinets can transform your space. Choosing the right materials is crucial for a smooth finish. This includes selecting appropriate paint and gathering essential tools.
Types Of Paint For Cabinets
Different paints suit different cabinet surfaces. Here are common options:
- Acrylic Paint:Dries quickly and resists moisture. Great for kitchens.
- Oil-Based Paint:Offers a durable finish. Ideal for high-use areas.
- Chalk Paint:Provides a matte look. Requires sealing for durability.
- Milk Paint:Natural option. Needs bonding agent for smooth surfaces.
Essential Tools And Supplies
Gathering the right tools makes the job easier. Here’s what you need:
- Sandpaper:Prepares the surface by smoothing out imperfections.
- Brushes and Rollers:Use high-quality for even paint application.
- Primer:Ensures paint adheres well to the cabinet surface.
- Drop Cloths:Protects floors from spills and drips.
- Masking Tape:Keeps edges clean and paint-free.
Choosing the right tools is half the battle. Equip yourself wisely for a flawless finish.

Credit: www.chismbrothers.com
Preparing The Cabinets
Preparing kitchen cabinets for painting involves cleaning and sanding to remove stains and ensure smooth surfaces. Use a degreaser to eliminate any residue. Sand thoroughly to create a texture that allows paint to adhere effectively.
Preparing kitchen cabinets for painting involves a few key steps. Proper preparation ensures a smooth and professional finish. Taking the time to clean, remove hardware, and sand will make a big difference. Let’s dive into each step.Cleaning And Degreasing
Begin by cleaning the cabinets thoroughly. Use a mild detergent mixed with warm water. Wipe down all surfaces to remove dust and grime. For greasy areas, apply a degreaser. A clean surface helps paint adhere better. Rinse with clean water and dry completely.Removing Hardware And Doors
Next, remove all cabinet doors and hardware. Unscrew hinges and knobs carefully. Place them in labeled bags to keep track. This step prevents paint from getting on metal parts. It also makes sanding and painting easier.Sanding Techniques
Sanding is crucial for a smooth finish. Use a medium-grit sandpaper to roughen the surface. Sand in the direction of the wood grain. This allows the paint to grip the surface well. After sanding, wipe down with a damp cloth. Remove all dust before moving to the next step.Priming The Surface
Painting kitchen cabinets that are stained requires a meticulous approach, and priming the surface is a crucial step. Without the right primer, your paint job may not adhere properly or might chip over time. This step is essential for achieving a flawless finish that stands the test of time.
Selecting The Appropriate Primer
Choosing the right primer can make or break your cabinet painting project. For stained cabinets, opt for a high-quality bonding primer. This type of primer is designed to adhere to glossy surfaces, ensuring your paint sticks without peeling. Consider using a stain-blocking primer if your cabinets have deep stains that might bleed through. This will prevent any discoloration from ruining your final look.
Application Methods
How you apply primer can impact the final result. Use a brush for detailed areas and corners to ensure full coverage. For larger surfaces, a foam roller can provide an even coat without brush marks. Remember to apply the primer in thin, even layers, allowing it to dry completely between coats. This patience will pay off, resulting in a smoother, more professional finish.
Painting Techniques
Preparing kitchen cabinets for painting involves careful cleaning and sanding. Choose a primer suitable for stained wood to ensure better paint adhesion. Apply paint in thin, even coats for a smooth finish.
Painting kitchen cabinets transforms your space with minimal expense. Techniques matter in achieving a smooth finish. Whether using brushes or rollers, each method offers unique benefits. Understanding these can guide your choice and enhance the final result.Using Brushes Vs. Rollers
Brushes provide precision, ideal for detailed areas. They reach corners and edges easily. They’re perfect for cabinets with intricate designs. Rollers cover large surfaces quickly, offering a uniform finish. They work well on flat cabinet doors. Choosing between brushes and rollers depends on the cabinet style and desired finish.Applying Multiple Coats
Multiple coats ensure durability and depth. The first coat serves as a base, adhering to the surface. Subsequent coats build up color richness. Allow each coat to dry thoroughly. This prevents streaks and uneven finishes. Three coats often achieve the best appearance. Quality paint and patience yield long-lasting results.Ensuring A Smooth Finish
Preparing stained kitchen cabinets for painting involves careful cleaning and sanding. This ensures paint adheres well. Applying a quality primer is crucial to cover stains and create a smooth base.
Ensuring a smooth finish on your stained kitchen cabinets is crucial for a professional look. It’s more than just slapping on a coat of paint; it’s about precision and patience. A smooth finish can transform your kitchen space, making it feel fresh and modern.Sanding Between Coats
Sanding between coats is a game changer. It helps to eliminate any brush strokes or uneven layers that might occur. Use a fine-grit sandpaper, like 220 grit, to gently sand the surface after the first coat dries. Wipe away the dust with a tack cloth before applying the next coat. This ensures the next layer adheres properly, creating a seamless finish.Dealing With Imperfections
Imperfections can be frustrating, but they are fixable. Look closely for drips, bumps, or rough spots after each coat. Use a light hand with sandpaper to smooth these areas. Sometimes, a small touch-up with a brush can work wonders. Have you noticed a stubborn spot that just won’t smooth out? Consider using a wood filler for deeper imperfections. Always ensure the filler is dry and sanded flush with the surface before continuing. Achieving that flawless finish might require extra effort, but the satisfaction of seeing your cabinets gleam is worth it.Sealing And Protecting
Achieving a flawless finish on stained kitchen cabinets involves sealing and protecting the surface before painting. Begin by cleaning the cabinets thoroughly, then apply a high-quality primer to ensure paint adheres well. Finish with a durable topcoat to protect against moisture and wear.
Sealing and protecting kitchen cabinets is essential for lasting beauty. After painting, a durable finish is crucial. This prevents scratches and moisture damage. Let’s explore ways to seal your stained cabinets effectively.Choosing A Topcoat
Selecting the right topcoat is vital for protection. Water-based polyurethanes are popular. They dry clear and won’t yellow over time. Oil-based options offer superior durability. But they may darken the paint slightly. Consider your needs and choose accordingly. Matte finishes provide a modern look. Glossy finishes offer a sleek, polished appearance. Test a small area before applying to the entire cabinet.Application Tips For Durability
Proper application ensures the topcoat lasts long. Use a high-quality brush for even coverage. A foam roller can help achieve a smooth finish. Apply thin layers to avoid drips. Let each coat dry completely before adding another. Generally, two to three coats are ideal. Sand lightly between coats for a smooth surface. Ensure your workspace is dust-free. This prevents imperfections in the finish.Reassembling The Cabinets
Reassembling the cabinets involves meticulous care. After painting stained kitchen cabinets, ensure each piece is dry and cured. Securely attach doors and hardware, aligning them properly for a fresh, cohesive look.
Reassembling the cabinets after painting can be both rewarding and nerve-wracking. You’ve invested time and effort into transforming your kitchen, and now it’s time to bring everything back together. This step is crucial for ensuring your kitchen looks polished and functions smoothly. Let’s dive into the details to make sure you achieve a flawless finish.Reattaching Hardware
Before reattaching hardware, make sure each piece is clean and free from any paint residue. This ensures a snug fit and prevents unnecessary wear on your newly painted cabinets. If you labeled each piece during disassembly, this step will be a breeze. Consider replacing old or worn-out hardware to give your cabinets a fresh look. Sleek, modern handles or vintage knobs can dramatically change the vibe of your kitchen. What style speaks to you? Use a screwdriver to carefully reattach hinges, handles, and any other hardware. Avoid over-tightening screws to prevent damage to the cabinet doors.Reinstalling Doors
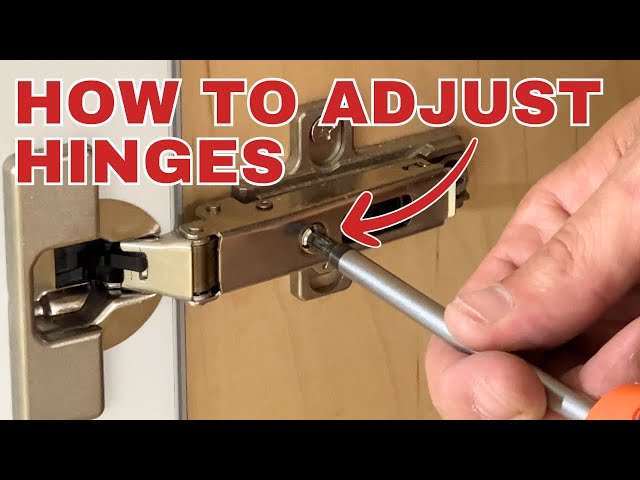
Aligning doors perfectly can be a bit tricky, but it’s worth the effort. Start by loosely attaching the hinges to the cabinet frame. This allows for minor adjustments and ensures a proper fit. Check the alignment by opening and closing the doors a few times. If they rub or don’t close properly, make small adjustments to the hinge screws. Patience is key here; a well-aligned door improves both the look and functionality of your cabinets. Once everything is aligned, tighten the screws to secure the doors in place. Stand back and admire your handiwork. Doesn’t your kitchen look stunning?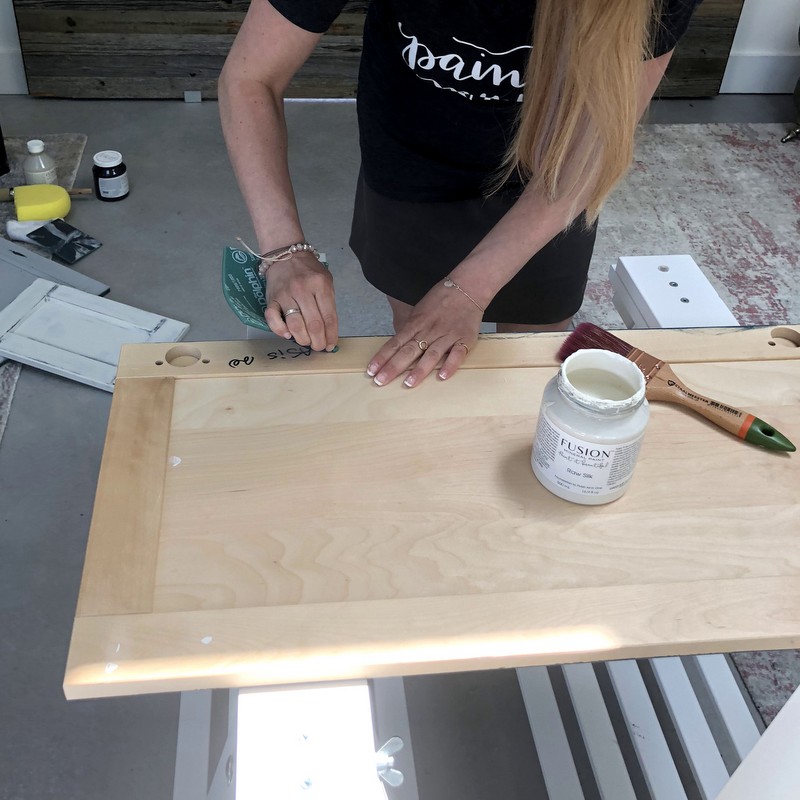
Credit: fusionmineralpaint.com
Maintenance Tips
Refreshing stained kitchen cabinets can be simple. Begin by cleaning and sanding the surface thoroughly. Apply a primer and two coats of paint for a lasting finish.
Maintaining painted kitchen cabinets requires regular attention. Proper care ensures they stay beautiful for years. Follow these simple tips to keep your cabinets looking fresh.Cleaning And Care
Regular cleaning prevents grime buildup. Use a soft cloth with mild soap. Avoid harsh chemicals; they can damage the paint. Wipe spills immediately to prevent stains. Dust the cabinets weekly using a dry microfiber cloth. This keeps them clean and shiny.Touch-up Strategies
Small chips can ruin the look of cabinets. Keep touch-up paint handy for quick fixes. Use a small brush to apply the paint. Blend it gently with the surrounding area. For deeper scratches, sand lightly before painting. This ensures a smooth finish.Frequently Asked Questions
Can You Paint Over Cabinets That Are Stained?
Yes, you can paint over stained cabinets. Clean and sand them first for better adhesion. Apply a primer before painting. Use quality paint for a smooth finish. Consider using a sealer to protect the paint. Proper preparation ensures long-lasting results.
Can I Paint Over Stained Cabinets Without Sanding?
Yes, you can paint over stained cabinets without sanding. Clean thoroughly, apply a primer, and then paint. Use high-quality paint for best results. Ensure proper ventilation during the process to avoid fumes.
What Is The Best Primer For Painting Over Stained Wood Cabinets?
The best primer for painting over stained wood cabinets is a shellac-based primer. It effectively blocks stains and seals surfaces, ensuring excellent paint adhesion. Brands like Zinsser B-I-N offer reliable options. Apply evenly for optimal results, creating a smooth surface for your paint.
Always follow the manufacturer’s instructions for best practices.
What Kind Of Kitchen Cabinets Cannot Be Painted?
Melamine, laminate, and thermofoil cabinets cannot be easily painted. Their surfaces resist paint adhesion. Solid wood or wood veneer cabinets are better for painting. Proper surface preparation is crucial for a successful paint job. Always test a small area before committing to painting non-wood cabinets.
Conclusion
Painting stained kitchen cabinets can refresh your space. It’s easier than it seems. Gather the right tools. Sand the surfaces well. Choose quality paint. Apply even coats. Let them dry completely. Your kitchen will look new. Plus, you’ll feel proud of the work.
Remember to clean up. Enjoy the fresh atmosphere. This project saves money. It boosts your home’s appeal. Start your cabinet transformation today. Share your success with friends. They’ll love your new kitchen vibe. Happy painting!