How to Put Contact Paper on Kitchen Countertops: Easy Guide
Is your kitchen countertop looking a bit tired and worn out? Maybe you’re dreaming of a fresh, stylish look but worried about the cost and hassle of a full renovation.
What if you could transform your kitchen space with just a roll of contact paper? Yes, you heard that right! Applying contact paper to your countertops is a simple, affordable, and non-permanent solution that can give your kitchen a whole new vibe.
Imagine the satisfaction of achieving a chic, modern look without breaking the bank or committing to a long-term change. In this guide, you’ll discover the step-by-step process to flawlessly apply contact paper, turning your kitchen into a space you’ll love to show off. Ready to dive in and unleash your inner DIY expert? Let’s get started!
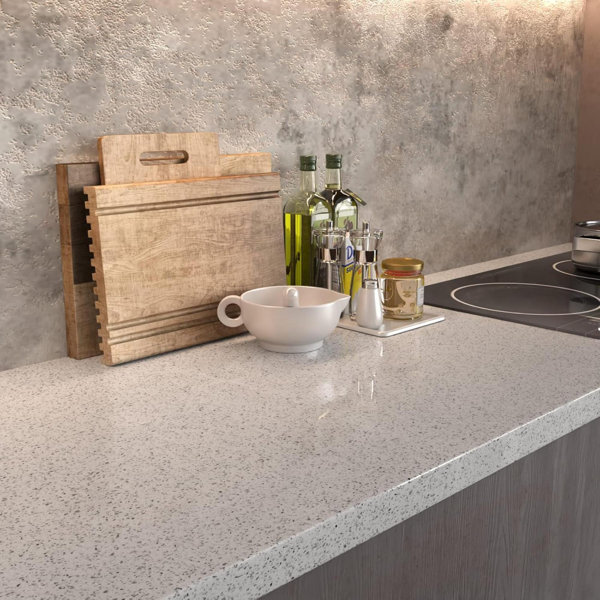
Credit: www.wayfair.com
Choosing The Right Contact Paper
Selecting the perfect contact paper for kitchen countertops is crucial. Choose durable, water-resistant designs that match your style. Ensure accurate measurements and smooth application for a seamless finish.
Choosing the right contact paper for your kitchen countertops can transform your space. The right choice can enhance the aesthetics and functionality. Consider factors like design, material, and durability before making a decision.
Types And Patterns
Contact paper comes in a variety of types and patterns. You can choose from marble, wood, or geometric designs. Marble patterns add elegance and sophistication. Wood designs bring warmth and a natural feel. Geometric patterns offer a modern touch. Assess your kitchen’s theme and select a pattern that complements it.
Material Considerations
The material of the contact paper is crucial. Vinyl is popular due to its water resistance and ease of cleaning. It’s also durable and affordable. Peel-and-stick options simplify installation. Consider textured materials for a unique look. Ensure the material is suitable for kitchen use.
Durability Factors
Durability is key for kitchen countertops. Choose contact paper that withstands heat and moisture. High-quality options resist scratches and stains. Opt for thicker paper for added protection. Check user reviews for insights on longevity. Durable contact paper ensures your countertops remain beautiful and functional.
Credit: www.tiktok.com
Preparing The Countertop
Clean the countertop thoroughly before applying contact paper. Remove all dirt, grease, and residue for a smooth surface.
Preparing the countertop is a crucial step before applying contact paper. Proper preparation ensures the paper adheres well and lasts longer. This process involves cleaning, repairing, and measuring. Each task is essential for a smooth and professional finish.
Cleaning The Surface
Start by removing all items from the countertop. Use a mild cleaner and cloth to wipe the surface. Ensure it’s free from grease and dirt. Dry it thoroughly to prevent moisture from affecting adhesion.
Repairing Imperfections
Inspect the countertop for any cracks or chips. These imperfections can affect the look and feel of the contact paper. Use filler or putty to repair them. Sand the area gently to create a smooth surface.
Measuring And Planning
Measure the countertop dimensions carefully. Accurate measurements help avoid wastage. Plan the layout of the contact paper. Consider where cuts and seams will be. Ensure all pieces align for a seamless appearance.
Cutting Contact Paper
Properly measuring and cutting contact paper ensures a seamless fit on kitchen countertops. Begin by cleaning the surface thoroughly. Carefully measure the countertop dimensions and cut the contact paper accordingly, ensuring precise edges for a smooth application.
Cutting contact paper is crucial for a perfect fit on countertops. Achieving neat edges and smooth lines enhances the kitchen’s look. Follow simple steps to ensure precision and style.
Measuring For Precision
Accurate measurements are essential before cutting. Use a tape measure to assess dimensions. Measure each section of the countertop carefully. Write down measurements to avoid mistakes. Allow extra length for adjustments.
Using Cutting Tools
Choose the right cutting tools for clean edges. A sharp utility knife or scissors works well. Ensure the blade is sharp for easy cutting. Use a straight edge to guide the knife. Cut slowly to maintain control and accuracy.
Handling Curves And Edges
Curves and edges require special attention. Trace the shape on paper before cutting. Use a flexible ruler to match the curve. Cut small sections to fit around edges. Smooth out any rough cuts with gentle sanding.
Applying Contact Paper
Transform kitchen countertops with contact paper for a fresh look. Clean the surface thoroughly. Measure and cut the paper to size. Carefully apply, smoothing out bubbles with a cloth. Trim edges for a neat finish. Enjoy your stylish new kitchen space.
Applying contact paper to your kitchen countertops can instantly transform the space without a hefty price tag. It’s a simple DIY project that requires a bit of patience and precision. Done right, this budget-friendly solution can mimic the look of high-end materials like marble or granite. Ready to roll up your sleeves and get started?
Starting The Application
Before applying the contact paper, ensure your countertop is clean and dry. Any dirt or grease can prevent the adhesive from sticking properly. Start by peeling back a small section of the backing paper and align the contact paper with the edge of your countertop. As you press it down, gradually peel more of the backing. This helps avoid misalignment and ensures a smooth start.
Smoothing Out Bubbles
Air bubbles are the nemesis of a smooth finish. Use a squeegee or a credit card to press the paper down as you go, working from the center outwards. If you spot any stubborn bubbles, gently lift the paper and reapply. Sometimes, a small pinprick can help release trapped air, but use this trick sparingly.
Aligning Patterns
If your contact paper has a pattern, alignment is crucial for a seamless look. Match the patterns at the edges before sticking the paper down fully. Take your time with this step, as misaligned patterns can be quite noticeable. Consider cutting slightly larger pieces and trimming the excess for a perfect fit. How do you feel about your new countertop look? A little effort can make a big change, and now your kitchen has a fresh, modern touch.
Finishing Touches
Applying contact paper to kitchen countertops adds style and protection. Clean and dry the surface thoroughly. Carefully align and smooth out the paper to avoid air bubbles for a seamless finish.
Finishing touches are crucial for a polished countertop. These steps ensure a long-lasting finish. Proper care enhances durability and appearance.
Trimming Excess Paper
Use a sharp utility knife for clean cuts. Trim carefully along the edges. Maintain a steady hand for precision. Avoid cutting too deep to prevent damage. A straight edge helps guide your cuts. Remove any small remaining bits with care.
Sealing Edges
Seal edges to prevent peeling. Use a clear silicone sealant. Apply a thin, even line along the seams. A caulking gun can make this easier. Smooth the sealant with a damp finger. Wipe away any excess with a cloth.
Caring For Your New Surface
Clean the surface regularly with a mild cleaner. Avoid abrasive scrubbing pads. Use a soft cloth for wiping. Protect the paper from hot items. Use trivets or mats under hot pans. Address spills promptly to prevent stains. Keep sharp objects away to avoid cuts. Regular maintenance keeps your countertop looking fresh.
Credit: www.tiktok.com
Troubleshooting Common Issues
Peeling edges and trapped air bubbles are common issues when applying contact paper on kitchen countertops. To fix, use a credit card to smooth bubbles and apply heat with a hairdryer to secure edges. Clean surfaces thoroughly before application to ensure better adhesion.
Putting contact paper on kitchen countertops can instantly transform your space, but it’s not always smooth sailing. You might encounter a few bumps along the way, quite literally! Whether it’s stubborn wrinkles, pesky misalignment, or the dreaded peeling, these common issues can be frustrating. But don’t worry; with a bit of patience and some handy tips, you can tackle these challenges head-on. Let’s dive into troubleshooting these common hiccups so your countertops can look just as sleek and polished as you envisioned.
Dealing With Wrinkles
Wrinkles can be a real headache when applying contact paper. The key is to start from one end and smooth the paper with a squeegee or credit card as you go. If you find a wrinkle forming, gently lift the paper back up and reapply it while smoothing out the area. Sometimes a hairdryer can be your best friend. Applying gentle heat can soften the paper, making it easier to stretch and smooth out. Have you tried this trick yet?
Fixing Misalignment
Misalignment is another common issue that can occur during application. Precision is crucial here. Begin by aligning the paper with a straight edge, like the side of the countertop. If you notice misalignment halfway through, don’t panic. Carefully peel back the paper to the misaligned section and slowly reapply, using a ruler to guide you. This way, you avoid starting over completely.
Preventing Peeling
Peeling can take away from the clean look you’re aiming for. To prevent this, ensure the surface is completely dry and free from dust before application. A good tip is to use rubbing alcohol to clean the surface thoroughly. After applying the paper, go over the edges and corners with extra pressure. You might even consider using a bit of transparent tape on the edges for added security. How do you maintain your contact paper’s pristine look over time?
Frequently Asked Questions
Can You Put Contact Paper On Countertops?
Yes, you can put contact paper on countertops. It offers an affordable and temporary solution. Ensure the surface is clean and dry before application. Contact paper is available in various designs, making it easy to update your kitchen’s look. Choose high-quality, water-resistant paper for durability.
Can I Use Peel And Stick Wallpaper On Kitchen Countertops?
Peel and stick wallpaper is not ideal for kitchen countertops. It lacks durability and may not withstand heat or moisture. Consider using materials specifically designed for countertops to ensure longevity and safety. Always prioritize using heat-resistant, water-resistant materials for kitchen surfaces.
What Can I Use To Seal Contact Paper On Countertops?
Use a clear acrylic sealant or polyurethane to seal contact paper on countertops. Apply it evenly for protection. Ensure the surface is clean and dry before sealing. This helps prevent water damage and extends the contact paper’s life. Always follow the product instructions for best results.
How To Apply Contact Paper Perfectly?
Clean the surface thoroughly. Measure and cut the contact paper accurately. Peel the backing slowly while applying. Smooth out bubbles using a squeegee or credit card. Trim excess edges with a sharp blade for a neat finish.
Conclusion
Transforming your kitchen can be simple with contact paper. It’s a budget-friendly way to refresh countertops. The process is straightforward and easy to follow. Clean the surface well before starting. Measure carefully for a precise fit. Apply the paper slowly to avoid bubbles.
Smooth it out with a tool like a credit card. Trim the edges neatly for a polished look. Enjoy the new appearance of your kitchen space. Contact paper offers a quick makeover without breaking the bank. Perfect for renters or anyone seeking a fresh style.
Try it and see the difference!