How to Remove a Kitchen Sink Faucet: DIY Made Simple
Executive Chef & Lead Commercial Kitchen Specialist at Daily Kitchup Test Lab
Feeling frustrated with your old kitchen sink faucet? Perhaps it’s leaking, or maybe it just doesn’t match your kitchen’s new aesthetic.
Whatever the reason, you’ve decided it’s time for a change. But where do you start? Removing a kitchen sink faucet might sound like a daunting task, especially if you’re not a seasoned DIY enthusiast. However, with a little guidance, you can tackle this project with confidence and ease.
Imagine the satisfaction of transforming your kitchen space yourself and the sense of achievement you’ll feel. Plus, think of the money you’ll save by not hiring a professional. We’ll guide you step-by-step through the process of removing your kitchen sink faucet. By the end, you’ll have the knowledge and skills to take on this task and make your kitchen just the way you want it. Ready to dive in? Let’s get started!
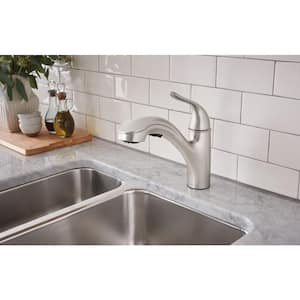
Credit: www.homedepot.com
Tools And Materials Needed
Gather essential tools like an adjustable wrench, basin wrench, and pliers. Prepare materials such as a bucket, towels, and plumber’s tape. Ensure all supplies are within reach to streamline the faucet removal process.
Removing a kitchen sink faucet might seem like an intimidating task, but with the right tools and materials, it can become a simple weekend project. Before you dive into the process, gathering everything you need is essential. This preparation ensures a smooth operation and saves you from the mid-task frustration of missing a crucial tool. Let’s look at the tools and materials you’ll need for a successful faucet removal.Tools Needed
The right tools make all the difference in DIY projects. Here’s what you’ll need to tackle that faucet:- Adjustable Wrench:An adjustable wrench is versatile and can fit different nut sizes.
- Basin Wrench:Perfect for reaching the hard-to-access nuts underneath the sink.
- Screwdriver:Both Phillips and flat-head screwdrivers are handy for handling screws.
- Bucket:Use a bucket to catch any water that may spill during the process.
- Plumber’s Tape:This helps ensure a tight seal for reinstallation.
- Towels or Rags:These are useful for wiping up spills and providing grip.
Materials Required
Not just tools, but the right materials are necessary for a smooth faucet removal. Here’s what you might need:- Replacement Faucet:If you are swapping out the old faucet, have the new one ready.
- Cleaning Supplies:Prepare a cleaning solution or vinegar to clean any buildup or grime.
- Sealant:A waterproof sealant can be beneficial to prevent leaks after installation.
Safety Gear
Safety should be a priority in any home project. Here’s how to protect yourself:- Gloves:Wearing gloves can protect your hands from sharp edges and chemicals.
- Safety Glasses:These protect your eyes from debris or accidental splashes.
Preparing Your Workspace
A clutter-free workspace makes the task more manageable. Clear out the area under the sink, ensuring you have ample space to maneuver. Lay down a towel or mat to catch any falling debris or water. Have you ever been halfway through a project and realized you’re missing a key tool? Preparing ahead can save you from such frustrations. With everything at hand, you’ll find the process of removing a kitchen sink faucet much easier and more efficient.Preparation Steps
Removing a kitchen sink faucet can seem daunting, but breaking it down into manageable preparation steps makes the process smoother. Starting with the right preparation ensures you don’t end up knee-deep in water or scrambling for tools. Let’s dive into the essential preparation steps that will pave the way for an easy faucet removal.
Shutting Off Water Supply
Start by shutting off the water supply to avoid any unexpected sprays or leaks. Locate the water shut-off valves under your sink. They are typically easy to spot, often found attached to the pipes. Turn them clockwise to stop the water flow.
Can’t find the valves? Check the main water supply in your home. It’s crucial to ensure both hot and cold water supplies are off. Test your efforts by turning on the faucet; if no water comes out, you’re good to go!
Clearing The Sink Area
Next, clear the sink area to give yourself ample workspace. Remove any cleaning supplies, towels, or dishes from beneath and around the sink. You want a clutter-free environment to maneuver comfortably.
Consider placing a towel or container under the pipes to catch any residual water. This simple step can save you from a messy cleanup later. Having a clear area makes it easier to locate tools and parts, ensuring you stay organized and focused.
Removing The Old Faucet
Removing an old kitchen sink faucet requires detaching the water lines and loosening the mounting nuts. Use a basin wrench to reach tight spots under the sink, ensuring a smooth removal process.
Removing the old faucet can seem like a tough task. With the right steps, it becomes manageable. This process involves disconnecting water lines, loosening mounting nuts, and lifting out the faucet. Each step is crucial for a smooth removal.Disconnecting Water Lines
Start by turning off the water supply. Use the valves under the sink. Turn them clockwise to close. Next, disconnect the water lines. Use a wrench to loosen the nuts. Place a bucket underneath to catch any water. This prevents spills and keeps your workspace clean.Loosening Mounting Nuts
Look for the mounting nuts under the sink. They hold the faucet in place. Use a basin wrench to reach and loosen them. This tool is perfect for tight spots. If the nuts are stuck, apply some penetrating oil. Wait a few minutes, then try again.Lifting Out The Faucet
Once the nuts are loose, it’s time to lift the faucet. Hold the faucet firmly and pull upwards. If it resists, check for any remaining connections. Carefully remove them. Lift the faucet out and set it aside. Your sink is now ready for a new faucet installation.Cleaning The Sink Surface
Removing a kitchen sink faucet requires basic tools. Turn off the water supply and drain the pipes. Unscrew the nuts under the sink to release the faucet. Gently clean the sink surface to remove any debris or mineral deposits. Ensure a clean area for installing a new faucet.
Cleaning the sink surface is crucial when removing a kitchen faucet. A clean area ensures a smooth removal process and prevents damage. It also makes the installation of a new faucet easier. Before you start, gather your cleaning supplies. You will need a mild detergent, a scrub brush, and a soft cloth. Now, let’s dive into the specifics of cleaning the sink surface.Removing Residue And Debris
Begin by clearing the area around the sink. Remove any items that might obstruct your cleaning. Wet the surface with warm water. Apply a mild detergent to a scrub brush. Gently scrub the sink surface to remove residue. Focus on the edges around the faucet. Rinse the area with clean water. Dry it with a soft cloth to prevent water spots.Inspecting For Damage
Look closely at the sink surface. Check for any signs of damage or wear. Cracks or chips can affect the faucet removal process. Look for corrosion or rust around the base. These can indicate problems with the faucet. If you find damage, consider repairs before installing a new faucet. This ensures a secure fit and prevents leaks.Installing The New Faucet
Removing a kitchen sink faucet involves turning off the water supply and disconnecting the water lines. Next, use a basin wrench to loosen the nuts securing the faucet underneath the sink. Carefully lift the old faucet out, ensuring all parts are detached.
Installing a new kitchen sink faucet can be an exciting task that transforms the look and functionality of your space. Whether you’re upgrading to a modern design or simply replacing a faulty fixture, the process is straightforward and satisfying. With a few tools and some patience, you’ll have your new faucet up and running in no time. Ready to dive in?Positioning The New Faucet
Before you begin, ensure that your new faucet is compatible with your sink’s configuration. Most sinks come with one to three pre-drilled holes, so make sure your faucet matches. Gently insert the faucet’s base into the sink’s hole, ensuring that any washers or gaskets are in place. These components help prevent leaks and provide stability. Take a step back and check the alignment. Is it straight? A crooked faucet can be a daily annoyance, so make adjustments as needed.Securing With Mounting Nuts
Once the faucet is in position, it’s time to secure it. Use the mounting nuts that came with your faucet to firmly attach it to the sink. Typically, you’ll need to tighten these nuts from underneath the sink. A basin wrench can be particularly helpful in reaching tight spaces. Ensure the faucet is stable and doesn’t wobble. If it does, you might need to tighten the nuts a bit more.Reconnecting Water Lines
Now, reconnect the water supply lines. Make sure each line is connected to the correct valve—hot water on the left, cold on the right. Tighten the connections with an adjustable wrench, but be careful not to overtighten and damage the threads. Turn on the water valves slowly and check for leaks. If everything is dry, you’ve done it right! What will you test out first with your new faucet?
Credit: www.magnushomeproducts.com
Testing For Leaks
After you’ve successfully installed your new kitchen sink faucet, the next crucial step is testing for leaks. This ensures that your plumbing is watertight and that all your hard work is worth it. You don’t want to go through the hassle of fixing leaks after you’ve put everything back together. So, how do you know if everything is functioning correctly? Let’s dive into the process of testing for leaks with two essential tasks: turning on the water supply and checking for drips.
Turning On The Water Supply
Begin by cautiously turning on the water supply. You might feel a bit anxious, but take a deep breath and turn those valves with confidence. Start with a slow flow to minimize pressure on the new fittings. This ensures that if there is a leak, it won’t be catastrophic.
Listen carefully for any unusual sounds like hissing or gurgling, which could be a sign of trouble. If you hear something odd, don’t ignore it—investigate further. Sometimes a simple adjustment can prevent future headaches.
Checking For Drips
Once the water is flowing, it’s time to check for drips. Use a flashlight to inspect areas that are hard to see. Look under the sink, around the base, and even check the connections you tightened. It’s like a treasure hunt, but instead of gold, you’re searching for drops of water.
Place a dry paper towel around the faucet base and connections. This is your leak detector. If it gets wet, you know exactly where the problem is. Catching these leaks early can save you from water damage and unnecessary repairs.
Tips For Maintenance
Loosen the nuts under the sink using a wrench. Detach the water supply lines carefully to avoid spills. Remove the mounting hardware and gently lift the faucet from the sink.
Keeping your kitchen sink faucet in top shape requires regular maintenance. Simple practices can extend the life of your faucet. This not only saves money but also enhances kitchen hygiene.Regular Cleaning
Clean your faucet weekly to prevent grime buildup. Use a mild soap and soft cloth for wiping. Avoid harsh chemicals that can damage the finish. Pay attention to hidden spots like handles and joints. Rinse thoroughly to remove soap residue. Dry with a clean towel to prevent water spots.Checking For Wear And Tear
Inspect your faucet monthly for signs of wear. Look for leaks around the base and handles. Check for any rust or corrosion on metal parts. Tighten loose screws to prevent further damage. Replace worn-out washers to stop leaks. Regular checks can catch issues early, saving on costly repairs.
Credit: www.reddit.com
Frequently Asked Questions
How To Detach A Faucet From A Kitchen Sink?
Turn off the water supply. Remove the supply lines using a wrench. Unscrew mounting nuts under the sink. Lift the faucet carefully. Clean the area before installing a new faucet.
How To Loosen A Kitchen Faucet Nut?
Use a basin wrench to reach the nut under the sink. Turn counterclockwise to loosen it. Apply penetrating oil if the nut is stuck. Ensure the wrench fits snugly for better grip. Regularly check progress to avoid damaging the faucet or pipes.
How To Remove A Kitchen Faucet Handle With No Visible Screws?
To remove a kitchen faucet handle with no visible screws, locate and remove the decorative cap. Use an Allen wrench or screwdriver to loosen the set screw underneath. Gently pull the handle off. If stuck, apply penetrating oil and retry.
Always turn off water supply before starting.
Is It Easy To Change Out A Kitchen Sink Faucet?
Changing a kitchen sink faucet is generally easy for those with basic DIY skills. Ensure you have the right tools and follow instructions. Turn off the water supply before starting. If unsure, consult a professional to avoid potential issues.
Conclusion
Removing a kitchen sink faucet can seem daunting. But with patience, it’s manageable. Follow the steps carefully. Gather all necessary tools first. Ensure the water supply is off. This prevents unwanted spills. Loosen nuts and remove the old faucet. Clean the area thoroughly.
A clean surface helps the new faucet fit well. Now, install the new faucet. Follow the manufacturer’s instructions closely. Double-check all connections. Turn on the water supply. Test for leaks. Tighten any loose connections. With practice, this task becomes easier.
Soon, you’ll have a functioning faucet. Enjoy your refreshed kitchen space!

Similar Posts





















