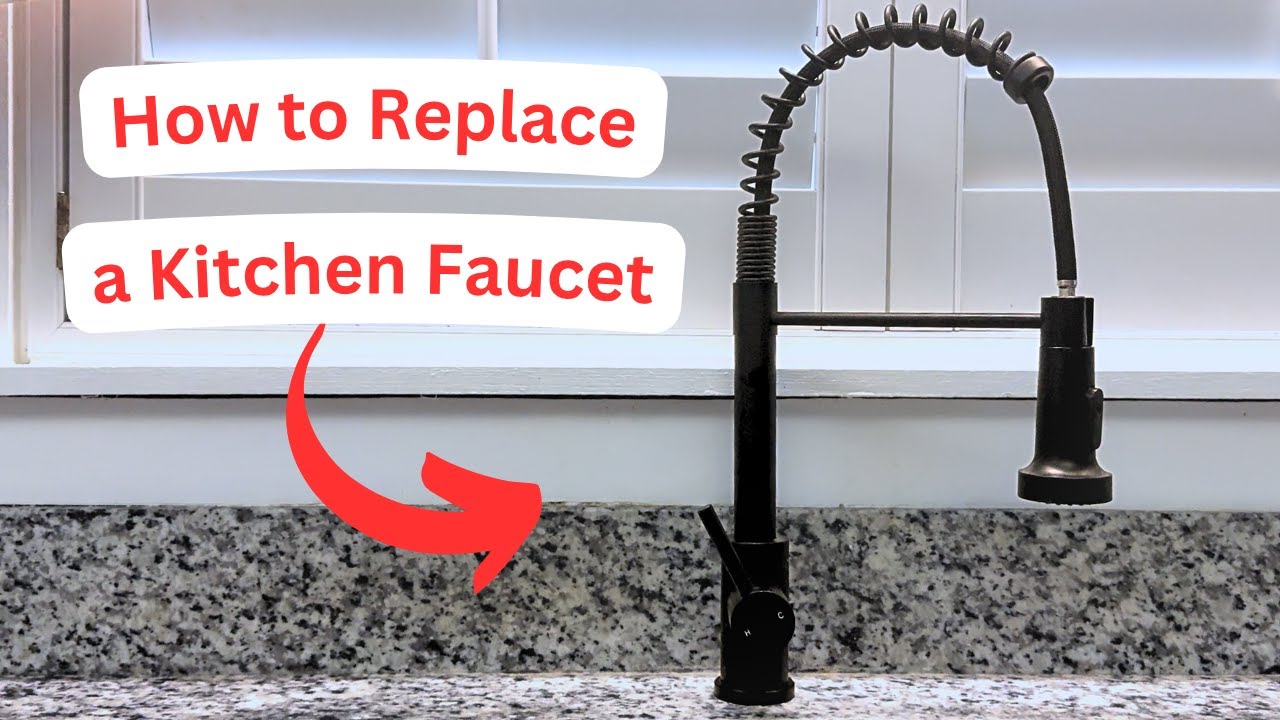
How to Replace a Kitchen Sink Faucet: Step-by-Step Guide
Are you tired of that annoying drip from your kitchen sink faucet, or maybe you’re just ready for a stylish upgrade? Replacing a kitchen sink faucet might seem like a daunting task, but it doesn’t have to be!
Imagine the satisfaction of transforming your kitchen space with just a few simple steps. In this guide, we’ll walk you through the entire process of how to replace a kitchen sink faucet, so you can tackle this project with confidence.
You’ll discover tips and tricks that make the job easier, save you time, and even some money. Ready to dive in and give your kitchen the fresh look it deserves? Let’s get started!
Tools And Materials Needed
Gather a wrench, basin wrench, and plumber’s tape for the faucet replacement. You’ll also need a bucket, towels, and the new faucet. Ensure all tools are within reach to make the process smooth and efficient.
Replacing a kitchen sink faucet can be a satisfying DIY project that saves you from the hassle of calling a plumber. However, diving into this task requires a bit of preparation. Before you roll up your sleeves, ensure you have all the necessary tools and materials at your disposal. The right tools not only make the job easier but also prevent unnecessary frustration. Let’s dive into what you’ll need.Tools You Will Need
A successful faucet replacement starts with gathering the right tools. Having these items ready will streamline the process:- Adjustable Wrench:Essential for loosening and tightening nuts and bolts.
- Basin Wrench:Specifically designed to reach the tight spaces under the sink.
- Screwdriver:A Phillips or flat-head screwdriver may be needed, depending on your faucet.
- Bucket or Bowl:To catch any water that might spill during the process.
- Pliers:Useful for gripping and twisting.
- Towel or Rag:To wipe away any spills or leaks.
Materials Required
Alongside tools, certain materials are crucial for a smooth installation. Make sure these are on your checklist:- New Faucet:Choose one that matches your sink and personal style.
- Plumber’s Tape:Helps ensure a tight seal and prevents leaks.
- Replacement Supply Lines:Sometimes it’s best to replace old lines with new ones for reliability.
- Sealant or Putty:To secure the faucet and prevent water seepage.
Safety Equipment
Safety should never be an afterthought. Protect yourself with the following:- Safety Glasses:Shield your eyes from debris and water splashes.
- Gloves:Protect your hands from rough edges and give you a better grip.
Choosing The Right Faucet
Choosing the right faucet can simplify the process of replacing a kitchen sink faucet. Consider style, functionality, and compatibility. Ensure the new faucet matches your sink’s configuration for easy installation.
Choosing the right faucet for your kitchen sink is crucial. The faucet you pick should meet your needs and match your kitchen’s style. Consider durability, functionality, and design. This guide will help you make an informed choice.Style And Design
The faucet should complement your kitchen’s overall look. A modern kitchen pairs well with sleek, metallic faucets. Traditional designs may prefer classic or vintage faucets. Choose a finish that matches your cabinet hardware.Material And Durability
Materials like stainless steel and brass offer durability. They resist rust and corrosion. Plastic faucets are less durable but cheaper. Balance cost and longevity when selecting the material.Functionality And Features
Consider the faucet’s functionality. Do you need a pull-down sprayer? Touchless models provide convenience and hygiene. Think about water flow and control features. Choose features that suit your cooking and cleaning habits.Installation And Compatibility
Check if the faucet is compatible with your sink. Count the number of mounting holes. Ensure the faucet fits your current plumbing system. Some faucets require professional installation. Others are DIY-friendly.Preparation Steps
Begin by turning off the water supply under the sink. Next, gather necessary tools like a wrench and pliers. Disconnect the old faucet by unscrewing nuts and bolts carefully.
Replacing a kitchen sink faucet requires careful preparation. Proper steps ensure a smooth process. Start by organizing your workspace and gathering tools. These actions prevent interruptions and reduce stress during installation.Shutting Off Water Supply
Locate the water valves under the sink. Turn them clockwise to shut off. Check the faucet to ensure water is completely off. This prevents leaks and water damage during replacement.Clearing The Work Area
Remove items around the sink. Clear away cleaning supplies and personal items. This creates space and minimizes clutter. A clean area improves focus and efficiency.Gathering Necessary Equipment
Collect essential tools before starting. You will need a wrench, screwdriver, and plumber’s tape. Ensure you have the new faucet and any additional parts. Check instructions for specific requirements. Proper tools make the job easier and faster.Removing The Old Faucet
Removing the Old Faucet Turn off the water supply under the sink. Use a wrench to loosen nuts holding the faucet in place. Carefully lift the old faucet out, ensuring all parts are detached.
Removing the old faucet is the first step in your kitchen upgrade. This task may seem challenging, but it becomes simple with the right guide. Follow these steps carefully to ensure a smooth transition to your new faucet.Disconnecting Water Lines
Start by turning off the water supply. Find the shutoff valves under the sink. Turn them clockwise to stop the water flow. Use a wrench to disconnect the water lines from the faucet. Place a bucket under the sink to catch any remaining water. Check for any leaks after disconnecting.Loosening Mounting Nuts
Look under the sink to find the mounting nuts. These secure the faucet to the sink. Use a basin wrench to loosen the nuts. If they are tight, apply some penetrating oil. This will help in loosening stubborn nuts. Remember to support the faucet from above to prevent damage.Lifting Out The Old Faucet
Once the nuts are loose, you can lift the faucet. Gently pull it from the top of the sink. If it sticks, wiggle it slightly to loosen it. Be careful not to damage the sink surface. Clean the sink area after removing the faucet. This ensures a clean surface for the new faucet installation.Installing The New Faucet
Replacing a kitchen sink faucet involves turning off the water supply and removing the old faucet. Carefully secure the new faucet in place, ensuring all connections are tight. Test for leaks by turning the water back on.
Installing a new kitchen sink faucet can refresh the look of your space. It’s a straightforward task that requires some basic tools and patience. Once you’ve removed the old faucet, it’s time to install the new one. This process involves positioning the new faucet, securing it with mounting hardware, and connecting the water supply lines. Let’s break it down step by step for clarity and ease.Positioning The New Faucet
Begin by placing the faucet through the mounting holes in the sink. Ensure the faucet is aligned correctly and sits flat against the sink surface. Check if the spout is centered and facing the correct direction. This step is crucial for the faucet to function properly.Securing With Mounting Hardware
Use the included mounting hardware to secure the faucet to the sink. Typically, this involves tightening nuts or screws underneath the sink. Make sure the faucet is stable and doesn’t wobble. Tighten evenly to prevent any leaks or movement. If needed, use a wrench for extra grip.Connecting Water Supply Lines
Connect the water supply lines to the faucet’s inlet tubes. Attach the hot and cold lines correctly. Tighten connections with a wrench, ensuring they are secure. Turn on the water supply and check for leaks. Adjust as necessary until everything is sealed properly.
Credit: directplumber.sg
Testing For Leaks
Testing for leaks ensures a secure faucet installation. Turn on the water and check for any drips. Tighten connections if needed to prevent future issues.
Replacing a kitchen sink faucet can transform your kitchen space. Yet, it’s crucial to test for leaks after installation. Identifying leaks early prevents water damage. Follow these steps to ensure a leak-free faucet.Turning On The Water Supply
Start by turning on the water supply. Open both the hot and cold water valves. This will fill the pipes with water. Ensure the faucet is in the off position. This prevents sudden water flow.Inspecting For Drips And Leaks
Check all connections for drips. Look under the sink and around the faucet base. Use a flashlight for better visibility. A dry tissue can help detect moisture. Place it around joints and watch for damp spots. Feel the pipes with your hand. This can reveal hidden leaks. Pay attention to unusual noises. A hissing sound might indicate a leak. Tighten connections if you find any issues. Repeat the process until all leaks are fixed. Ensure everything is dry before concluding the test. This verifies your faucet replacement is successful.Finishing Touches
Finishing touches ensure the faucet is secure and aligned. Tighten all connections and check for leaks. Clean the area around the sink for a polished look.
Once you’ve successfully installed your new kitchen sink faucet, it’s time to focus on the finishing touches. These last steps are crucial to ensure your installation looks pristine and functions perfectly. Pay attention to the details, as they can make a significant difference in the overall outcome.Cleaning The Work Area
Begin by tidying up your workspace. Remove any leftover tools, packaging materials, and debris. A clean area not only looks better but also prevents potential mishaps like falling over stray objects. Wipe down the sink and surrounding countertop. Use a mild cleaner to remove any fingerprints, smudges, or watermarks. It’s surprising how a simple wipe can elevate the appearance of your newly installed faucet. Consider taking a step back and examining your work from different angles. Does anything look out of place? This is your chance to make adjustments before calling it a day.Checking Faucet Operation
Now that the area is clean, it’s time to test the faucet. Turn it on and off, checking for any leaks or irregular water flow. This step is essential to ensure everything is connected securely. Test the faucet’s range of motion. Does the spout swivel smoothly? If there’s any stiffness, it might be worth revisiting your installation steps to ensure nothing is too tight. Finally, consider the overall user experience. Ask yourself, “Is this easy to use?” A faucet that operates effortlessly can make daily kitchen tasks much more enjoyable.
Credit: www.youtube.com

Credit: www.youtube.com
Frequently Asked Questions
Can I Replace A Kitchen Sink Faucet Myself?
Yes, you can replace a kitchen sink faucet yourself. Ensure you have the right tools and follow instructions carefully. Turn off the water supply before starting. Check the manufacturer’s guide for specific steps. This DIY task can save money and improve your home improvement skills.
Do All Kitchen Sink Faucets Fit The Same?
Not all kitchen sink faucets fit the same. Faucet sizes and installation types vary. Measure your sink’s holes before purchasing. Check compatibility with your plumbing setup. Choose the correct faucet size and type for easy installation.
Can You Change The Faucet On A Sink Without A Plumber?
Yes, you can change a faucet without a plumber. Ensure you have the right tools and instructions. Follow safety guidelines to avoid leaks or damage. Many online tutorials offer step-by-step guidance. Always turn off the water supply before starting.
Do I Need To Shut Off Water To Replace A Kitchen Faucet?
Yes, you need to shut off the water. Turn off the valves under the sink before replacing your kitchen faucet. This prevents leaks and ensures safety during installation.
Conclusion
Replacing a kitchen sink faucet is simpler than it seems. Follow the steps carefully. Gather your tools and materials beforehand. Turn off the water supply. Remove the old faucet with care. Install the new one securely. Check for leaks after installation.
Regularly inspect for wear and tear. Enjoy your improved kitchen setup. A fresh faucet can enhance your space. Tackle this DIY project with confidence. Save money by doing it yourself. Your kitchen will look refreshed. Share your experience with friends.
They might want to try it too. Happy renovating!