How to Tile a Kitchen Floor: Step-by-Step Guide
Are you ready to transform your kitchen floor into a stunning masterpiece? Tiling a kitchen floor might seem like a daunting task, but with the right guidance, you can achieve a professional look without breaking the bank.
Imagine walking into your kitchen and feeling that sense of pride and accomplishment. By learning how to tile a kitchen floor yourself, you not only save money but also add a personal touch to your home. In this guide, you’ll discover step-by-step instructions and expert tips that will make the process simple and enjoyable.
Let’s dive in and turn your kitchen floor dreams into reality!
Preparation And Planning
Gather essential tools and materials for tiling a kitchen floor. Measure the area accurately to estimate tile quantity. Plan the layout and mark guidelines for a precise installation.
Preparing and planning are the first crucial steps in tiling a kitchen floor. This stage sets the foundation for a successful and smooth installation process. By focusing on key elements, one can avoid common pitfalls and ensure the project runs seamlessly.Choosing The Right Tiles
Consider the kitchen’s theme and style. Select tiles that complement the overall design. Durability is key; opt for tiles that withstand heavy foot traffic. Porcelain and ceramic are popular choices. They offer a balance between style and strength. Check the tile’s slip resistance rating for safety. Choose a finish that suits your cleaning preferences. Glossy tiles are easy to clean but show dirt quickly. Matte finishes may hide dirt but require more maintenance.Gathering Necessary Tools
Having the right tools makes the job easier. Essentials include a tile cutter and spacers. Get a notched trowel for spreading adhesive evenly. A level ensures tiles are laid flat. Safety gear like gloves and goggles protect during cutting. A rubber mallet helps position tiles without damage. Purchase grout and adhesive designed for the specific tiles. Keep a bucket and sponge handy for cleaning excess grout.Measuring The Floor Space
Accurate measurements prevent tile shortages. Measure the length and width of the kitchen floor. Multiply these figures to find the total area. Account for any odd-shaped areas separately. Include a 10% overage for breakage and mistakes. Sketch a layout plan to visualize tile placement. This helps in estimating the number of tiles needed. Double-check measurements before purchasing tiles.Surface Preparation
Surface preparation is crucial for tiling a kitchen floor. Clean and level the surface to ensure tiles adhere properly. Remove debris and old flooring materials before applying new tiles.
Preparing your kitchen floor for tiling is a crucial step that can make or break your project. A well-prepared surface ensures that your tiles adhere properly and last for years without issues. Let’s dive into how you can set the stage for a beautiful kitchen floor transformation.Cleaning The Floor
Start by removing any furniture and appliances from the kitchen. Sweep the floor thoroughly to get rid of dust and debris. Use a mop with a mild detergent to scrub away any grease or stains that could interfere with tile adhesion. Once cleaned, let the floor dry completely. Moisture can be a silent enemy, causing tiles to lift or grout to crack. A dry surface is essential for a strong bond.Repairing Damaged Areas
Inspect the floor for any cracks, holes, or uneven areas. Small imperfections can lead to big problems if not addressed. Use a patching compound to fill in cracks or holes, ensuring a smooth surface. If you’re dealing with larger damage, consider replacing the affected sections. It’s better to spend extra time now than face issues later. Remember, a sturdy foundation is vital for your tile’s longevity.Leveling The Surface
A level floor is critical for even tile placement. Use a long level or a laser level to check for any dips or high spots. If you notice unevenness, self-leveling compound can be a lifesaver. Mix the compound according to the manufacturer’s instructions and pour it over the low areas. Spread it evenly with a trowel, ensuring a flat, level surface. Allow it to set as per the instructions, usually overnight. By giving attention to these surface preparation steps, you’re setting yourself up for a successful tiling project. Have you ever skipped a preparation step and faced consequences? Share your experiences in the comments!Layout And Design
Planning the layout and design for a kitchen floor is crucial. It sets the foundation for how the tiles will look and fit. Proper preparation ensures a professional finish. This involves arranging tiles to suit the space and design. A well-thought-out layout makes installation smoother. Design patterns add character and style. Let’s explore how to create a stunning tile layout.
Creating A Tile Layout
Start by measuring the kitchen floor dimensions. Use these measurements to calculate the number of tiles needed. Sketch a grid on paper representing the floor. This visual guide helps plan the tile arrangement. Consider the direction and flow of the tiles. Will they be diagonal or straight? Ensure the layout matches your kitchen’s overall aesthetic.
Dry Fitting The Tiles
Lay tiles without adhesive for a dry fit. This step reveals potential alignment issues. Begin from the center and work outward. This technique helps balance the design. Adjust tiles to minimize cuts at edges. Dry fitting saves time and prevents mistakes. It allows for adjustments before the final installation.
Adjusting For Design Patterns
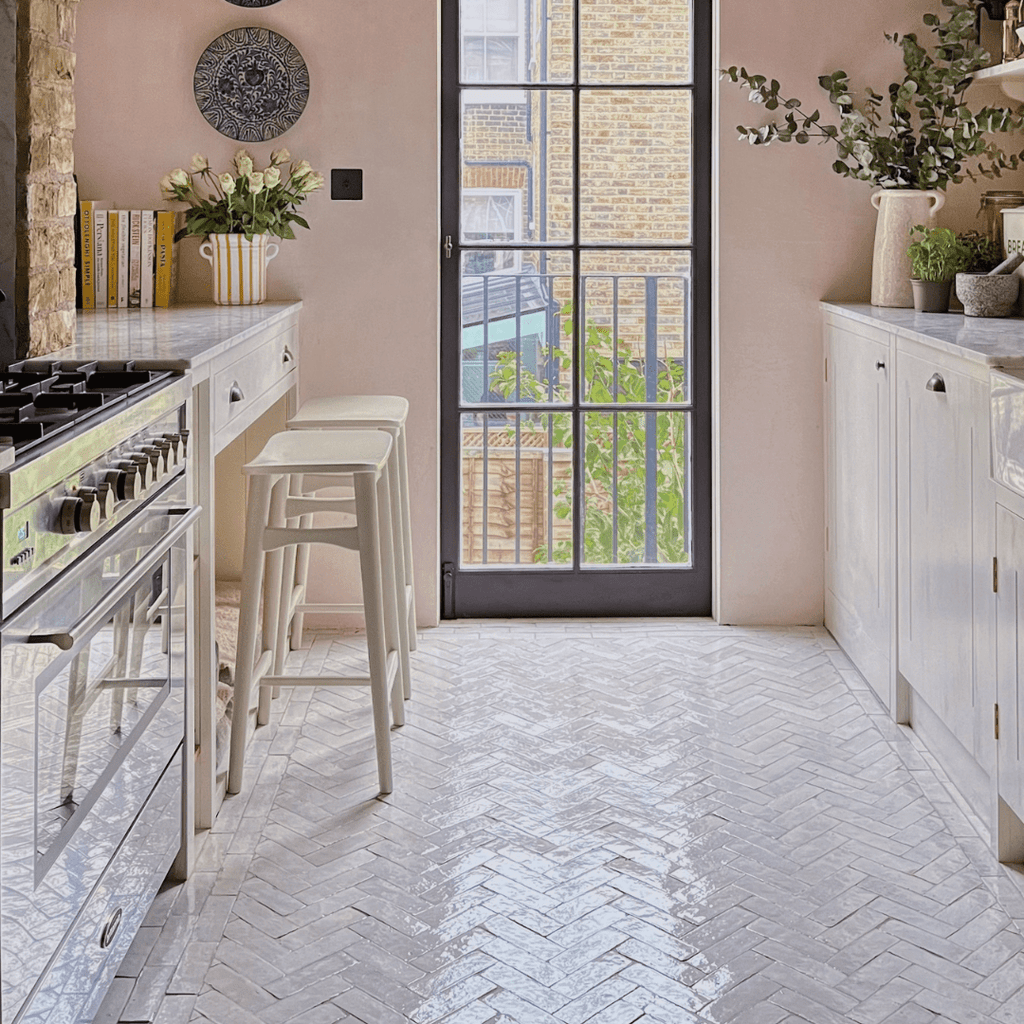
Design patterns add flair to your floor. Decide on a pattern that complements your kitchen. Options include checkerboard or herringbone. Consider how the pattern interacts with the space. Adjust tile placement to maintain pattern integrity. Ensure patterns flow naturally around obstacles. This attention to detail enhances the visual appeal.

Credit: www.reddit.com
Applying Adhesive
Applying adhesive is a crucial step in tiling your kitchen floor. Getting it right means your tiles will stay secure and last for years. A wrong move can lead to loose tiles and frustrating repairs. By focusing on the details, you’ll ensure a professional finish even if you’re a DIY novice. Let’s dive into the key aspects of applying adhesive effectively.
Mixing The Mortar
Start with the right mortar mix. Check the instructions on the bag; they usually recommend a specific water-to-mortar ratio. Pour the water into your mixing bucket first, then add the mortar gradually.
Use a paddle mixer attached to a drill for a smooth consistency. Aim for a thick paste that holds its shape but spreads easily. Too dry, and it won’t adhere properly; too wet, and it won’t support the tiles.
Spreading Adhesive Evenly
Spread the adhesive evenly to avoid uneven tiles. Begin by applying a small amount of mortar to the floor. Use a flat trowel to smooth it out. Work in small sections to maintain control.
Ensure the coverage is complete without gaps. This prevents moisture from seeping under the tiles. Have you ever walked on a floor and felt the tiles move? That’s what you’re trying to avoid.
Using The Notched Trowel
The notched trowel is your best friend for tiling. Hold it at a 45-degree angle to create grooves in the adhesive. These grooves help the tiles adhere better by increasing surface contact.
Imagine each tile fitting snugly into its adhesive bed. Use consistent pressure to create uniform grooves. This ensures each tile sits at the same height, avoiding a bumpy finish.
Laying The Tiles
Begin by preparing the kitchen floor surface for tiling. Ensure it’s clean and level. Next, plan the tile layout by marking guidelines. This helps in maintaining straight rows. Apply adhesive evenly using a notched trowel, then place tiles carefully, pressing firmly.
Use spacers to maintain consistent gaps between tiles.
Laying the tiles in your kitchen can transform the space. This process requires patience and precision. The right techniques ensure a smooth and durable finish. Let’s dive into the steps for laying tiles efficiently.Placing The First Tile
Start by identifying the center of the room. Use chalk lines to mark guidelines. This helps in aligning your first tile perfectly. Place the first tile at the intersection of these lines. Align it carefully to ensure accuracy. This sets the stage for the rest of your tiles.Ensuring Proper Spacing
Proper spacing is crucial for a neat finish. It prevents tiles from shifting over time. Use a measuring tape to maintain consistent gaps. This step ensures that grout lines are uniform. It also aids in achieving a professional look.Using Tile Spacers
Tile spacers are essential for even spacing. Insert them between each tile. This keeps your lines straight and consistent. Remove spacers before the grout sets. This guarantees a clean and polished look.Cutting And Fitting Tiles
Cutting and fitting tiles require precision and patience. Measure carefully to ensure a perfect fit. Use a tile cutter or wet saw for clean edges.
Cutting and fitting tiles is an essential part of tiling your kitchen floor. It’s where precision meets creativity, ensuring every tile fits perfectly into your unique space. Whether you’re working around tricky corners or fitting the last row, this process demands attention to detail and a steady hand. Let’s dive into the essentials of cutting and fitting tiles with confidence and accuracy.Using A Tile Cutter
Using a tile cutter can feel intimidating at first, but with practice, it’s a straightforward process. Ensure your tile cutter is clean and the blade is sharp for a precise cut. Position the tile on the cutter, aligning it with the guide for accurate measurement. Apply firm pressure as you score the tile, then use the lever to snap it cleanly. A tile cutter offers efficiency for straight cuts, making it a handy tool for most of your tiling needs. Have you ever considered how a simple tool can make such a significant difference in your project?Cutting Around Obstacles
Cutting tiles around obstacles is where your creativity comes into play. Measure the space meticulously, noting any irregular shapes or corners. Use a wet saw or tile nippers for more complex cuts, ensuring you follow your markings accurately. Patience is key here; take your time to avoid any costly mistakes. Imagine the satisfaction of seeing a perfectly fitted tile in a challenging spot. How do you handle the unexpected twists in your DIY projects?Fitting Edge Tiles
Fitting edge tiles requires a bit of finesse to complete the look of your kitchen floor. Measure the remaining space and cut tiles to fit snugly along walls or cabinets. Ensure your cuts are precise to avoid gaps that can collect dirt or moisture. Use a level to check that the tiles are laid evenly, maintaining a seamless transition from tile to wall. The final touches make a big impact on the overall appearance. Do you enjoy the feeling of accomplishment when the last tile is perfectly in place?Grouting The Tiles
Grouting tiles seals spaces and keeps the floor clean. Apply grout evenly with a float, pressing it firmly. Wipe off excess grout with a damp sponge for a smooth finish.
Grouting the tiles is a crucial step in tiling a kitchen floor. Proper grouting ensures the tiles are securely set and looks polished. This process involves mixing the grout, applying it to the tile joints, and cleaning off the excess. It requires patience and attention to detail for the best results.Mixing The Grout
Start by choosing the right grout for your tiles. Carefully follow the instructions on the packaging. Use a bucket to mix the grout powder with water. Stir until you achieve a smooth and consistent paste. Avoid lumps for an even application.Applying Grout To Joints
Use a rubber float to apply the grout. Press the mixture into the gaps between tiles. Hold the float at a 45-degree angle for better coverage. Work in small sections to prevent the grout from drying too quickly.Cleaning Excess Grout
Let the grout set for 15-30 minutes. Use a damp sponge to wipe the tiles. Clean in a circular motion to remove excess grout. Rinse the sponge frequently to keep it clean. Repeat until the tiles look neat and tidy.Sealing And Finishing
Sealing and finishing are essential steps for a durable kitchen floor. Apply a quality sealant to protect tiles from moisture and stains. Ensure even coverage to prevent grout discoloration and enhance longevity.
Sealing and finishing your kitchen floor tiles is the last, but crucial step to ensure they are protected and look their best for years to come. This process not only enhances the tiles’ appearance but also shields them from stains and moisture. If done correctly, sealing and finishing can make your kitchen floor both beautiful and durable, saving you future headaches.Choosing A Sealant
Selecting the right sealant is essential for the longevity of your tiles. Consider the type of tile you have; ceramic tiles might not require sealing, but natural stone tiles, like marble or slate, definitely do. Look for a penetrating sealant that will soak into the tile and grout, providing robust protection against spills and dirt. It’s important to pay attention to the finish you want. Do you prefer a glossy, matte, or natural look? Each sealant offers different aesthetics, so choose one that complements your kitchen’s style.Applying The Sealant
Before applying the sealant, ensure that your tiles are clean and dry. Any dirt or moisture left on the surface could be trapped under the sealant, leading to unsightly marks. Use a clean sponge or applicator to spread the sealant evenly across the tiles and grout. Work in small sections to make sure every part is covered. Avoid over-applying, as it can lead to a sticky residue. Allow the sealant to dry completely, which usually takes a few hours, before walking on the floor or moving furniture back into the kitchen.Polishing The Tiles
Once the sealant is dry, polishing your tiles can add an extra layer of shine and protection. Use a clean, soft cloth or a polishing pad to buff the surface gently. This step can enhance the natural beauty of the tiles, giving your kitchen floor a polished, professional look. Do not skip this step thinking it’s optional. Polishing can actually help in maintaining the sealant, making it last longer and keeping your tiles looking fresh. Ask yourself: How often do you want to repeat this process? Regular maintenance will keep your floor in top condition, but sealing and finishing are not tasks you’ll want to do too frequently. Properly done, your hard work will pay off, leaving you with a stunning kitchen floor that impresses every guest.Maintenance Tips
Preparing the kitchen floor is key before tiling. Clean thoroughly and ensure the surface is dry and even. Use spacers for even tile placement, and apply grout carefully for a polished finish.
Maintaining a beautifully tiled kitchen floor isn’t just about aesthetics; it’s about ensuring longevity and functionality. After spending time and effort to tile your kitchen floor, you want to preserve its pristine condition for as long as possible. Here are some actionable maintenance tips to help you keep your kitchen floor looking its best and functioning optimally.Regular Cleaning
Regular cleaning is essential to maintain the shine and longevity of your kitchen tiles. Sweep or vacuum your tiled floor daily to remove dirt and debris. Use a damp mop with a mild detergent once a week to keep your tiles spotless and free from grime. Avoid using harsh chemicals that can erode the grout and damage the tiles. Instead, opt for a vinegar and water solution for a natural clean. Consider placing mats at entry points to reduce the amount of dirt being tracked onto the tiles.Handling Repairs
Chips and cracks can be inevitable, but quick action can prevent further damage. If you notice a broken tile, replace it immediately to avoid injury and to keep your floor looking uniform. Grout can also wear down over time. Re-grouting is a simple way to refresh your tiles and reinforce their stability. Keep a small stash of spare tiles and grout for minor repairs, ensuring a seamless match with your existing floor.Preventing Damage
Prevention is always better than repair. Use felt pads under furniture legs to avoid scratches when moving items around. Regularly check for loose tiles and fix them before they become a bigger issue. Avoid dropping heavy items on your tiled floor as this can cause cracks. Consider using a rug in high-traffic areas to protect your tiles from wear and tear. By taking these preventative measures, you ensure your kitchen floor remains intact and beautiful for years to come.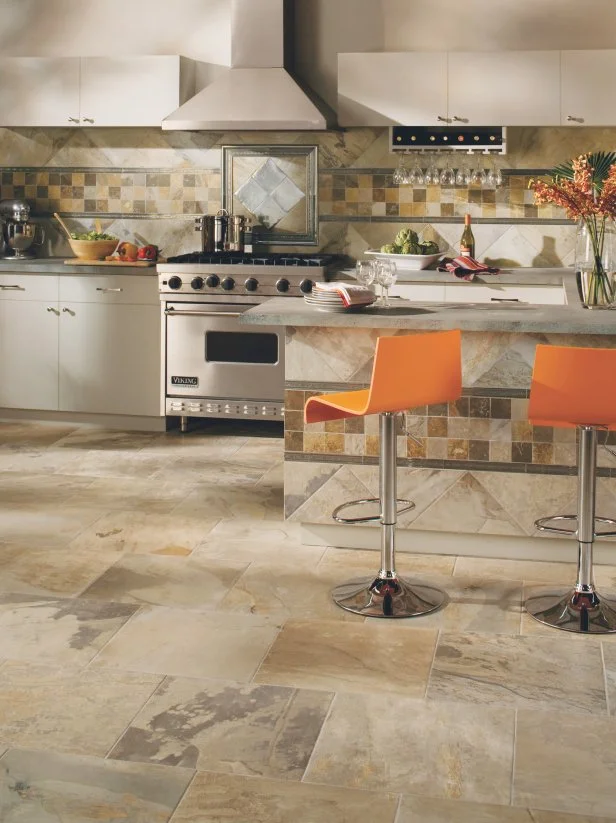
Credit: www.hgtv.com

Credit: www.bertandmay.com
Frequently Asked Questions
Where To Start When Tiling A Kitchen Floor?
Begin tiling from the center of the kitchen floor. Measure and mark the midpoint for accuracy. This ensures tiles align symmetrically. Lay out a dry run to check fit and pattern. Use spacers for even gaps. Adjust as necessary before applying adhesive.
What Is The 3 4 5 Rule For Tiling?
The 3 4 5 rule helps ensure tiles are set at a 90-degree angle. Measure 3 units on one side, 4 units on the other, and the diagonal should be 5 units. This confirms a perfect right angle, ensuring neat tile alignment.
Can I Tile A Kitchen Floor Myself?
Yes, you can tile a kitchen floor yourself. Ensure you have the right tools and materials. Follow step-by-step instructions carefully. It requires patience, precision, and some DIY skills. Preparing the surface is crucial for a professional finish. Consider watching tutorials or reading guides for detailed tips.
What Is The First Thing You Do Before Tiling A Floor?
The first step before tiling a floor is to clean the surface thoroughly. Ensure it’s dry, smooth, and level. Remove any debris or old adhesive. A clean, prepared surface ensures tiles adhere properly, preventing future issues. Use a leveling compound if necessary to address any uneven areas.
Conclusion
Tiling a kitchen floor can be a satisfying project. With patience, it becomes manageable. Gather your tools and plan each step. Follow these guidelines for a smooth process. Measure carefully to avoid mistakes. Choose tiles that fit your style. Prepare the surface properly for a lasting finish.
Lay tiles with precision, ensuring even spacing. Use grout to secure and complete the look. Clean up thoroughly for a neat result. Enjoy your new floor and its fresh appeal. Remember, practice makes perfect. With these tips, you can tile like a pro.
Your kitchen awaits its new charm!