How to Update Laminate Kitchen Cabinets: Easy DIY Tips
Imagine stepping into your kitchen and feeling an instant wave of inspiration and freshness. Updating your laminate kitchen cabinets can transform your space without the need for a costly renovation.
Whether you’re tired of the old look or simply want to infuse some new life into your kitchen, updating your cabinets is a smart, cost-effective choice. But where do you start? The process might seem daunting, but with the right guidance, it’s simpler than you think.
This guide will walk you through the essentials, giving you the confidence to revamp your cabinets with ease. Get ready to discover how you can create a kitchen that not only looks fantastic but also feels uniquely yours. Stay with us, and you’ll learn the secrets to achieving a stunning transformation that will make you fall in love with your kitchen all over again.

Credit: www.kylieminteriors.ca
Assessing Cabinet Condition
Updating laminate kitchen cabinets can breathe new life into your space. Before diving into the transformation, assess the condition of your cabinets. This step ensures a smooth update process and avoids unexpected issues. Two key areas to focus on are checking for damage and evaluating surface wear. Understanding these aspects helps in planning your renovation efficiently.
Checking For Damage
Examine each cabinet door and frame for visible damage. Look for cracks, chips, or broken pieces. These issues need repair before any updates. Use a flashlight to spot hidden damage inside corners. Check hinges and handles for wear or rust. Ensure all moving parts work smoothly. Fixing minor damages now prevents bigger problems later.
Evaluating Surface Wear
Surface wear is common in kitchens. Inspect the laminate for fading or discoloration. Look for scratches or worn-out patches on cabinet surfaces. Check edges for peeling laminate. These signs indicate the need for refinishing. Take note of areas with high exposure to heat or moisture. They might need special attention during updates.
Gathering Necessary Tools
Gather the right tools for updating kitchen cabinets. Sandpaper, paint, brushes, and primer are essential. They ensure a smooth and lasting finish.
Updating your laminate kitchen cabinets can breathe new life into your space without breaking the bank. Before diving into the project, gathering the right tools is essential for a smooth and successful transformation. Having everything ready ensures you won’t be scrambling mid-project, saving both time and frustration. Whether you’re a DIY enthusiast or tackling this for the first time, knowing what tools to have on hand is key to achieving the best results.Essential Tools List
To kickstart your cabinet makeover, you’ll need a set of basic tools that are vital for the process. Begin with a screwdriver, as you’ll need it to remove cabinet doors and hardware. A sanding block or electric sander is crucial to smooth out surfaces and prep them for painting. Don’t forget a high-quality paintbrush or foam roller for an even coat of paint. Painter’s tape is another must-have, helping you protect areas you don’t want painted and ensuring clean, crisp lines. Finally, a drop cloth or old sheets to cover your floors and countertops will save you from potential messes.Optional Tools For Advanced Updates
For those looking to go beyond simple updates, there are additional tools that can elevate your project. A heat gun can be particularly useful if you’re planning to remove old adhesive or laminate. It helps in loosening stubborn areas that resist traditional methods. Consider using a wood filler if you need to address any dents or scratches before painting. This small step can make a significant difference in the final appearance. For a truly professional finish, a paint sprayer can give your cabinets that flawless, factory-finished look. While it requires more setup and space, the results can be well worth the effort. Are there other tools you swear by for cabinet makeovers? Sometimes, the smallest tool can make the biggest impact.Choosing The Right Paint
Updating laminate kitchen cabinets starts with choosing the right paint. Opt for durable, high-quality paint suitable for laminate surfaces. Ensure a smooth finish by selecting colors that complement your kitchen’s style.
Updating your laminate kitchen cabinets can dramatically refresh your space without breaking the bank. One of the most crucial steps in this transformation is choosing the right paint. The paint you select not only affects the final appearance but also the durability of your cabinets. You want to ensure that your kitchen facelift is both stylish and long-lasting.Types Of Paint For Laminate
Selecting the correct type of paint is essential for a successful update. Laminate surfaces require special consideration due to their slick finish. – Acrylic Latex Paint: This is a popular choice for laminate cabinets as it is water-based, easy to clean, and provides a durable finish. It’s also low in volatile organic compounds (VOCs), making it a healthier option for indoor environments. – Chalk Paint: Known for its matte finish and minimal prep requirements, chalk paint can adhere well to laminate. However, it often requires a protective wax or topcoat to ensure longevity. – Oil-Based Paint: While providing a hard, durable finish, oil-based paints can be more challenging to work with due to their strong fumes and longer drying times. They are best suited for areas that endure heavy wear and tear.Color And Finish Selection
Choosing the right color and finish can transform your kitchen’s vibe. Consider what mood you want to set in your kitchen. – Color: Lighter shades like white or cream can make a kitchen feel larger and more inviting. For a bold statement, deep blues or greens can add a modern touch. If you love classic aesthetics, consider shades like taupe or gray. – Finish: The finish you select can impact the overall look. A matte finish offers a sleek, modern feel, while a semi-gloss or satin finish can enhance brightness and make cleaning easier. Think about how much light your kitchen gets and how often you’ll need to wipe down surfaces. Think about your lifestyle and how you use your kitchen. Do you prefer a space that feels cozy and warm or sleek and modern? Your paint choices should reflect these preferences while also being practical for your daily routine.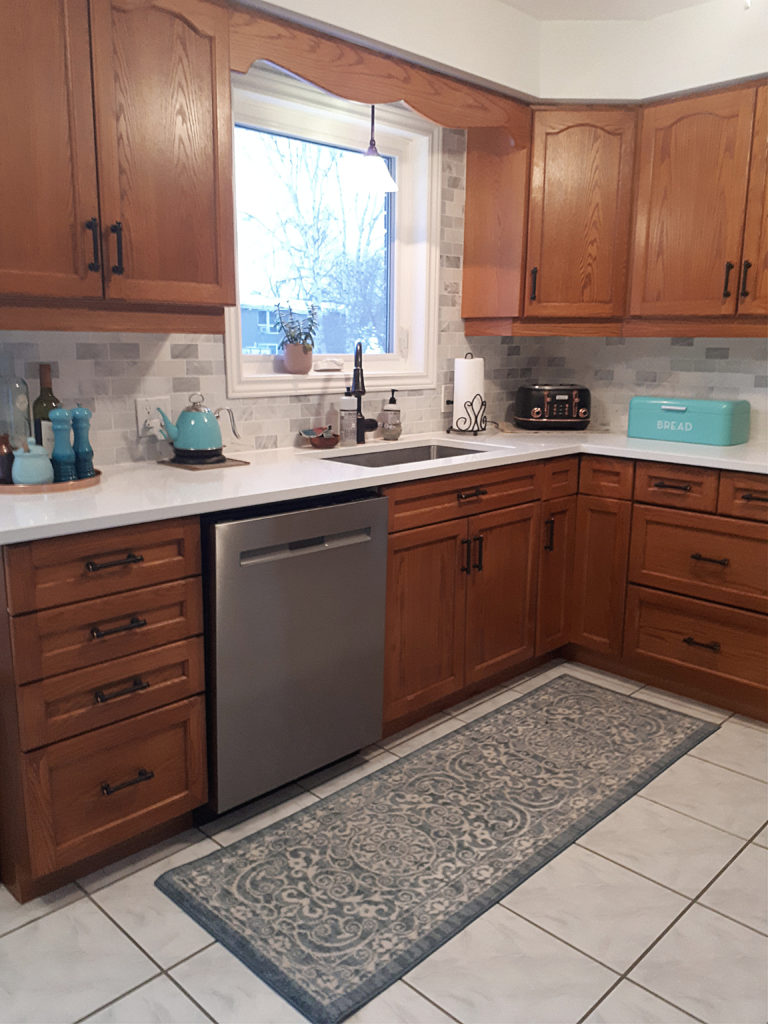
Credit: www.kylieminteriors.ca
Preparing The Cabinets
Preparing the Cabinets Start by cleaning the cabinets thoroughly to remove dirt and grease. Sand the surfaces gently to create a smooth base for paint.
Updating your laminate kitchen cabinets can completely transform the look of your kitchen without the hefty price tag of a full remodel. Before diving into painting or refacing, it’s crucial to properly prepare the cabinets. This step sets the foundation for all the work that follows, ensuring a smooth, durable finish.Cleaning And Degreasing
Start by thoroughly cleaning your cabinets. Kitchens are notorious for grease build-up, and even a small amount can prevent paint or adhesive from sticking. Use a powerful degreaser or a mix of vinegar and water to wipe down every inch of the cabinet surfaces. Pay extra attention to areas near the stove and handles, where grime tends to accumulate. A clean surface is essential for adhesion and a professional-looking result.Sanding The Surface
Once your cabinets are clean and dry, it’s time to sand them. Sanding is crucial to create a rough surface for the primer and paint to grip onto. Use a fine-grit sandpaper, around 220 grit, to gently sand the laminate surface. Be careful not to sand too hard or you’ll risk damaging the laminate. A light, even sanding is all that’s needed. Remember to wipe away the dust with a damp cloth after sanding to keep the surface clean.Repairing Any Damage
Inspect your cabinets for any damage such as chips or scratches. These imperfections can be filled with wood filler or a laminate repair paste. Apply the filler using a putty knife, smoothing it out to ensure it’s level with the rest of the cabinet surface. Let it dry completely before sanding it smooth. This step is vital for achieving a flawless finish. Have you ever skipped over a small scratch, only to regret it later when it became an eyesore? Taking the time now can save you from future frustration.Applying Primer
Applying primer is crucial for a smooth finish on laminate kitchen cabinets. It ensures paint adheres properly, covering any imperfections and creating a uniform surface. Clean the cabinets thoroughly before applying primer to achieve the best results.
Applying primer to laminate kitchen cabinets is a vital step. It ensures the paint adheres well and stays durable. Priming creates a smooth surface for painting. It also helps in covering any existing stains or discolorations. Let’s explore more about priming.Benefits Of Priming
Priming laminate cabinets offers several advantages. It enhances paint adhesion, making the finish last longer. Primer seals the surface, preventing paint from peeling. It also blocks stains, ensuring a clean, vibrant look. Priming can even out imperfections, providing a smooth base. This step can save time and money in the long run.Choosing The Right Primer
Selecting the right primer is crucial for success. Use a primer designed for laminate surfaces. Look for bonding primers, as they stick well. Oil-based primers offer great durability. Water-based primers dry faster and have less odor. Always check the primer label for compatibility. Test a small area first to ensure the best results.Painting The Cabinets
Painting laminate kitchen cabinets is a great way to refresh your space. This process can transform outdated cabinets into stylish focal points. It’s cost-effective and can be done over a weekend. With the right techniques, your cabinets will look professionally finished.
Techniques For Even Coverage
Even coverage ensures a smooth and flawless finish. Start by removing cabinet doors and hardware. Clean surfaces with a mild detergent to remove grease and grime. Sand lightly to create a surface that paint can adhere to. Use a primer designed for laminate surfaces. This step is crucial for paint adhesion. Apply paint using a high-quality brush or roller. Work in thin layers, letting each dry before the next. This prevents drips and ensures a smooth finish.
Drying Times And Tips
Patience is key for drying times. Allow each coat to dry thoroughly before adding another. This might take a few hours depending on the paint type. Check the manufacturer’s instructions for exact drying times. Ensure proper ventilation to speed up the drying process. Avoid touching the surface while it dries to prevent smudges. Reattach hardware and cabinet doors only after the paint is fully cured. This can take up to a week for some paints. Your patience will ensure a durable and beautiful finish.
Finishing Touches
Add fresh hardware and handles for a modern look. Consider painting or applying peel-and-stick coverings. Finish with a sealant for durability.
As you reach the final stage of updating your laminate kitchen cabinets, it’s time to focus on the finishing touches that will bring your vision to life. These details can transform your space from simply updated to utterly dazzling. With just a few strategic changes, your kitchen can exude personality and style.Adding New Hardware
Swapping out old hardware is like giving your cabinets a breath of fresh air. Choose handles and knobs that complement your kitchen’s theme. Sleek stainless steel for a modern look or vintage brass for a cozy, rustic feel can make a world of difference. Take a moment to consider the size and shape of your hardware. Do they fit comfortably in your hand? Imagine opening your cabinets every day and feel the ease and satisfaction of well-chosen hardware. What about mixing and matching styles? A bold approach could add unique flair to your kitchen, making it a conversation starter.Applying A Protective Sealant
Think of a protective sealant as a shield for your cabinets. It guards against scratches, stains, and general wear and tear. Applying it is a simple yet effective way to extend the life of your newly updated cabinets. Begin by selecting a sealant that suits your cabinet’s finish. Whether it’s matte, glossy, or somewhere in between, there’s a perfect sealant out there for you. Remember to apply it evenly, using smooth strokes for a flawless finish. Feel the satisfaction as your cabinets gleam with their new protective layer. Have you considered the long-term benefits? Your cabinets will thank you, maintaining their shine and durability for years to come.Maintaining Updated Cabinets
Refresh laminate kitchen cabinets with a fresh coat of paint or adhesive vinyl. Choose colors or patterns that complement your kitchen’s style. Clean surfaces thoroughly before applying new finishes for best results.
Maintaining updated cabinets is more than just admiring their new look. It involves consistent care and attention to detail, ensuring that your kitchen remains a vibrant and welcoming space. Let’s dive into some simple yet effective ways to keep your laminate kitchen cabinets looking their best.Regular Cleaning Tips
Consistent cleaning is your first line of defense against grime and stains. Wipe down the cabinets weekly with a damp cloth and mild dish soap. This routine prevents dirt buildup and keeps the surface shiny. Avoid harsh chemicals that could damage the finish. Instead, opt for natural solutions like vinegar and water. They are gentle yet effective. Always dry the cabinets with a soft cloth to prevent water spots. This step is crucial for maintaining their pristine appearance.Avoiding Common Damages
Prevent scratches by using soft sponges or cloths for cleaning. Abrasive materials can leave marks that are difficult to remove. Be mindful of heat sources. Placing hot pots directly against the cabinets can cause warping. Always use heat-resistant pads or trivets. Consider installing soft-close hinges to minimize the impact when closing doors. This small change can significantly extend the life of your cabinets. What are some of the clever tricks you use to keep your kitchen looking fresh and inviting?
Credit: www.chismbrothers.com
Frequently Asked Questions
How Do You Prepare Laminate Cabinets For Painting?
Start by cleaning the cabinets with a degreaser to remove grime. Sand the surface lightly to ensure paint adhesion. Wipe away dust with a damp cloth. Apply a primer designed for laminate surfaces to create a good base. Let it dry completely before painting with your chosen color.
What Paint Is Best For Laminate Cabinets?
Choose a high-quality acrylic or latex paint for laminate cabinets. These paints offer durability and a smooth finish. Ensure the paint is suitable for high-traffic areas. Consider using a semi-gloss or satin finish for easy cleaning and maintenance. Always use a primer to enhance paint adhesion.
Can You Refinish Laminate Cabinets Without Sanding?
Yes, you can refinish without sanding by using a high-bonding primer. Clean the cabinets thoroughly to remove all dirt and grease. Apply a quality primer designed for slick surfaces like laminate. This method saves time and effort while still ensuring paint sticks effectively.
How Long Does It Take To Update Cabinets?
Updating cabinets typically takes a weekend, around 2-3 days. Time includes cleaning, sanding, priming, and painting. Allow each coat to dry as per the product’s instructions. Ensure proper ventilation and drying time for the best results. Plan for unexpected delays in drying or additional coats.
Conclusion
Transforming your laminate kitchen cabinets can be simple. With careful planning, you achieve a fresh look. Choose durable paint for long-lasting results. Sanding is crucial for smooth surfaces. Apply primer for better paint adhesion. Use quality brushes for even coats.
Let each layer dry completely. Update hardware to enhance style. Small changes bring big impact. Your kitchen feels new without a complete renovation. Enjoy your revamped space and the compliments it brings. Have fun with this creative project and make your kitchen shine.