How Do You Change a Kitchen Sink Faucet: Step-by-Step Guide
Executive Chef & Lead Commercial Kitchen Specialist at Daily Kitchup Test Lab
Changing a kitchen sink faucet might seem like a daunting task, but with the right guidance, it’s easier than you think. Imagine transforming your kitchen without the hefty price tag of a full remodel.
A new faucet can instantly refresh your space, adding both style and functionality. Whether you’re tired of leaks or just want an upgrade, learning how to change a faucet empowers you to take control of your home improvement projects. You don’t need to be a plumbing expert; you just need the right instructions.
You’ll discover simple steps that will make this task manageable and even enjoyable. Feel the satisfaction of accomplishing something that enhances your daily life. Dive in to unlock the secrets to a hassle-free faucet replacement and give your kitchen a fresh, new look.
Gather Necessary Tools
Gather the necessary tools like a wrench, screwdriver, and plumber’s tape before changing the kitchen sink faucet. Having these tools ready ensures a smoother and faster installation process.
Gathering the right tools ensures a smooth faucet replacement. Preparation is key. Before starting, make sure you have everything on hand. This saves time and reduces stress. Below are essential tools you will need.Wrench Or Pliers
A wrench loosens the nuts. It’s crucial for removing the old faucet. Adjustable pliers can work too. They provide a firm grip. Choose one that fits the size of your nuts.Plumber’s Tape
This tape prevents leaks. Wrap it around the threads of the new faucet. It creates a tight seal. Make sure it’s readily available.Basin Wrench
A basin wrench is helpful. It works well in tight spaces. Especially under the sink. This tool reaches difficult spots with ease.Bucket Or Towel
A bucket catches water. Place it under the sink pipes. This prevents spills. A towel can also absorb any drips.Flashlight
A flashlight improves visibility. Under-sink areas are dark. Proper lighting helps you see better. It aids in precise work.Screwdriver
Screws secure the faucet. You’ll need a screwdriver to remove them. Both flat and Phillips types might be necessary. Keep both handy.Cleaning Supplies
After removal, cleaning is important. Wipe down the sink area. Use mild soap and a cloth. This ensures a clean installation surface. With these tools ready, you’re set for a successful faucet change.Turn Off Water Supply
Changing a kitchen sink faucet can transform the look and functionality of your kitchen. But before you start the process, the first crucial step is to turn off the water supply. This simple yet essential task prevents unwanted leaks and ensures a smooth replacement experience. Let’s dive into how you can easily turn off the water supply to your kitchen faucet.
Check Under The Sink For Shutoff Valves
Your journey begins right under the sink. Look for two small valves, typically located at the back wall or within the cabinet space. These are your shutoff valves for hot and cold water. Turning these valves clockwise will stop the water flow to the faucet. If they feel stuck, don’t panic—sometimes a gentle tap or a squirt of WD-40 helps them move.
After turning the valves, test your faucet to ensure the water is indeed off. Turn the faucet handles to the ‘on’ position and observe if any water drips out. If no water flows, congratulations—your shutoff was successful! If there’s still a trickle, you might need to check the valve’s position or look for another source.
Locate Main Water Supply Valve If Needed
What if the shutoff valves under the sink don’t work properly? Don’t worry; you still have options. Head to your home’s main water supply valve, usually found in a basement or garage. Turning this valve off will cut off water to the entire house. It’s a more comprehensive solution but guarantees no leaks during your faucet installation.
Prepare For Possible Water Residue
Even with the water supply off, some residual water might remain in the pipes. Have a towel or bucket ready to catch any drips when you disconnect the faucet. This proactive step saves you from unexpected messes and keeps your work area clean.
Turning off the water supply might seem simple, but it’s a step that sets the stage for a successful faucet replacement. Have you ever forgotten to do this before starting a plumbing task? It’s a mistake you’ll only make once! By ensuring the water is off, you’re not just protecting your home from leaks; you’re also paving the way for a hassle-free faucet change.
Remove Old Faucet
Replacing a kitchen sink faucet can breathe new life into your kitchen. But before you get to the exciting part of installing a shiny new faucet, the old one has to go. Removing an old faucet might seem daunting, but with a bit of preparation, you can handle it like a pro. Here’s how you can remove the old faucet efficiently, focusing on loosening the mounting nuts and detaching the water supply lines.
Loosen Mounting Nuts
The first step in removing your old faucet involves loosening the mounting nuts. These nuts secure the faucet to the sink and are usually located underneath the sink basin. Grab a basin wrench, a handy tool designed specifically for tight spaces. If you’ve never used one before, don’t worry. It’s surprisingly easy to maneuver once you get the hang of it.
Begin by reaching up behind the sink and finding the mounting nuts. They might be a bit stubborn due to years of use and accumulation of grime. Spray a penetrating oil if they refuse to budge. Let it sit for a few minutes, then try again. Feel the satisfaction as the nuts finally start to loosen, knowing you’re one step closer to a fresher kitchen look.
Detach Water Supply Lines
Next up, you’ll need to detach the water supply lines. These lines connect your faucet to the water valves, and they’re usually found beneath your sink. Before you get started, make sure to turn off the water supply to avoid any unexpected sprays of water. You don’t want to end up soaked!
Use an adjustable wrench to loosen the nuts that secure the supply lines to the faucet. As you do this, keep a bucket or a towel underneath to catch any residual water. This simple precaution can save you a lot of cleanup time. Once the lines are detached, you might even consider upgrading them if they’re old or corroded. After all, a fresh faucet deserves equally fresh connections.
These are the primary steps to remove an old faucet. With a bit of persistence and patience, you’ll soon have your old faucet out and be ready to install the new one. Can you already picture that gleaming new fixture in your kitchen?

Credit: www.youtube.com
Prepare Sink For New Faucet
Shut off the water supply and clear the space under the sink. Disconnect old faucet connections carefully. Remove the existing faucet, ensuring the area is clean and dry for the new installation.
Preparing your sink for a new faucet is an essential step that sets the foundation for a smooth installation process. Before diving into the nitty-gritty of replacing the faucet, take a moment to get the area ready. A well-prepared sink not only makes the installation easier but also ensures your new faucet functions perfectly.Clean Area Thoroughly
Start by clearing the area around your sink. Remove any items or clutter that might get in your way. This could be anything from soap dishes to decorative plants. Once the sink area is clear, focus on cleaning the sink surface. Use a mild cleaning solution to wipe down the sink and surrounding countertop. Pay special attention to any grime or old sealant around the edges of the sink. A clean sink area will allow you to work more efficiently and helps prevent any dirt from getting into your new faucet fittings. Plus, it’s always satisfying to start with a fresh, clean space.Check Sink Holes
Before installing your new faucet, you need to check the number of holes your sink has. Some sinks have one, two, or even three holes for faucets and additional fixtures like sprayers or soap dispensers. Take a moment to examine these sink holes. Make sure they align with the new faucet’s configuration. If your new faucet doesn’t match the existing holes, you might need to consider adapters or additional parts. It’s like solving a puzzle — ensuring everything fits together perfectly will save you time and frustration later. Have you double-checked everything? It’s always better to measure twice and install once.Install New Faucet
Changing a kitchen sink faucet might seem like a daunting task, but installing a new faucet can be a straightforward and rewarding DIY project. Whether you’re upgrading for style or function, the process is an opportunity to breathe new life into your kitchen space. Let’s dive into the steps needed to position and secure your new faucet effectively.
Position New Faucet
Begin by positioning the new faucet through the designated holes on your sink. Ensure that the base is sitting flush against the surface to prevent future leaks. You’ll want to double-check the alignment of the handle, ensuring it can move freely without hitting the wall or backsplash.
Consider the faucet’s reach and height to ensure it’s practical for your daily kitchen tasks. Perhaps take a moment to visualize how it fits with your kitchen’s overall aesthetic and functionality. A well-placed faucet can transform how you use your kitchen, making everyday activities more enjoyable.
Secure With Mounting Nuts
Once the faucet is in position, it’s time to secure it. Use mounting nuts to fasten the faucet from underneath the sink. Tighten the nuts evenly, ensuring the faucet remains centered and stable.
While securing, use a basin wrench for those hard-to-reach spots. If you find the area cramped, take a deep breath and remember patience is key. This small effort ensures your faucet remains firm and wobble-free for years to come.
After securing, check everything for alignment once more before moving on to the water lines. A stable faucet is not only functional but also a testament to your DIY skills. Did you ever imagine you could tackle such a project on your own?

Credit: www.youtube.com
Connect Water Supply Lines
Connect the new faucet to the water supply lines under the sink. Use adjustable pliers to tighten connections. Ensure no leaks by testing each line with water running.
Connecting the water supply lines is crucial in faucet installation. This process ensures water flows correctly through the new fixture. Follow the steps carefully to avoid leaks or damages. You’ll need basic tools like a wrench and plumber’s tape.Attach Hot And Cold Lines
Identify the hot and cold water lines. Typically, hot is on the left, cold on the right. Attach the corresponding supply line to the faucet’s inlets. Ensure the connections are finger-tight first. This helps in aligning the threads properly.Ensure Tight Connections
Use a wrench to tighten the connections. Avoid over-tightening, which can damage the threads. Wrap plumber’s tape around the threads for a secure seal. This tape helps prevent leaks over time. Check the connections by gently pulling on the lines. They should feel secure without any movement. These steps ensure your faucet functions properly. Proper installation prevents future plumbing issues.Test The Faucet
Once you’ve installed your new kitchen sink faucet, the next step is to ensure everything is working smoothly. Testing the faucet is crucial to avoid any water-related mishaps that could arise from leaks or improper installation. Imagine the frustration of waking up to a flooded kitchen because you skipped this step. Don’t let that happen to you! Let’s dive into how you can confidently test your faucet.
Turn On Water Supply
Start by turning the water supply back on. This is typically done via the valves located under the sink. Ensure both the hot and cold water lines are open. Listen for any unusual sounds that might indicate a problem. If the water flows smoothly without any strange noises, you’re on the right track.
Check For Leaks
Once the water is running, inspect the area around the faucet for leaks. Look closely at the base of the faucet and the connections beneath the sink. A paper towel can be a handy tool here; place it around the base and the connections to quickly spot any dripping water. Remember, even a small leak can lead to bigger issues down the line.
Why not test the faucet’s functionality by running both hot and cold water? This simple action can help you ensure that everything is properly connected and working as it should. As you test, ask yourself: Does the water pressure feel right? Are there any unexpected splashes? Your observations can provide valuable insights into any adjustments needed.
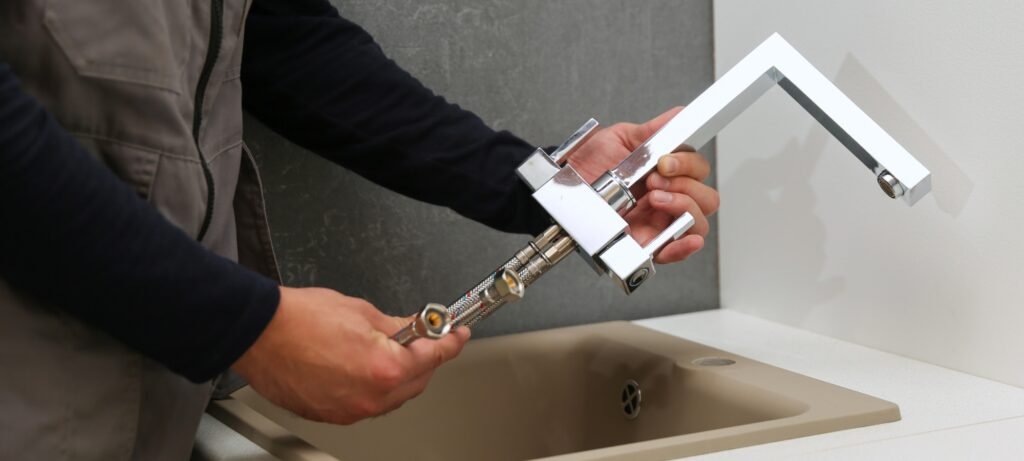
Credit: carolinagirlcooks.com
Final Adjustments
You’ve successfully installed your new kitchen sink faucet, but there’s still one crucial step left: the final adjustments. These tweaks ensure that your faucet not only functions smoothly but also complements the look of your kitchen. Let’s dive into making those final touches that make all the difference.
Align Faucet Properly
Ensuring your faucet is aligned correctly is crucial for both aesthetics and functionality. Stand back and take a good look. Is it centered and straight?
Misalignment can lead to uneven water flow and splashing. Adjust the faucet by gently moving it into position. Most models allow minor shifts without needing to re-tighten everything.
Remember when I installed my own faucet and it was slightly off-center? It drove me crazy until I realigned it! Don’t skip this simple yet impactful step.
Tighten Any Loose Parts
Once your faucet is perfectly aligned, it’s time to secure all the parts. Loose components can cause leaks and reduce the lifespan of your faucet.
Check each connection under the sink. Use a wrench to tighten nuts and bolts, but be careful not to overtighten, which can damage fittings.
- Ensure the base is snug against the sink.
- Check the handles for any wobble.
- Confirm that the water lines are secure.
During my first installation, I skipped this step and ended up with a minor flood. A lesson learned the hard way! Always double-check your work.
Do you feel confident about your final adjustments? Taking these steps ensures your new faucet is ready for action, without unexpected surprises. Happy plumbing!
Frequently Asked Questions
Can I Replace My Kitchen Faucet Myself?
Yes, you can replace your kitchen faucet yourself. Ensure you have the necessary tools and follow step-by-step instructions. This DIY task can save money and time, enhancing your plumbing skills. Always turn off the water supply before starting to avoid any leaks or damage.
Do All Kitchen Faucets Fit All Kitchen Sinks?
Not all kitchen faucets fit all sinks. Compatibility depends on hole configuration and size. Check your sink’s specifications. Ensure the faucet matches the number of holes and spacing. Consider style and function preferences for a perfect fit. Always verify measurements before purchase to avoid mismatches.
Do You Need To Turn Water Off To Change A Kitchen Faucet?
Yes, turn off the water supply before changing a kitchen faucet. This prevents leaks and potential damage. Locate the shut-off valves under the sink. Twist them clockwise to stop water flow. Ensure both hot and cold valves are off. After replacement, turn them back on to test the faucet.
How Long Does It Take To Swap Out A Kitchen Faucet?
Swapping out a kitchen faucet typically takes 1-2 hours. Time varies based on experience and faucet type. Simple installations might be quicker, while complex setups or unexpected issues could extend the duration. Always have necessary tools ready for a smoother process.
Conclusion
Replacing a kitchen sink faucet is simpler than it seems. With the right tools, you can do it yourself. Start by gathering necessary tools and shutting off water. Remove the old faucet carefully. Install the new one by following step-by-step instructions.
Tighten connections and check for leaks. Enjoy your new faucet and improved kitchen look. Feel proud of your DIY skills. Remember, practice makes perfect. It’s all about patience and attention to detail. You’ll save money and gain satisfaction from your successful project.
Now, relax and admire your handiwork!

Similar Posts





















