How to Install Soap Dispenser in Kitchen Sink: Easy Guide
Executive Chef & Lead Commercial Kitchen Specialist at Daily Kitchup Test Lab
Ever find yourself fumbling with soap bottles while your hands are covered in grease? Installing a soap dispenser in your kitchen sink can be a game changer.
Imagine the convenience of having soap readily available at the push of a button. Plus, it keeps your countertop clutter-free. If you’ve been putting off this small upgrade, it’s time to take action. In this guide, you’ll discover just how easy it is to install a soap dispenser on your own.
By the end, you’ll wonder why you didn’t do it sooner. So, are you ready to transform your kitchen experience with a simple DIY project? Let’s dive in!
Credit: www.tiktok.com
Choosing The Right Soap Dispenser
Choosing the right soap dispenser for your kitchen sink might seem like a simple task, but it’s a decision that impacts both functionality and aesthetics. With various options available, selecting a dispenser that complements your kitchen design while offering ease of use is crucial. You want something reliable, stylish, and durable—qualities that make your daily kitchen routines smoother and more enjoyable.
Types Of Soap Dispensers
Soap dispensers come in various types, each suited for different needs and preferences. Built-in dispensers are a popular choice if you’re looking for a sleek, integrated look. These require installation but offer a clutter-free counter space. Alternatively, countertop dispensers offer flexibility, allowing you to move them around as needed.
If you’re someone who enjoys the latest technology, automatic dispensers can be a game-changer. They provide touchless operation, which is not only convenient but also more hygienic. Think about your kitchen habits—do you prefer a traditional pump, or are you ready to embrace modern convenience?
Material And Design Considerations
When it comes to material, durability and style go hand in hand. Stainless steel dispensers offer a sleek, modern look while being resistant to rust and corrosion—perfect for busy kitchens. Plastic dispensers are often more affordable, with various colors and designs to match different aesthetics.
Consider the design. Is it easy to refill and clean? A dispenser with a wide opening makes refilling a breeze, saving you time and frustration. Pay attention to the spout length and direction; a well-designed spout should direct soap where you need it without splashing. Your kitchen sink’s design and your personal style preference should guide your choice.
Have you ever chosen a kitchen accessory that looked great but wasn’t practical? How did it affect your daily routine? Reflecting on these experiences can help you make a more informed decision. Choose a soap dispenser that not only enhances your kitchen’s look but also improves your daily life.
Gathering Necessary Tools And Materials
Installing a soap dispenser in your kitchen sink can be a simple yet effective upgrade. Before you start, it’s crucial to gather all the necessary tools and materials. This preparation step ensures a smooth installation process and minimizes interruptions. Knowing exactly what you need also saves time and helps avoid those frustrating mid-project trips to the hardware store.
Essential Tools List
- Drill:A cordless drill is ideal for creating holes without the hassle of cords.
- Adjustable wrench:This will help you tighten the dispenser components.
- Phillips screwdriver:Necessary for securing screws and fittings.
- Measuring tape:Ensures precise placement and fitting.
- Safety goggles:Protect your eyes during drilling.
Materials Required
- Soap dispenser kit:Includes the pump, bottle, and mounting hardware.
- Plumbers tape:Provides a leak-proof seal for connections.
- Silicone sealant:Ensures a waterproof installation around the sink hole.
Before diving into the installation, ask yourself: Do you have everything you need? Checking this list twice can prevent common setbacks. It’s better to start prepared than to halt midway through the process because something essential is missing.
Preparing The Installation Area
Ensure the sink area is clean and dry before installing the soap dispenser. Check for enough space to accommodate the dispenser comfortably. Measure the area to confirm the dispenser fits without obstructing other fixtures.
Preparing the installation area is crucial for a smooth setup of your soap dispenser. A clean and well-marked area ensures the dispenser fits perfectly and functions efficiently.Cleaning The Sink Surface
Start by removing any items around the sink. Use a mild cleaner to wipe the area clean. Make sure to scrub away any grime or residue. A clean surface prevents any issues with adhesion or alignment. Rinse the surface with water and dry with a soft cloth.Marking The Installation Spot
Decide where you want the dispenser to be located. Consider convenience and accessibility. Use a pencil to mark the spot lightly. Double-check the position to ensure it’s reachable for regular use. Verify there’s enough space for the dispenser’s components underneath. This prevents any installation mishaps later.Drilling The Hole
Drilling the hole in the kitchen sink is the first step to installing a soap dispenser. Choose a spot near the faucet for easy access. Use a drill with the correct bit size for a clean cut.
Drilling a hole in your kitchen sink for a soap dispenser can seem daunting. With the right tools and guidance, it’s manageable for any DIY enthusiast. Safety is crucial before starting. Gather the necessary tools and prepare to enhance your kitchen’s functionality.Safety Precautions
Before drilling, ensure safety. Wear safety goggles to protect your eyes. Use ear protection if the drilling noise is too loud. Ensure your workspace is clean and free from clutter. This helps prevent accidents.Step-by-step Drilling Guide
Follow these steps for a successful drilling process.- Identify the location for the dispenser. Ensure it’s within reach from the sink.
- Use a measuring tape to mark the drilling spot. Verify it twice for accuracy.
- Select a drill bit that matches the dispenser’s size. A 7/8-inch bit is common.
- Attach the drill bit to your drill securely. Double-check for a tight fit.
- Position the drill at a 90-degree angle above the mark. Maintain a steady hand.
- Begin drilling slowly. Apply gentle pressure to avoid slipping.
- Once through, clear any debris. Ensure a clean and smooth hole.
Installing The Soap Dispenser
Installing a soap dispenser in the kitchen sink is simple. Begin by selecting a spot near the faucet. Drill a hole and secure the dispenser, ensuring it fits snugly. Attach the soap container underneath, fill it with liquid soap, and pump to test its functionality.
Installing a soap dispenser in your kitchen sink can simplify dishwashing. It reduces clutter around the sink and provides easy access to soap. Follow these simple steps to install your soap dispenser quickly and efficiently.Mounting The Dispenser
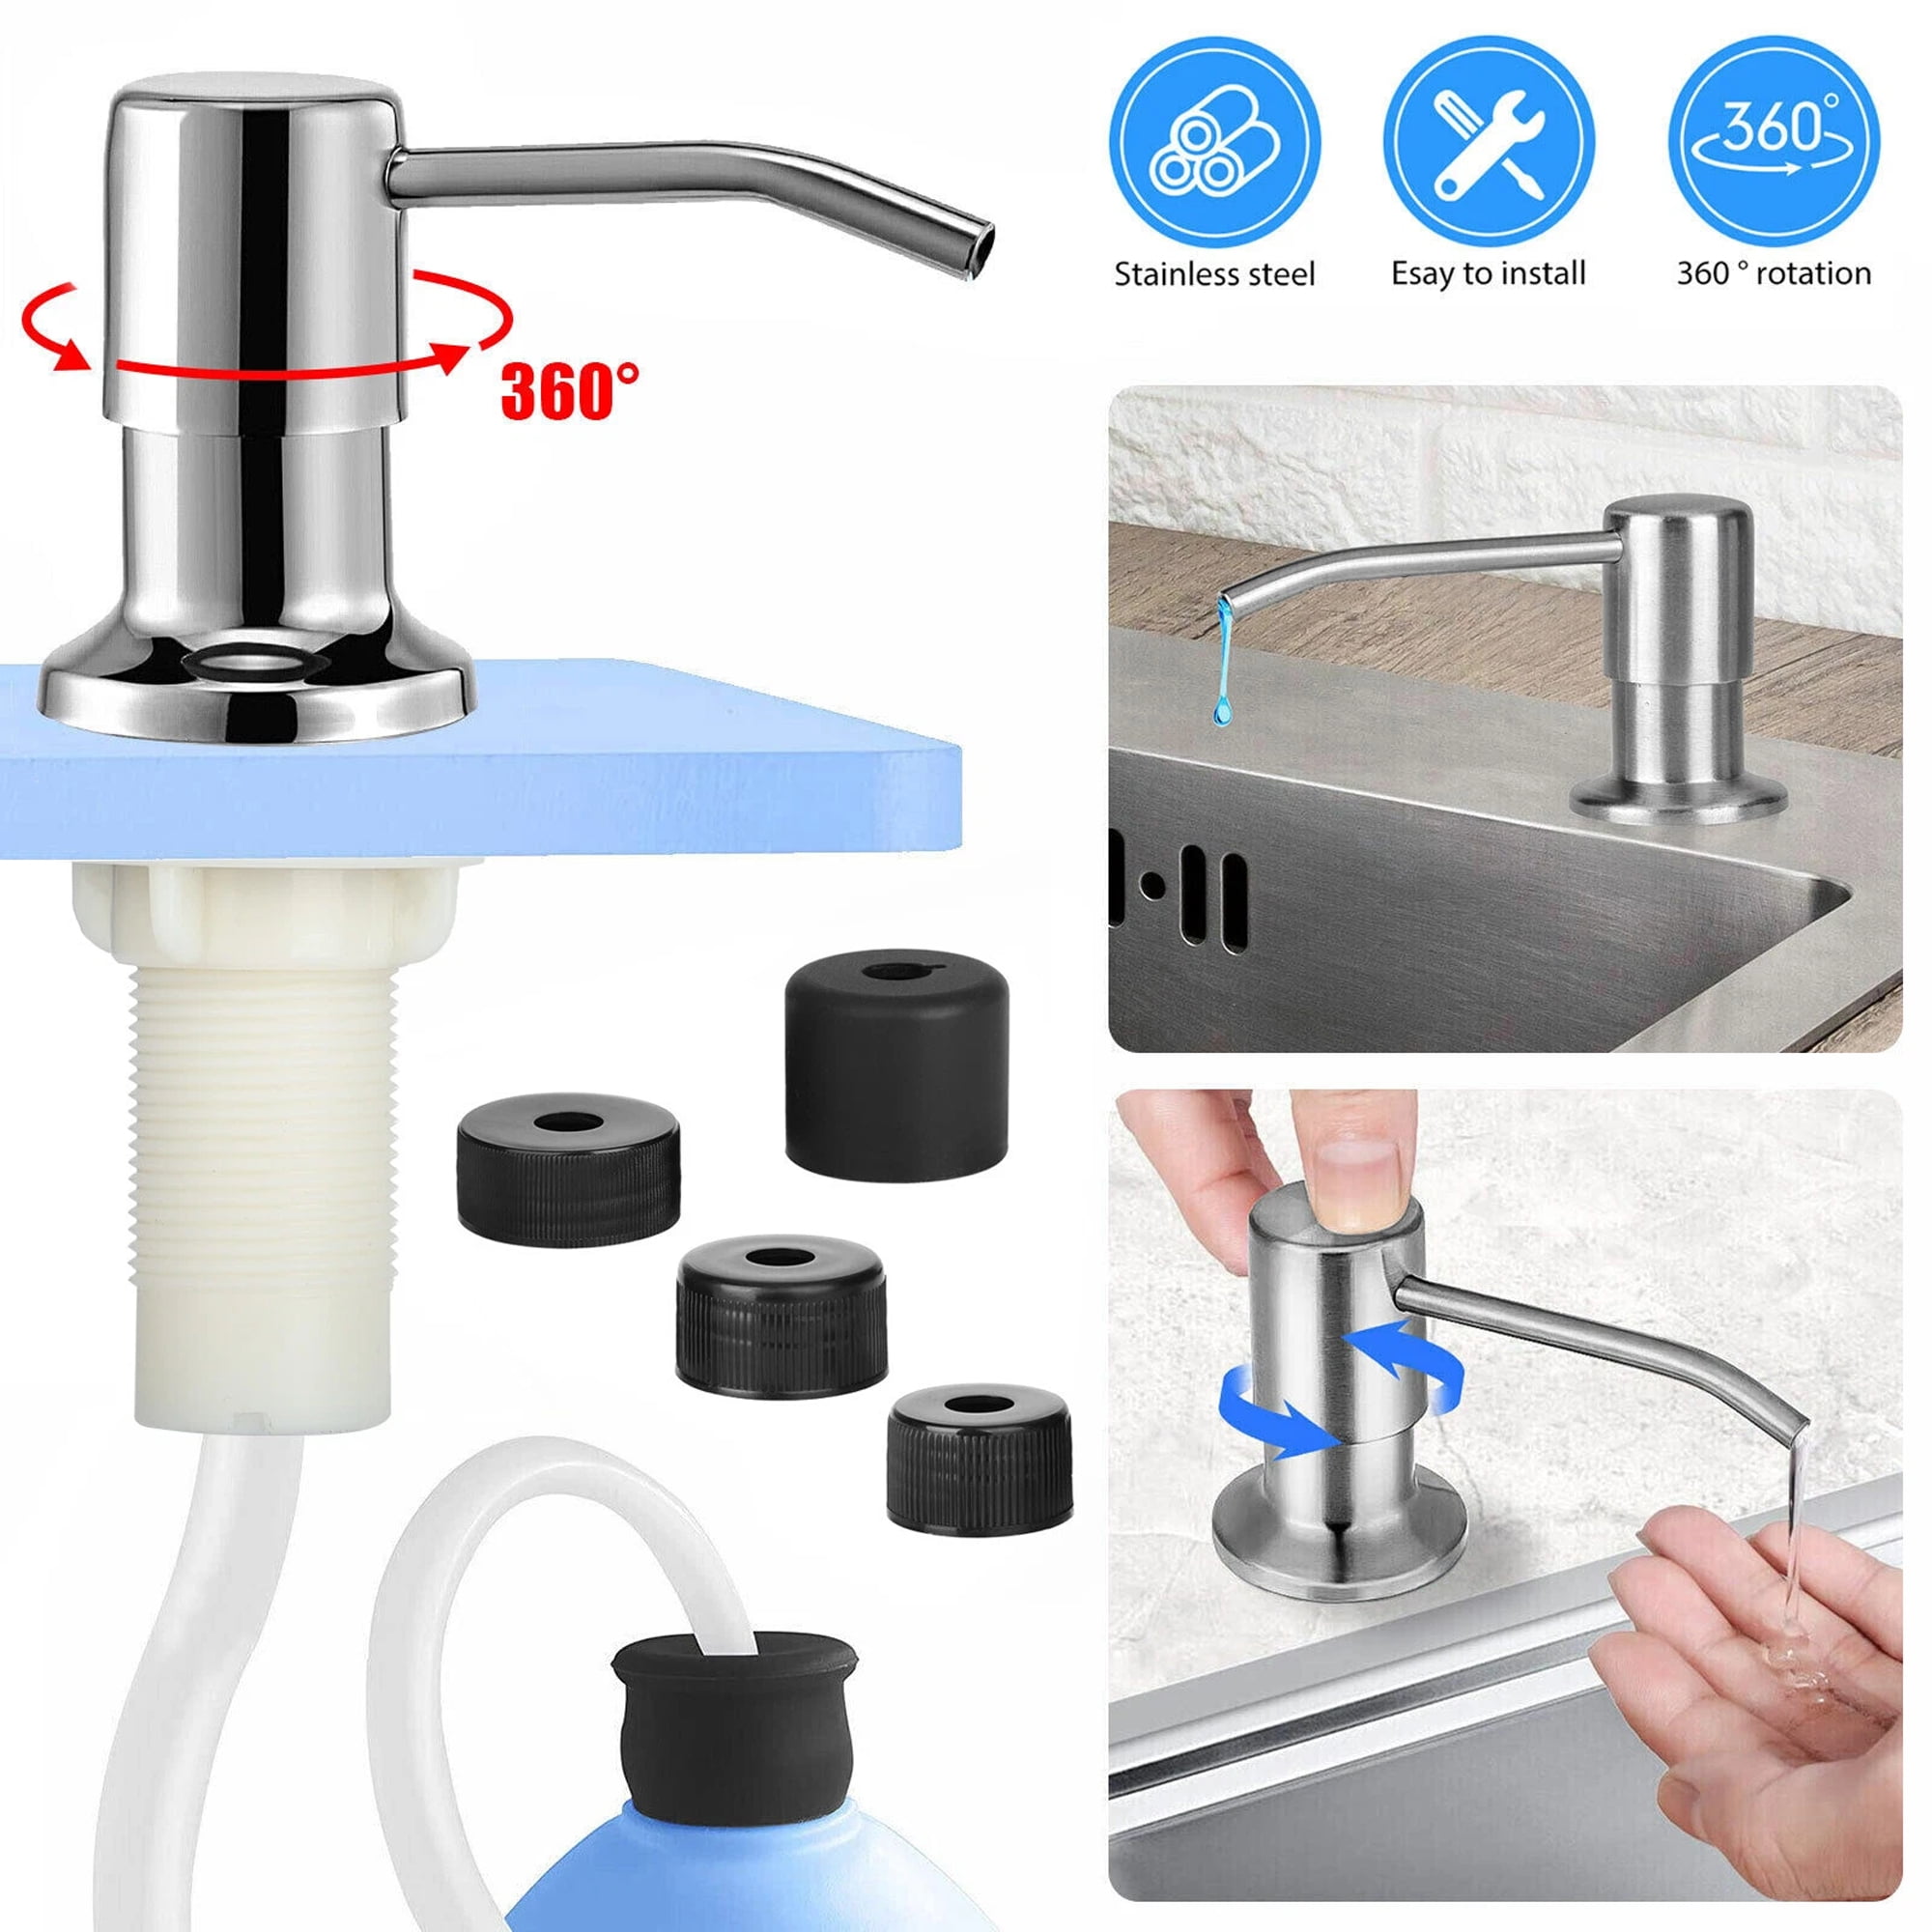
Start by selecting the right spot on your sink. Ensure there’s enough space for the dispenser and bottle. Most sinks have pre-drilled holes, but you can drill a hole if needed. Use a drill bit that matches the dispenser’s diameter. Insert the dispenser pump into the hole. Make sure the dispenser sits snugly. Tighten the mounting nut underneath the sink. This secures the dispenser in place.Securing The Soap Bottle
Locate the threaded opening beneath the sink. Attach the soap bottle to the dispenser’s threaded shank. Turn the bottle clockwise to secure it tightly. Ensure the connection is firm to prevent leaks. Fill the bottle with liquid soap. Avoid overfilling to prevent spills. Test the dispenser pump by pressing it a few times. Ensure the soap flows smoothly without any blockages. Your soap dispenser is now ready for use!Connecting The Dispenser
Connecting the dispenser involves attaching the soap container under the kitchen sink. Ensure the pump fits snugly through the sink hole. Secure the dispenser with the provided nuts, ensuring a firm hold.
Connecting the dispenser to your kitchen sink is a straightforward task. Begin by understanding the components and their functions. This ensures a smooth installation process. The connection involves attaching the pump and ensuring a proper fit. These steps are crucial for the dispenser to function effectively.Attaching The Pump
Locate the pump mechanism of your soap dispenser. This part usually comprises a nozzle and a tube. Insert the tube firmly into the soap bottle. Ensure it reaches the bottom for optimal use. Next, thread the pump onto the bottle. Twist until it feels secure. This prevents leaks and keeps the pump stable.Ensuring Proper Fit
Check the dispenser’s fit on your sink. A snug fit prevents wobbling and spills. Align the dispenser with the sink hole. Push the base down firmly. Confirm it sits flush with the sink surface. If needed, adjust the position slightly. This ensures the soap dispenses smoothly without obstruction.Testing The Dispenser
Testing the Dispenser Ensure your soap dispenser works smoothly by pressing the pump a few times. Check for steady soap flow. Adjust as needed for optimal performance.
Testing the soap dispenser is crucial to ensure it works perfectly. Proper testing eliminates future issues and guarantees a seamless experience in your kitchen. This process involves checking for leaks and adjusting the pump action. Follow these steps to get your dispenser ready for everyday use.Checking For Leaks
Inspect the area around the dispenser. Look for any signs of water or soap dripping. Leaks can cause damage and affect functionality. Tighten any loose connections. Use a wrench if needed. Run water through the dispenser to test it. Observe closely for any leaks. Ensure the seal is intact. Proper sealing prevents water seepage.Adjusting The Pump Action
Push the dispenser pump several times. Ensure smooth motion without obstruction. A jammed pump can lead to uneven soap flow. Check the pump mechanism inside. Make sure it’s aligned correctly. Adjust the pump tension if necessary. This helps in achieving a consistent soap output. Test the dispenser with soap. Ensure proper flow with each pump.Credit: www.facebook.com
Maintenance Tips
Proper maintenance of your kitchen soap dispenser ensures its longevity. Regular care keeps it functioning smoothly. Follow these simple tips to maintain your dispenser.
Cleaning The Dispenser
Keep the dispenser clean to avoid clogging. Use a damp cloth to wipe the pump. Remove any soap residue from the nozzle. For deeper cleaning, disassemble the pump. Soak it in warm water. This removes stubborn soap build-up. Ensure all parts are dry before reassembling.
Refilling The Soap Bottle
Refill the soap bottle regularly to avoid running out. Remove the pump and set it aside. Pour liquid soap into the bottle. Use a funnel to prevent spills. Fill the bottle three-quarters full. This allows space for the pump. Securely screw the pump back on. Test the dispenser to ensure it works properly.
Credit: www.walmart.com
Frequently Asked Questions
Can You Add A Soap Dispenser To A Kitchen Sink?
Yes, you can install a soap dispenser in a kitchen sink. Choose a compatible dispenser, drill a hole, and secure it. Follow manufacturer instructions for the best results. A built-in dispenser offers convenience and a streamlined look. Ensure proper maintenance for longevity.
How To Secure A Soap Dispenser To The Sink?
Drill a hole in the sink for the soap dispenser. Insert the dispenser pump into the hole. Secure it underneath with a washer and nut. Ensure it’s tight and stable. Fill the dispenser with soap and attach the pump head.
Test for proper operation.
How To Cut A Hole In A Countertop For A Soap Dispenser?
Mark the spot with masking tape. Drill a pilot hole using a drill bit. Use a hole saw to cut. Ensure the hole matches the soap dispenser’s size. Clean the edges for a smooth finish.
Is A Sink Soap Dispenser Worth It?
A sink soap dispenser adds convenience and reduces countertop clutter. It offers an easy way to access soap while enhancing kitchen aesthetics. With fewer refills needed, it saves time and effort. Investing in a quality dispenser can provide durability and long-term value, making it a worthwhile addition.
Conclusion
Installing a soap dispenser enhances your kitchen’s functionality. It keeps soap handy. The process is straightforward. With basic tools, anyone can do it. This project saves time and reduces clutter. Remember to measure accurately. Ensure you have the right tools.
Follow each step carefully for the best results. Enjoy your tidy and efficient kitchen. Feel proud of your new skill. It’s a small change with a big impact. Now, washing dishes is easier. Your kitchen will look more organized and modern.
Happy installing!

Similar Posts





















