How to Remove Kitchen Sink Faucet: Easy DIY Guide
Executive Chef & Lead Commercial Kitchen Specialist at Daily Kitchup Test Lab
Is your kitchen sink faucet dripping or looking outdated? Are you ready to tackle the task of replacing it yourself?
Removing a kitchen sink faucet might seem daunting, but with the right guidance, you can do it with confidence. Imagine the satisfaction of turning off that persistent drip or upgrading to a sleek new design. You’ll not only save money by doing it yourself but also gain a sense of accomplishment.
In this guide, we’ll walk you through each step, making it simple and straightforward. By the end, you’ll feel empowered to take on this project and transform your kitchen space. Curious to see how easy it can be? Let’s get started!
Gathering Necessary Tools
Before diving into the task of removing your kitchen sink faucet, it’s crucial to gather the necessary tools. Having everything you need at your fingertips not only saves time but also prevents unnecessary frustration during the process. You wouldn’t want to find yourself in the middle of the job, only to realize you’re missing a key tool. So, let’s ensure you’re fully equipped for this DIY adventure.
Basic Tools You’ll Need
Start with the essentials. A wrench is your best friend in this endeavor. An adjustable wrench will help you tackle various sizes of nuts and bolts. A screwdriver, preferably both Phillips and flathead, is indispensable for loosening screws. Additionally, having a pair of pliers can be handy for gripping and turning stubborn parts.
Specialized Tools For The Job
Some faucets may require a basin wrench, especially if the nuts are hard to reach. This tool is designed to maneuver in tight spaces, making it perfect for faucet removal. If your sink has been around for a while, a penetrating oil like WD-40 might be necessary to loosen rusted parts. These specialized tools can make a challenging task much more manageable.
Safety Equipment
Don’t overlook safety. Protect your hands with a pair of durable work gloves. If you’re working under the sink, a flashlight can ensure you see everything clearly. A towel or mat can help you avoid scratches on your sink and keep the area clean. These safety measures aren’t just about your protection—they’re also about maintaining your workspace.
Organizing Your Tools
Once you have your tools gathered, lay them out systematically. Consider using a small tool box or a tray to keep everything organized. This way, you’re not scrambling around to find what you need. It’s a small step that can save you a lot of hassle during the process.
Are you ready to take on this task with confidence? With your tools organized and ready, you’re one step closer to successfully removing your kitchen sink faucet. Remember, preparation is key to a smooth and efficient DIY project.
Credit: www.reddit.com
Preparing The Workspace
Begin by clearing the area under the sink for easy access. Organize necessary tools like a wrench and basin wrench. Ensure you have a towel or bucket handy to catch any water spills.
Preparing the workspace is crucial for a smooth faucet removal. A well-organized area minimizes stress and prevents accidents. Before beginning, ensure everything you need is ready. This will save time and make the task easier.Clearing The Sink Area
Start by removing all items around the sink. Clear away soap, sponges, and dish racks. This gives you ample space to work. Place a towel or mat on the counter. This protects surfaces and catches any small parts. Ensure the sink is clean and dry. A clutter-free area reduces distractions and accidents.Turning Off Water Supply
Locate the water supply valves under the sink. Turn both the hot and cold water valves clockwise. This stops water flow to the faucet. Double-check by turning on the faucet. Ensure no water comes out. If the valves are stuck, use a cloth for a better grip. This step prevents water spills during removal.Removing The Old Faucet
Removing the Old Faucet Detach the water supply lines using an adjustable wrench. Loosen the mounting nuts under the sink with a basin wrench. Lift the faucet out carefully, ensuring no parts are left behind.
Removing the old faucet from your kitchen sink might seem daunting, but with the right approach, it can be a straightforward task. Whether you’re upgrading to a sleek new model or simply need a change, removing the old faucet is the first critical step. Before you dive in, make sure you have the necessary tools ready, like a wrench and pliers. Remember, a little patience goes a long way in ensuring everything goes smoothly without unnecessary damage or frustration.Loosening The Nuts
Begin by locating the nuts securing the faucet to the sink. These are usually found underneath the sink, holding the faucet in place. Use a wrench to loosen these nuts, turning them counterclockwise. You might need to maneuver around pipes and other fixtures, so be patient. If the nuts are stubborn, a spritz of penetrating oil can help break the bond.Detaching Water Connections
Once the nuts are loose, it’s time to detach the water connections. Turn off the water supply by shutting off the valves under the sink. Next, disconnect the hoses attached to the faucet. These are usually held by nuts that can be loosened with pliers or a wrench. Be ready for some residual water to spill out when you disconnect them, so keep a towel handy to mop up any mess.Lifting Out The Faucet
With the water connections detached and nuts loosened, gently lift the faucet out of its position. It might need a little wiggle to break free if it’s been in place for a long time. If it’s stuck, check for any remaining attachments or residue that might be holding it down. Once free, lift it out carefully, ensuring not to scratch the sink surface. Do you feel a sense of accomplishment yet? Removing the old faucet is a job well done, paving the way for a new installation that will refresh your kitchen’s look and functionality.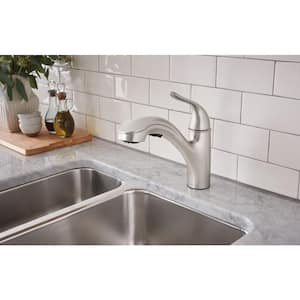
Credit: www.homedepot.com
Cleaning The Sink Surface
Removing a kitchen sink faucet involves cleaning the sink surface thoroughly. Begin by wiping away grime and residue using a mild cleaner. Ensure the area around the faucet is spotless to facilitate easy removal and prevent dirt from falling into the plumbing.
Cleaning the sink surface is a crucial step when removing a kitchen sink faucet. A clean surface ensures a smooth removal process and prevents grime buildup. Keeping your sink sparkling also maintains hygiene and aesthetic appeal in your kitchen. Below are some practical ways to clean the sink surface effectively.Use Mild Detergent And Warm Water
Mix mild detergent with warm water in a bowl. Dip a soft cloth in the solution. Gently scrub the sink surface. Focus on areas around the faucet base. Rinse with clean water and dry.Apply Baking Soda For Stubborn Stains
Sprinkle baking soda on tough stains. Use a damp sponge to scrub. Baking soda acts as a gentle abrasive. Rinse thoroughly with water.Vinegar Solution For Mineral Deposits
Mix equal parts vinegar and water in a spray bottle. Spray on areas with mineral deposits. Let it sit for 15 minutes. Wipe with a clean cloth.Polish With Olive Oil
After cleaning, apply a few drops of olive oil. Use a soft cloth to polish. This adds shine and protects the surface.Regular Maintenance Tips
Wipe the sink daily to prevent grime. Use a gentle cleaner weekly. Avoid harsh chemicals that can damage the surface. Regular cleaning keeps your kitchen sink looking new.Installing A New Faucet
Removing a kitchen sink faucet involves turning off the water supply first. Detach the water lines, then unscrew the mounting nuts beneath the sink. Carefully lift the faucet out of the sink to complete the removal process.
Installing a new kitchen sink faucet can refresh your kitchen. It also improves functionality. The process is straightforward with a few simple steps. Let’s explore the steps involved in installing a new faucet.Positioning The New Faucet
Place the faucet base on the sink’s pre-drilled holes. Ensure it’s correctly aligned. Check that the faucet’s gasket sits snugly on the surface. This prevents any leaks. Have someone hold the faucet in place from above. This makes it easier to secure it later.Connecting Water Lines
Attach the hot and cold water lines to the faucet. Use adjustable wrenches for a tight fit. Ensure the connections are secure to prevent leaks. Double-check each connection for any signs of looseness. Proper connection ensures a steady water flow.Securing The Faucet In Place
From beneath the sink, secure the faucet with nuts or screws. Use a basin wrench for better reach. Tighten the mounting nuts evenly. Make sure the faucet is firmly in place. Finally, check for any wobble or movement.Testing The Installation
Ensure the water supply is off before removing the kitchen sink faucet. Test the installation by turning the faucet handles to confirm no water flows. Check for leaks and secure connections to complete the process.
Testing the installation of your new kitchen sink faucet is crucial. This step ensures everything functions perfectly. After all your hard work, you want to be sure your efforts are successful. Below are key areas to focus on during testing.Checking For Leaks
Turn on the water supply. Check for any leaks around the faucet base. Look under the sink as well. Inspect all connections and joints. Tighten any loose fittings. Use a dry cloth to wipe areas prone to leaks. This helps spot any water quickly.Ensuring Proper Water Flow
Turn on the faucet. Check both hot and cold settings. Observe the water pressure. It should be consistent and strong. Low pressure may indicate a blockage. Check the aerator for any debris. Clean it if necessary. Make sure the water stops completely when turned off. This ensures the faucet is working efficiently.Troubleshooting Common Issues
You’ve decided to tackle the task of removing your kitchen sink faucet, perhaps due to a leak or just for an upgrade. But what do you do when you encounter unexpected issues? Knowing how to troubleshoot common problems can save you time and frustration. It’s all about understanding the little quirks of your plumbing system and being ready to fix them. Let’s dive into some typical challenges you might face and how to resolve them effectively.
Fixing Loose Connections
Loose connections are a common hurdle. Imagine you’re midway through the removal, and suddenly, the faucet feels like it’s about to fall off, or worse, water starts leaking unexpectedly. Tightening nuts and bolts can be the solution. Grab a wrench and check the connections under the sink. Sometimes, it’s just a matter of giving them a snug twist. If you’re unsure, try wiggling the faucet gently to pinpoint the loose joint.
Another tip: if the connections seem tight but the problem persists, inspect the washers. They can wear out over time, causing leaks even with tight connections. Replacing worn washers can make all the difference.
Resolving Low Water Pressure
Low water pressure can be a puzzling issue when removing a faucet. You’ve disconnected everything, but why is the water flow still weak? The culprit might be sediment build-up. Check the aerator at the faucet’s tip; debris often accumulates here. Cleaning it can restore the flow.
Another potential cause is a kink in the water supply hose. Straightening or replacing the hose can resolve this issue. If you’ve tried these and the pressure is still low, consider examining the valves under the sink. Ensure they’re fully open, as partial closure can restrict water flow.
As you tackle these issues, remember that patience and careful inspection are your best tools. Have you faced similar challenges while working on your kitchen faucet? Share your experiences or tips to help others navigate these common plumbing woes.

Credit: www.reddit.com
Frequently Asked Questions
How To Detach A Faucet From A Kitchen Sink?
Turn off the water supply. Use a wrench to unscrew the nuts beneath the sink. Disconnect water lines. Remove the faucet by lifting it from the sink. Ensure all connections are free before lifting. Clean the area for a new installation.
How To Loosen A Faucet Nut Under The Sink?
Use a basin wrench to loosen the faucet nut under the sink. Slide it onto the nut for grip. Turn the wrench counterclockwise to loosen the nut effectively. Ensure the area is dry and clear for better access. Applying penetrating oil can help if the nut is stuck.
How To Remove A Kitchen Faucet Handle With No Visible Screws?
To remove a kitchen faucet handle with no visible screws, first locate the hidden set screw under a decorative cap. Use a flathead screwdriver to gently pry off the cap. Then, use an Allen wrench to loosen the set screw, allowing you to remove the handle easily.
Is It Hard To Change Out A Kitchen Sink Faucet?
Changing a kitchen sink faucet is moderately easy for those with basic plumbing skills. Gather tools like a wrench, screwdriver, and plumber’s tape. Follow instructions carefully to avoid leaks. Seek professional help if unsure. Proper preparation and patience ensure a smooth installation process.
Conclusion
Removing a kitchen sink faucet feels intimidating but is quite manageable. Start by gathering the necessary tools. Follow each step carefully to avoid mistakes. Always turn off the water supply first. Double-check connections to prevent leaks later. Remember, patience is key during this process.
Take your time and stay organized. Clean the area well when finished. This ensures a tidy and functional kitchen. Now, you can enjoy your newly installed faucet with ease. Feel proud of your handy work! Don’t forget regular maintenance to keep your faucet working perfectly.

Similar Posts





















