How to Replace Kitchen Sink Drain Pipe: DIY Guide
Tackling a leaky kitchen sink drain pipe can feel like a daunting task, but what if you could handle it yourself with ease? Imagine saving money, gaining a new skill, and enjoying the satisfaction of a job well done.
You’re about to discover a straightforward, step-by-step guide that will empower you to replace your kitchen sink drain pipe without breaking a sweat. Whether you’re dealing with a drip or just want to upgrade your plumbing, knowing how to replace your drain pipe can save you from future headaches.
Keep reading to transform this often-overlooked chore into a rewarding DIY project that boosts your confidence and keeps your kitchen running smoothly. Dive in, and let’s get started on making your kitchen a better place!

Credit: www.youtube.com
Tools And Materials Needed
Gather a pipe wrench, plumber’s tape, and a bucket. Ensure you have PVC pipe, fittings, and a hacksaw. These tools and materials will help you efficiently replace your kitchen sink drain pipe.
Replacing a kitchen sink drain pipe might seem daunting, but with the right tools and materials, it becomes manageable. This process requires a few essential items, ensuring efficiency and safety. Preparing these tools in advance makes the task smoother and less stressful. Below, we outline the necessary tools and materials, helping you get ready for the task ahead.Tools Needed
| Tool | Description |
|---|---|
| Adjustable Wrench | Loosens and tightens nuts easily. |
| Pliers | Grips and twists pipes and connections. |
| Pipe Cutter | Cuts pipes to the required length. |
| Plumber’s Tape | Seals connections to prevent leaks. |
| Buckets | Catches water during disassembly. |
Materials Needed
- Replacement Drain Pipe: Choose the correct size and type.
- Rubber Washers: Ensure a tight, leak-free seal.
- Pipe Sealant: Provides extra protection against leaks.
- Cleaning Cloths: Keeps the area clean and dry.
Safety Precautions
Ensure the water supply is turned off before beginning. Wear gloves to protect your hands from debris. Use safety goggles to shield eyes from potential splashes or falling particles.
Replacing a kitchen sink drain pipe can be a straightforward task, but safety should always be your top priority. Taking the right precautions not only ensures your well-being but also helps prevent damage to your plumbing and home. Before diving into the project, let’s explore some essential safety guidelines to keep in mind.Wear Protective Gear
Equip yourself with gloves to protect your hands from sharp edges and potentially harmful substances. Safety goggles are also vital to shield your eyes from splashes and debris. It’s easy to underestimate the importance of protective gear, but it can make all the difference in staying safe.Shut Off The Water Supply
Ensure the water supply to your kitchen sink is completely turned off. This prevents unexpected leaks or water damage while you work. Double-checking the valves might seem like a small step, but it helps avoid a messy surprise.Have Adequate Lighting
Good lighting is crucial. A well-lit workspace allows you to see small parts clearly and reduces the risk of mistakes. Consider using a portable lamp or flashlight if the area under your sink is dimly lit.Use The Right Tools
Having the correct tools at hand makes the job smoother and safer. Gather all necessary equipment, including wrenches and pliers, before starting. Using the wrong tool can lead to injury or damage, so be sure your tools are appropriate for the task.Check For Leaks
After installation, be vigilant about checking for leaks. Run water through the new drain pipe to ensure it’s securely fitted and functioning properly. This step is essential to confirm your work was successful and to prevent future water issues. By following these safety precautions, you can tackle your kitchen sink drain pipe replacement with confidence. Remember, a little preparation goes a long way in ensuring a successful and safe DIY project. Have you ever encountered a plumbing mishap? What safety measures did you find most helpful?Preparing The Workspace
Clear the area under the sink for easy access. Gather necessary tools like a wrench and bucket. Ensure the workspace is dry and well-lit to prevent accidents.
Replacing a kitchen sink drain pipe requires careful preparation. Ensuring the workspace is ready can make the process smoother and safer. Begin by clearing the area under the sink. This provides easy access to the drain pipe and prevents damage to items stored below. Organize tools and materials within reach to avoid unnecessary movements during the replacement.Clear The Area Under The Sink
Remove all items stored under the sink. This includes cleaning supplies, towels, and any other objects. Clearing the space ensures you have full access to the drain pipe. It also prevents accidental damage to your belongings.Gather Necessary Tools
Have all tools and materials ready before starting. This includes a wrench, bucket, and replacement pipes. Ensure everything is within arm’s reach to save time. Prepare a flashlight if the space is dimly lit.Protect The Flooring
Place a towel or mat on the floor. This protects the flooring from water spills or dropped tools. It also creates a comfortable surface for kneeling.Ensure Adequate Lighting
Good lighting is essential for visibility. Use a portable lamp or flashlight if needed. Proper lighting helps identify leaks and ensures accurate work.Turn Off Water Supply
Locate the water valves and turn them off. This prevents water from flowing while replacing the pipe. It also reduces the risk of flooding during the process.Removing The Old Drain Pipe
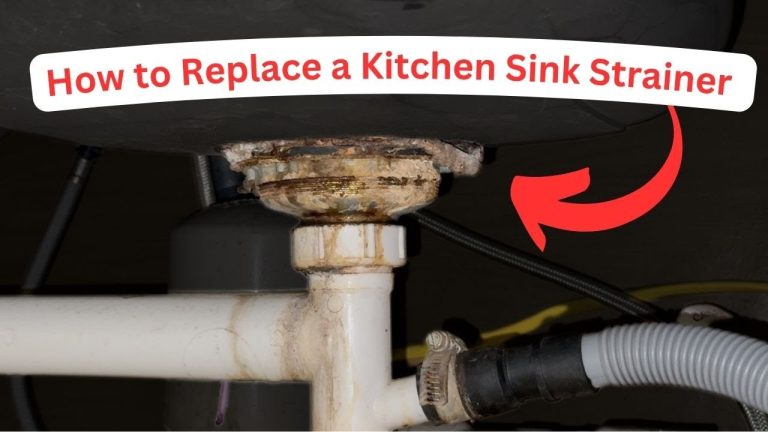
Removing the old drain pipe is the first step in replacing your kitchen sink drain. Loosen the slip nuts and gently detach the pipe. Ensure all water is drained out before proceeding to install the new one.
Removing the old drain pipe can seem daunting at first. With the right steps, it becomes manageable. Begin by preparing your workspace. Clear the area under the sink for easy access. Ensure you have the right tools. A wrench, pliers, and a bucket are essential.Turning Off Water Supply
Before starting, turn off the water supply. Locate the valve under the sink. Turn it clockwise to close it. This prevents any leaks or spills while working. Ensure no water is left in the pipes. Turn on the faucet to drain any remaining water.Detaching Pipes And Fittings
Begin by loosening the slip nuts. Use a wrench for this task. Carefully detach the pipes from the fittings. Place a bucket underneath to catch any residual water. Remove the old drain pipe slowly. Check for any damage in the surrounding pipes. If any, consider replacing them too.Selecting The Right Replacement Parts
Choosing the right parts ensures smooth kitchen sink drain pipe replacement. Match the size and material for compatibility. Check for durable options to prevent future leaks and save on repairs.
Selecting the right replacement parts for your kitchen sink drain pipe is vital. This ensures a smooth installation and prevents future leaks or issues. With various types of drain pipes available, choosing the correct parts can be overwhelming. But don’t worry! Understanding the basics will make your task easier and more efficient.Types Of Drain Pipes
When replacing a kitchen sink drain pipe, material choice is crucial. Common types include PVC, ABS, and metal pipes. PVC pipes are lightweight and affordable. They’re ideal for most kitchen sinks. ABS pipes are similar but slightly stronger. They’re suitable for areas with extreme temperatures. Metal pipes, like stainless steel, offer durability. They resist corrosion and last longer. Each material has its pros and cons. Consider your kitchen needs and local building codes.Choosing Compatible Fittings
Fittings ensure all parts of the drain system connect properly. Check the pipe diameter before purchasing. Common sizes are 1.5 inches and 2 inches. Purchase fittings that match your pipe size. Compression fittings are popular for their ease of use. They require no special tools. Slip-joint fittings provide a tight seal and are easy to adjust. Look for high-quality materials to avoid leaks. Also, ensure fittings are compatible with the chosen pipe type. Proper fittings prevent leaks and extend the life of your drain system. Remember, careful selection of parts saves time and effort. It makes your kitchen sink drain replacement a smooth process.
Credit: www.tiktok.com
Installing The New Drain Pipe
Replacing a kitchen sink drain pipe involves removing the old pipe and installing a new one securely. Begin by disconnecting the old pipe, ensuring all water is turned off. Attach the new drain pipe, checking for leaks, and secure connections tightly.
Installing the new drain pipe is a straightforward process. It requires precision and patience. A tight fit ensures no leaks. Begin by gathering all necessary tools. You’ll need a wrench, plumber’s tape, and the new pipe. This preparation makes the task smoother.Attaching Pipe To Sink
Secure the new pipe to the sink’s outlet. Ensure the rubber gasket is in place. This prevents water leakage. Tighten the pipe using a wrench. Make sure it’s snug but not too tight. Over-tightening can damage the threads. Use plumber’s tape around the joints. This adds an extra layer of protection.Connecting To Wall Drain
Position the pipe towards the wall drain. Align the pipe and wall connection. This alignment is crucial for proper flow. Insert the pipe into the wall drain opening. Use a wrench to tighten the connection. Check for any gaps. Apply plumber’s tape if needed. This ensures a watertight seal. Test the setup by running water. Look for leaks and make adjustments if necessary. This method ensures a secure drain pipe installation.Testing For Leaks
Testing for leaks is crucial after replacing a kitchen sink drain pipe. Ensure all connections are tight. Run water and check for any drips or moisture around the joints. This helps in identifying potential issues early, preventing water damage and ensuring a smooth functioning sink.
Testing for leaks is a crucial step after replacing your kitchen sink drain pipe. Ensuring a watertight seal prevents future issues. This step saves you from potential water damage and costly repairs. Let’s explore how to conduct thorough leak tests.Running Water Test
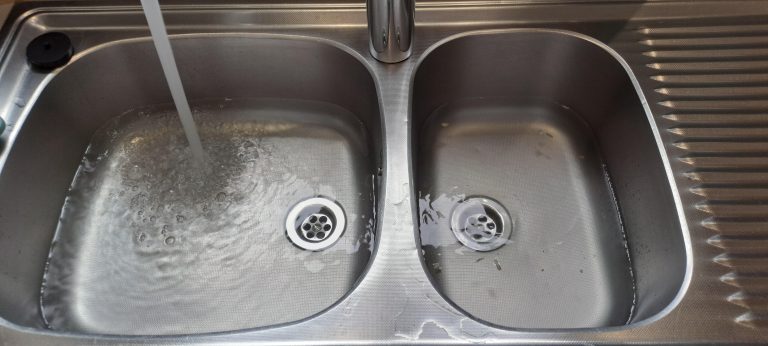
Begin by running water through the sink. Turn on the faucet fully. Observe the drain area carefully. Look for any signs of dripping water. Ensure water flows smoothly through the pipe. This test identifies obvious leaks.Checking And Tightening Connections
Inspect each pipe connection closely. Feel around joints for moisture. Use a wrench to tighten loose connections. Ensure all fittings are secure. Check washers and seals for damage. Replace if necessary. Proper tightening prevents leaks.
Credit: www.tiktok.com
Maintaining Your Drain Pipe
Replacing a kitchen sink drain pipe involves removing the old pipe, ensuring all parts are clean, and installing the new one securely. Proper alignment and sealing of the connections prevent leaks and ensure smooth drainage. Regular checks help maintain the system’s efficiency and prolong its lifespan.
Maintaining your kitchen sink drain pipe is crucial for ensuring the longevity and efficiency of your plumbing system. A well-maintained drain pipe prevents clogs, leaks, and unpleasant odors. But how can you keep your drain pipe in top-notch condition? Let’s explore some practical tips.Routine Cleaning Tips
Regular cleaning helps prevent buildup that can lead to blockages. Use a mixture of baking soda and vinegar to naturally clean your pipes. Simply pour half a cup of baking soda followed by half a cup of vinegar down the drain, let it sit for about 15 minutes, then flush with hot water. Consider using a drain snake occasionally to remove any stubborn clogs. It’s an easy tool to use and can reach deep into your pipes. I once discovered a surprisingly large clump of hair and grease using a snake, saving a costly plumber visit. Also, avoid using harsh chemical cleaners as they can damage pipes over time. Natural solutions are not only effective but also eco-friendly.Preventing Future Issues
Prevention is better than repair when it comes to drain pipes. Install a drain strainer to catch food particles and debris before they enter the pipe. This simple addition can significantly reduce the chances of clogs. Be mindful of what you pour down your sink. Grease, coffee grounds, and large food scraps should never go down the drain. These items are major culprits in causing blockages. Regularly check for leaks or signs of wear and tear. Even a small drip can lead to bigger problems if not addressed promptly. Is there a slight dampness under your sink that you’ve been ignoring? By incorporating these tips into your routine, you can maintain a healthy and functional kitchen sink drain pipe, ensuring it serves you well for years to come.Frequently Asked Questions
How Much Does It Cost To Replace A Kitchen Sink Drain Pipe?
Replacing a kitchen sink drain pipe typically costs between $100 and $350. This includes labor and materials. Prices can vary based on location, pipe material, and complexity of the installation. It’s advisable to get a quote from a local plumber for an accurate estimate.
Can Kitchen Sink Drains Be Replaced?
Yes, kitchen sink drains can be replaced. Ensure compatibility with your sink and plumbing system. Consider professional help for installation. Proper replacement can prevent leaks and improve drainage efficiency. Regular maintenance extends the lifespan of your new drain.
What Type Of Pipe Is Used For Kitchen Sink Drain?
PVC or ABS pipes are commonly used for kitchen sink drains. These materials are durable, resistant to corrosion, and easy to install. Ensure proper fittings and seals for optimal drainage performance. Regular maintenance helps prevent clogs and ensures efficient water flow in the kitchen sink system.
Is It Easy To Change Sink Pipes?
Changing sink pipes is moderately easy for those with basic plumbing skills. Gather essential tools and materials first. Ensure you turn off the water supply. Carefully follow step-by-step guides or tutorials. If unsure, consult a professional plumber to avoid potential issues.
Conclusion
Replacing your kitchen sink drain pipe is easier than it seems. Just follow these steps carefully. Gather your tools and materials beforehand. Remove the old pipe and clean the area. Attach the new pipe securely. Check for any leaks and tighten connections.
Regular maintenance helps prevent future problems. A functional drain pipe ensures a clean, efficient kitchen. Enjoy your fresh setup without plumbing worries. You did it yourself, saving money and time. Keep this guide handy for future reference. Share your success with family and friends.
Feel proud of your DIY achievement!