How to Replace Kitchen Sink Shut off Valve: DIY Guide
Are you tired of dealing with a leaky kitchen sink shut-off valve? You’re not alone.
Many homeowners face this common yet frustrating issue. But here’s the good news: you can tackle this problem yourself and save money on costly plumber visits. Imagine the satisfaction of knowing you’ve solved a plumbing issue on your own, with just a few simple tools and steps.
In this guide, you’ll learn exactly how to replace your kitchen sink shut-off valve quickly and efficiently. By the end of this article, you’ll be equipped with the knowledge and confidence to fix your sink like a pro. So, why wait? Dive in and discover how easy it can be to take control of your plumbing woes.

Credit: www.youtube.com
Tools And Materials Needed
Gather tools like an adjustable wrench and a screwdriver. Have plumber’s tape and replacement valve ready. Ensure a bucket and towels are nearby for any water spills.
When replacing a kitchen sink shut-off valve, having the right tools is essential. This ensures a smooth process and reduces potential issues. Gathering the necessary tools and materials beforehand saves time.Tools Required For Replacement
To replace the shut-off valve, you need specific tools. These tools help you work efficiently. Here’s a list of what you will need:- Adjustable Wrench:Useful for loosening and tightening nuts.
- Pliers:Helps in gripping and turning fittings.
- Pipe Cutter:Needed if you must cut the pipe.
- Bucket:Catches any water spill during the process.
- Old Towel:Keeps the area dry and clean.
Materials Needed For Replacement
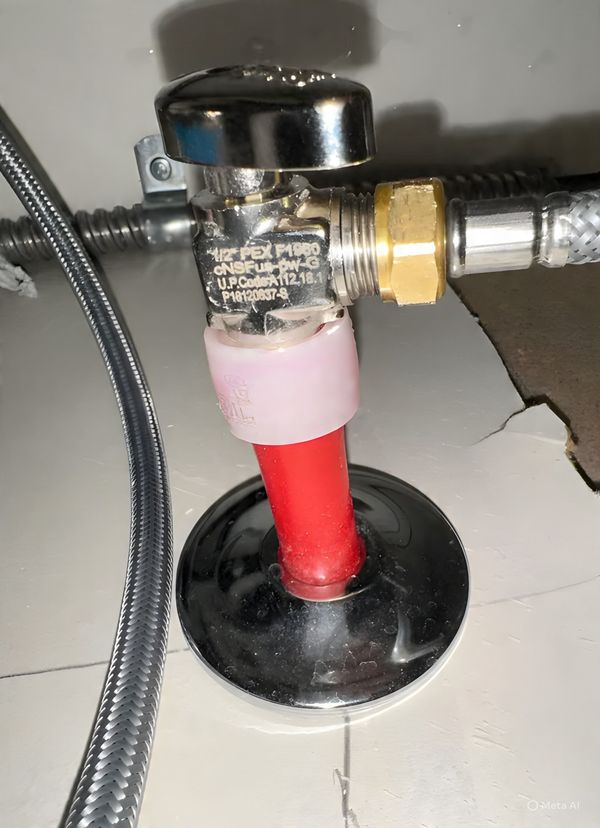
Having the right materials is equally important. These materials ensure the new valve fits and functions properly:- New Shut-off Valve:Purchase one that fits your existing plumbing.
- Plumber’s Tape:Ensures a watertight seal on threaded connections.
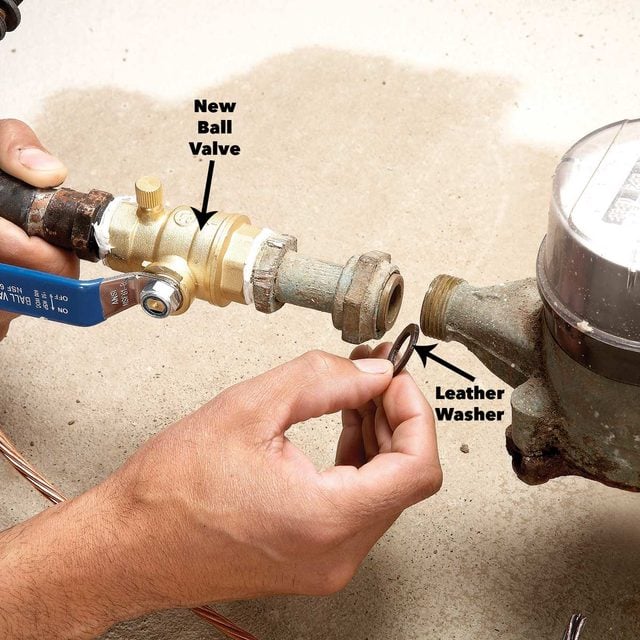
- Replacement Washers:Useful for preventing leaks.
Credit: www.facebook.com
Preparing For The Replacement
Preparing for the Replacement Gather necessary tools like a wrench and bucket. Turn off the water supply to avoid leaks.
Replacing a kitchen sink shut-off valve is a straightforward task. Proper preparation is crucial for a smooth replacement process. Follow these steps to ensure you’re ready.Turn Off Water Supply
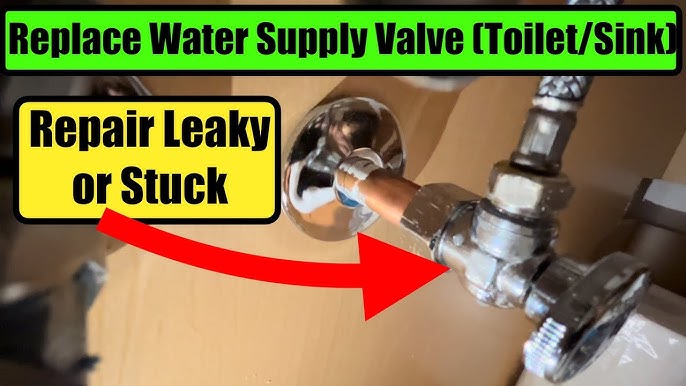
Start by turning off the main water supply. This step prevents leaks and water damage. Locate the valve nearest to your kitchen. Turn it clockwise until it stops. Test the faucets to confirm the water is off.Clear The Area
Make space under the sink for easy access. Remove any items stored there. Use a flashlight to see clearly. Ensure the area is dry and clean. This makes the task easier and safer.Removing The Old Shut Off Valve
Removing the old shut off valve from your kitchen sink might seem daunting at first, but with the right steps, it’s a task you can confidently tackle. Imagine the satisfaction of fixing something yourself and the money you’ll save by avoiding a plumber’s visit. Dive into the process with patience and precision, and you’ll have your kitchen sink running smoothly in no time.
Loosen The Valve
Start by ensuring the water supply is completely turned off. You don’t want a surprise spray of water while you’re working. Use an adjustable wrench to gently loosen the nuts securing the valve in place. Sometimes, these nuts can be stubborn, especially if they haven’t been touched in years. A little penetrating oil can work wonders in easing them up.
Detach The Water Line
Once the valve is loosened, it’s time to detach the water line. Carefully unscrew the nut connecting the water line to the valve. Keep a towel handy to catch any residual water that might drip out. As you remove the line, take note of how it’s attached—this will make reassembly much easier. Have you ever considered how much simpler tasks become when you break them down into smaller steps?
Installing The New Shut Off Valve
Replacing a kitchen sink shut off valve ensures smooth water control. Begin by turning off the main water supply. Remove the old valve using a wrench, then install the new one securely.
Installing the New Shut Off Valve requires precision and patience. This step ensures your kitchen sink functions smoothly without leaks. Proper installation prevents future plumbing issues and keeps your kitchen running efficiently. Follow these steps to install the new valve correctly.Connect The Water Line
First, attach the water line to the new shut-off valve. Ensure the threads align perfectly. Tighten the connection using a wrench. Do not overtighten; it could damage the valve or line. Check the seal for any gaps. This prevents leaks and secures the connection.Secure The Valve In Place
Position the valve correctly on the pipe. Use mounting brackets if needed. Ensure the valve is stable and does not wobble. Tighten any screws or clamps securely. Test the valve to ensure it’s firmly attached. A secure valve prevents unwanted movement and ensures reliable performance.Checking For Leaks
Inspect connections for leaks after installing the shut-off valve. Tighten any loose fittings with a wrench. Ensure the valve is properly closed and dry. Test with water flow to confirm no drips occur.
Checking for leaks is essential after installing a new kitchen sink shut-off valve. Ensuring there are no leaks prevents water damage and maintains plumbing efficiency. After completing the installation, take a moment to inspect for any leaks. This step will give you peace of mind and confirm a successful valve replacement.Turn On Water Supply
First, turn on the water supply at the main valve. Do this slowly to avoid sudden pressure surges. Allow the water to flow gently. This will help identify any immediate leaks. Listen for unusual sounds indicating a problem.Inspect For Leaks
Examine the area around the new shut-off valve. Use a dry cloth to check for moisture. Pay close attention to the connections and joints. Feel for any dampness or wet spots. If you detect a leak, tighten the connections slightly. Avoid over-tightening as it can damage threads. Recheck the area for any signs of leaking. If leaks persist, the valve may need reseating or further inspection. Continue monitoring for a few minutes. Watch the entire area around the valve. Ensure no water drips or collects anywhere. A successful check means your new shut-off valve is secure and leak-free.Final Adjustments
After installing a new kitchen sink shut-off valve, final adjustments ensure everything works seamlessly. These tweaks refine the installation, enhancing its functionality and longevity. Follow these simple steps to perfect the setup.
Tighten Connections
Begin by checking all connections. Use a wrench to gently tighten each fitting. Avoid over-tightening to prevent damage. Ensure every part is securely fastened. Properly tightened connections prevent leaks.
Ensure Proper Function
Test the valve by turning it on and off. Check for smooth operation. Listen for any unusual sounds. Look for leaks around the valve. Confirm water flows correctly without obstruction.
Inspect the surrounding area for signs of moisture. A dry surface indicates a successful installation. Adjust any loose parts immediately. Regular checks keep your plumbing in top shape.
Credit: www.familyhandyman.com
Frequently Asked Questions
How Do I Replace My Sink Shut-off Valve?
Turn off the main water supply. Drain remaining water from the pipes. Unscrew the old valve with a wrench. Install the new shut-off valve securely. Ensure all connections are tight. Restore the water supply, and check for leaks. Always use appropriate tools and safety measures during the replacement process.
How Much Does A Plumber Charge To Replace A Shut-off Valve Under A Sink?
Plumbers typically charge between $100 to $250 to replace a shut-off valve under a sink. Costs may vary based on location, labor, and materials. Always request quotes from multiple professionals for the best price. Ensure the plumber is licensed and experienced for optimal service.
How To Fix A Leaky Shut-off Valve Under A Kitchen Sink?
Turn off water supply. Use a wrench to tighten packing nut. Replace washer if leak persists. Check connections.
Can You Install Shut-off Valves Yourself?
Yes, you can install shut-off valves yourself with basic plumbing skills. Ensure you have the right tools and follow instructions. Turn off the water supply before starting the installation. If unsure, consider hiring a professional plumber to avoid potential mistakes.
Proper installation prevents leaks and ensures efficient water control.
Conclusion
Replacing your kitchen sink shut-off valve is easy with some care. Start with turning off the main water supply. Gather the needed tools. Follow step-by-step instructions for safety. Check for leaks after installation. A smooth process ensures your plumbing works well.
Regular checks prevent future issues. Enjoy a leak-free kitchen space. A simple fix can save you from potential water damage. Always prioritize safety and quality in home repairs. You’re now equipped to handle this task confidently. Keep learning and enhancing your DIY skills.
Your kitchen will thank you!