How to Stain Kitchen Cabinets: Transform Your Space
Transforming the look of your kitchen doesn’t have to break the bank. If you’re eyeing a fresh, new vibe for your cooking space, learning how to stain kitchen cabinets might just be your golden ticket.
Imagine walking into your kitchen each morning and being greeted by the rich, warm tones of beautifully stained wood. It’s not just a visual upgrade; it’s a mood enhancer, too. You might be wondering if this is a task you can tackle yourself.
The answer is a resounding yes! With the right guidance, you can achieve professional-looking results that will leave your friends and family in awe. Plus, the satisfaction of admiring your handiwork every day is unbeatable. What if you could breathe new life into your kitchen without the hefty price tag of a remodel? In this guide, we’ll walk you through every step, providing tips and tricks that make the process as smooth as possible. Get ready to roll up your sleeves and discover how a simple stain can redefine your kitchen cabinets and, in turn, your entire home.
Choosing The Right Stain
Staining kitchen cabinets can transform your space. Choosing the right stain is crucial for achieving the desired look. The stain you select impacts the final appearance and durability. Understanding different types and colors helps in making an informed choice.
Types Of Stains
There are various types of stains available. Each offers unique characteristics. Oil-based stains penetrate deeply and enhance wood grain. They are durable and resistant to wear. Water-based stains are eco-friendly and dry quickly. They provide a lighter finish compared to oil-based options. Gel stains offer a thicker consistency, ideal for vertical surfaces. They are perfect for achieving a uniform color.
Color Selection Tips
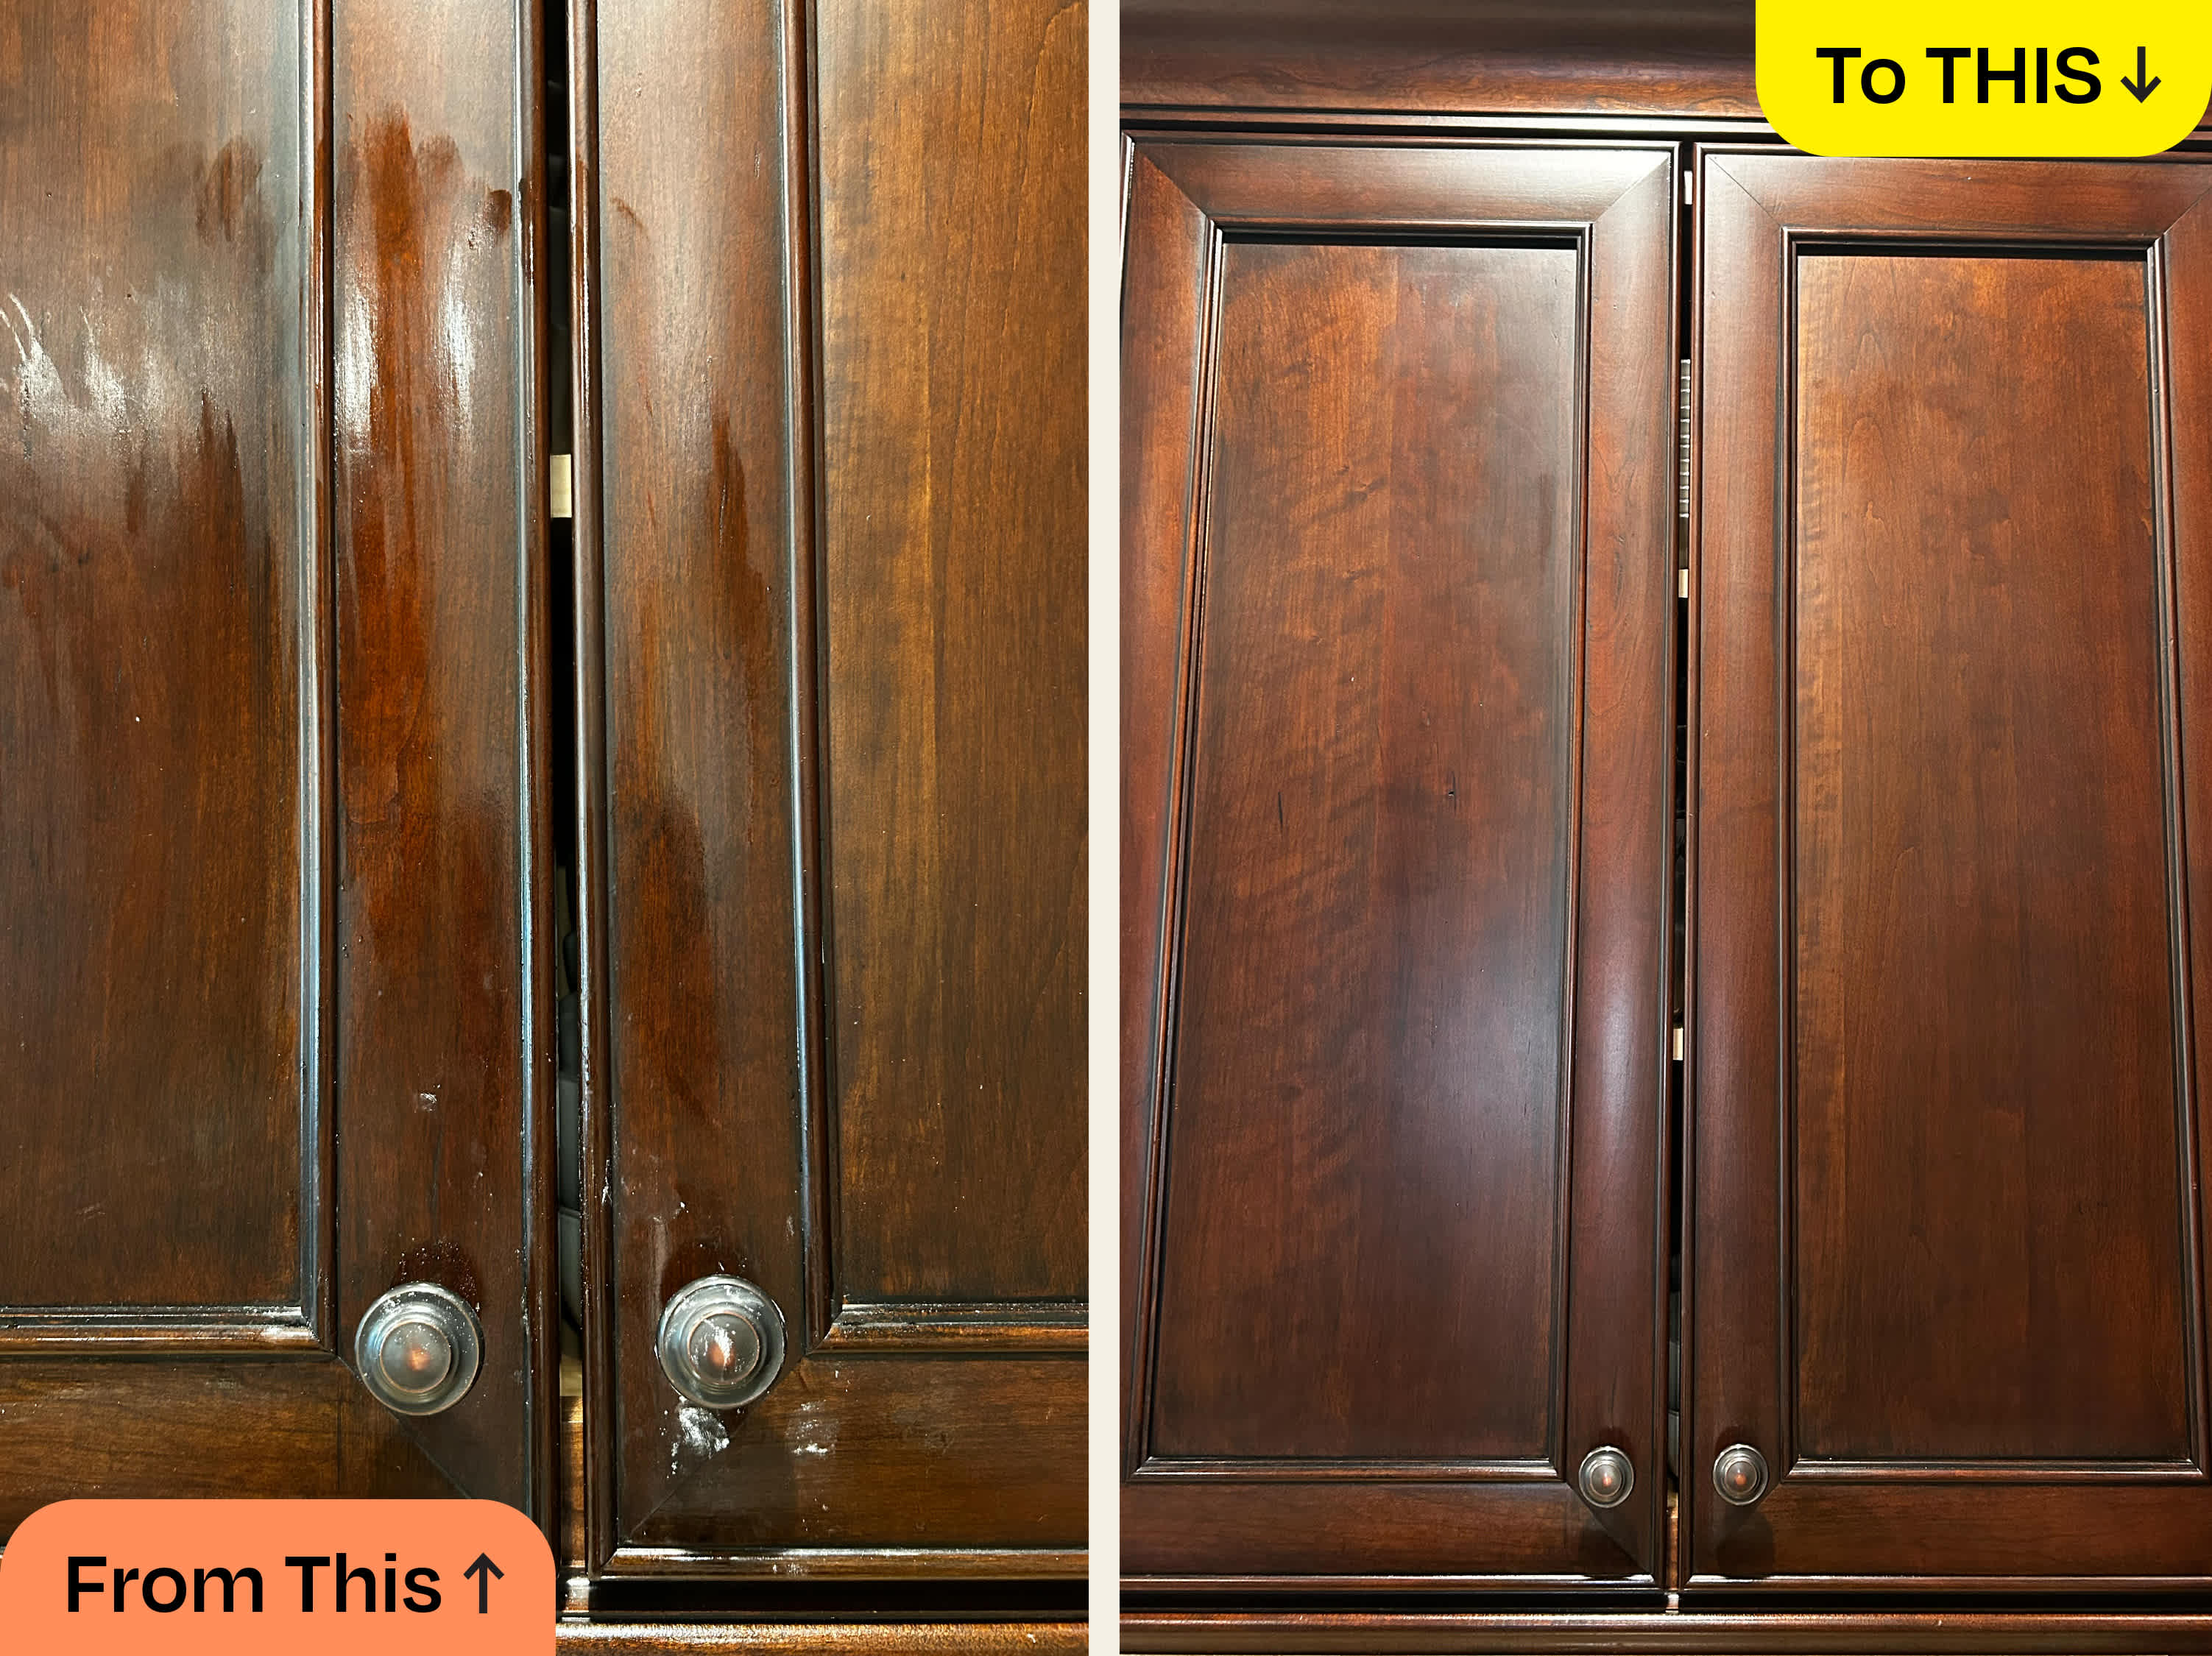
Choosing the right color for your cabinets matters. Consider the overall theme of your kitchen. Light stains create a spacious feel. They are ideal for modern kitchens with neutral tones. Dark stains add warmth and richness. They suit traditional settings and add depth. Test samples before making a final decision. Observe how different colors look under varying light conditions.
Credit: www.thekitchn.com
Gathering Necessary Tools
Gathering the necessary tools is crucial to stain kitchen cabinets effectively. Without the right equipment, achieving a smooth and professional finish becomes difficult. Proper preparation can save time and effort in the staining process.
Essential Equipment
Start with quality sandpaper to smooth the cabinet surfaces. Use fine-grit sandpaper for a smooth finish. Purchase a good paintbrush for even application. Opt for a brush made specifically for stain. This ensures better coverage and less streaking.
A clean cloth is vital to wipe excess stain. Choose lint-free cloths to avoid residue. Purchase a wood conditioner to prepare the surface. It helps in achieving an even stain absorption.
Keep a mixing stick handy for stirring the stain. This ensures consistency in color. Use painter’s tape to protect areas not to be stained. It prevents accidental smudges and ensures clean lines.
Safety Gear
Wearing safety gear is vital for protection. Use protective gloves to keep hands safe from chemicals. Gloves also prevent stains on skin.
A mask is essential to avoid inhaling fumes. Choose one designed for painting and staining projects. Goggles protect eyes from splashes and dust. Ensure they fit well for maximum safety.
Ventilation is crucial while staining. Use fans to circulate air. Open windows for fresh air exchange. This keeps the space safe and reduces fumes.
Preparing The Cabinets
Preparing the cabinets involves cleaning and sanding surfaces thoroughly. Remove any dust and grease for a smooth finish. Use protective gear to ensure safety during the staining process.
Preparing the cabinets is a crucial step in staining kitchen cabinets. Proper preparation ensures a smooth and lasting finish. It requires time and patience but yields rewarding results. Below, you’ll find essential techniques for cleaning and sanding your cabinets. These steps ensure your cabinets are ready for staining.Cleaning Techniques
Start by removing dust and grime from the cabinets. Use a mild detergent mixed with warm water. A soft sponge works best to avoid scratches. Gently scrub all surfaces, focusing on corners and edges. Rinse with clean water and dry thoroughly with a lint-free cloth. Ensure no residue remains before moving to the next step.Sanding For Smoothness
Sanding creates an even surface for the stain. Use medium-grit sandpaper for initial sanding. Gently sand the cabinet doors and frames. Pay attention to any rough areas or old stain spots. Follow with fine-grit sandpaper for a smooth finish. Always sand in the direction of the wood grain. Wipe away dust with a tack cloth to prepare for staining.
Credit: www.facebook.com
Applying The Stain
Applying the Stain Begin by choosing a quality wood stain for your kitchen cabinets. Apply the stain evenly using a clean cloth or brush. Allow it to dry completely before applying a second coat for a richer color.
Applying the stain to your kitchen cabinets is where you start seeing your hard work pay off. You’ve done the prep; now it’s time to give your cabinets a fresh, vibrant look. This stage is all about technique and patience, ensuring the stain is applied evenly and effectively.Brushing Vs. Spraying
Choosing between brushing and spraying can impact the final look of your cabinets. Brushing is often more accessible for beginners, allowing for controlled application. But it can leave brush marks if not done carefully. Spraying, on the other hand, provides a smooth, even coat and is faster. However, it requires more setup, including masking off areas and using a spray gun. Consider your comfort level with each method and the equipment you have on hand.Layering For Depth
Achieving a rich, deep finish often requires layering the stain. A single layer might look flat, lacking the depth that brings out the wood’s natural beauty. Applying multiple thin layers can enhance color richness and allow you to fine-tune the shade. Between layers, lightly sand with fine-grit sandpaper to ensure smoothness and adhesion. Do you want your cabinets to tell a story? Layering is your chance to craft a unique narrative through color depth.Finishing Touches
The finishing touches bring life to your newly stained kitchen cabinets. They ensure that your hard work lasts longer and shines brilliantly.
Sealing For Protection
Sealing is crucial for durability. Use a clear coat to protect the stain. It guards against moisture and scratches. Choose a sealant that suits the stain type. Apply evenly with a brush or sprayer. Allow it to dry completely. This enhances the cabinet’s shine and longevity.
Hardware Reinstallation
Reinstalling hardware is like adding the final puzzle piece. Clean knobs and handles before placing them back. Ensure screws are tight for a secure fit. Align each piece properly for a polished look. Updated hardware can refresh your kitchen’s style. Consider new designs if you want a modern touch.

Credit: www.instagram.com
Maintenance Tips
Staining kitchen cabinets starts with cleaning the surfaces thoroughly. Sand the cabinets gently to remove old finishes. Apply stain evenly with a brush, letting it dry completely. Finish with a protective sealant to enhance durability and shine. Regularly dust and clean to maintain their fresh look.
Staining your kitchen cabinets can breathe new life into your space, but maintaining that fresh look requires some ongoing effort. With the right maintenance tips, your cabinets can stay beautiful and durable for years. Whether you’re a DIY enthusiast or just someone trying to prolong the life of your cabinets, these tips can help you achieve a lasting finish.Cleaning And Care
Regular cleaning is crucial to maintaining the beauty of your stained cabinets. Use a soft cloth dampened with warm, soapy water to wipe down the surfaces. Avoid harsh chemicals that can strip away the stain. Once a month, consider using a mild wood polish to add a layer of protection and shine. This not only enhances the appearance but also helps to preserve the stain. Have you noticed how some stains can dull over time? Regular polishing can prevent this. Pay attention to areas around handles and knobs where grime can build up. A gentle scrub with a toothbrush can reach these tricky spots. Remember, a little effort now can save you from a big refinishing job later.Touch-up Tips
Even with the best care, your cabinets might get nicked or scratched. Keep a small container of the original stain on hand for quick touch-ups. A tiny brush or cotton swab can work wonders for small imperfections. Before touching up, clean the area thoroughly to ensure the stain adheres well. Allow the touch-up stain to dry completely before applying a thin layer of sealant. This helps protect the area from future damage. Consider keeping a small toolkit for minor repairs. This way, you’re always ready for any blemishes that come your way. Do you have a favorite way to keep your cabinets looking new? Sharing tips with fellow DIYers can be surprisingly helpful. By incorporating these cleaning and touch-up tips, you can maintain your kitchen cabinets’ stunning appearance and extend their lifespan.Frequently Asked Questions
Can You Stain Cabinets Without Sanding?
Yes, you can stain cabinets without sanding. Use a liquid deglosser to clean and prepare the surface. Apply a bonding primer for better adhesion. Choose a gel stain or a stain designed for non-sanded surfaces. Follow instructions carefully for a smooth finish.
Do You Need To Sand Cabinets Before Staining Them?
Yes, sanding cabinets before staining ensures a smooth finish. It removes old finishes and imperfections. Use fine-grit sandpaper for best results. Sanding helps stain penetrate evenly, enhancing the wood’s natural beauty. Always clean the surface after sanding to remove dust.
Proper preparation leads to professional-looking results.
Is It Better To Stain Or Paint Kitchen Cabinets?
Staining highlights natural wood grain, offering a classic look. Painting provides a modern, customizable finish. Choose based on style preference and kitchen design. Both options have benefits; ensure proper surface preparation for durability. Consider maintenance and aesthetic appeal before deciding.
How Many Coats Of Stain Do You Put On Cabinets?
Typically, two coats of stain are recommended for cabinets. The first coat penetrates the wood, while the second enhances color and durability. Ensure thorough drying between coats to achieve the best finish. Adjust based on desired depth of color and wood type.
Conclusion
Staining kitchen cabinets transforms their look with minimal cost. It’s a simple way to refresh your kitchen’s style. Remember to clean and sand the surfaces first. Choose the right stain for your desired finish. Apply it evenly for the best result.
Protect your work with a clear sealant. This process extends the life of your cabinets. Plus, it adds a personal touch to your kitchen. With patience and care, anyone can achieve beautiful results. Your kitchen will feel new and inviting.
Enjoy the satisfaction of a job well done.