Can You Paint Kitchen Cabinets Without Removing Them: Easy Guide
Are you tired of looking at your old, worn-out kitchen cabinets but dread the thought of a lengthy and expensive renovation? Good news!
You might not need to remove them to give your kitchen a fresh, new look. Imagine transforming your cooking space without the hassle of dismantling fixtures or spending a fortune. Sounds appealing, right? You’ll discover a simple and cost-effective way to paint your kitchen cabinets without taking them off their hinges.
Get ready to learn a few tricks that can save you time, money, and a whole lot of stress. Stick around, and by the end, you’ll feel empowered to tackle this DIY project with confidence!
Benefits Of Painting Cabinets In Place
Painting kitchen cabinets without removing them offers convenience and saves time. This approach reduces the hassle of dismantling and reassembling, making it easier for a quick refresh. It also minimizes disruption, allowing you to maintain your kitchen’s functionality throughout the process.
Painting kitchen cabinets without removing them can be a game-changer for your home renovation plans. It offers a host of advantages that can make the process not only easier but also more efficient. Here, we’ll dive into the benefits of painting cabinets in place, highlighting why this approach might just be what you need for your kitchen makeover.Convenience And Time-saving
Painting cabinets in place saves you from the hassle of dismantling and reassembling them. You avoid spending hours unscrewing and labeling each piece. This means you can complete your project in a fraction of the time.Cost-effective Solution
By not removing cabinets, you save on potential damage costs. There’s no need for special tools or hiring professionals to uninstall and reinstall cabinets. Keeping the cabinets in place allows you to invest in quality paint instead.Maintaining Kitchen Functionality
Your kitchen remains functional throughout the painting process. You can continue to use your appliances and countertops without interruption. This is particularly helpful if you have a busy household.Better Control Over Painting Process
With cabinets in place, you can better visualize the overall look as you paint. It allows you to make adjustments on the spot, ensuring a perfect finish. This approach minimizes the risk of painting errors.Avoiding Damage And Wear
Removing cabinets can lead to scratches and dents. Painting them in place reduces the chance of accidental damage. You preserve the integrity of your kitchen layout and design. Would you consider painting your cabinets without removing them? This method could save you time, money, and stress.Essential Tools And Materials
Painting kitchen cabinets without removing them requires specific tools and materials. Use high-quality brushes, rollers, and sandpaper for smooth finishes. Select a durable paint and primer suitable for kitchen surfaces.
Painting kitchen cabinets without removing them can be a convenient option, saving both time and effort. However, achieving a professional finish requires the right tools and materials. This task demands precision, and with the right equipment, you can transform your kitchen without the hassle of dismantling cabinets.Preparation Supplies
Before starting, gather essential supplies to ensure a smooth process. Use painter’s tape to protect areas you don’t want painted. Drop cloths are crucial for safeguarding your floors and countertops from paint splatters.Sanding Tools
Proper sanding is crucial for paint adhesion. An electric sander can speed up the process and provide a smooth surface. If you prefer manual tools, sanding blocks or sheets can work well, especially for small details.Paint Selection
Choosing the right paint is vital for durability and finish. Opt for high-quality cabinet paint or enamel, as these are formulated to withstand the rigors of kitchen environments. Consider colors that complement your kitchen’s design.Brushes And Rollers
Invest in high-quality brushes and rollers for even application. A small angled brush can be perfect for tight corners and edges. Use foam rollers for larger surfaces to achieve a smooth, streak-free finish.Cleaning Materials
Start with a clean surface. Use a degreaser to remove any kitchen grime from cabinet surfaces. A bucket of warm soapy water and a sponge can do wonders for thorough cleaning.Protective Gear
Safety is paramount. Wear a mask to avoid inhaling paint fumes and gloves to protect your hands. Consider goggles if you’re sensitive to airborne particles.Drying Tools
Ensure proper drying between coats. Fans can help speed up drying times and prevent dust from settling on wet paint. Good ventilation is essential for a safe and efficient process. Have you ever marveled at a DIY project that looks professionally done? The secret often lies in the preparation and tools used. With these essentials, painting your kitchen cabinets without removing them becomes a manageable task.Preparing The Kitchen Area
Ensure surfaces are clean and free from grease. Protect countertops and floors with drop cloths. Use painter’s tape to shield hinges and handles.
Preparing the kitchen area is crucial when painting cabinets without removing them. A well-prepared space ensures a smoother process and better results. By organizing and cleaning, you create a safer and more efficient environment. Let’s explore how to get your kitchen ready for this transformation.Clearing And Protecting Surfaces
Start by removing items from countertops and shelves. Store them safely away from the painting area. Cover appliances and floors with drop cloths or plastic sheets. This prevents paint splatter and keeps surfaces clean. Use painter’s tape to protect edges of walls and countertops. Ensure all areas near the cabinets are shielded from potential spills.Cleaning Cabinets Thoroughly
Clean cabinet surfaces well before painting. Use a mild detergent mixed with warm water. Wipe down each cabinet, focusing on greasy spots and grime. Scrubbing helps paint adhere better to the surface. Rinse with clean water and dry with a soft cloth. Ensure all surfaces are free from residue and dust. Clean cabinets are crucial for a smooth and lasting finish.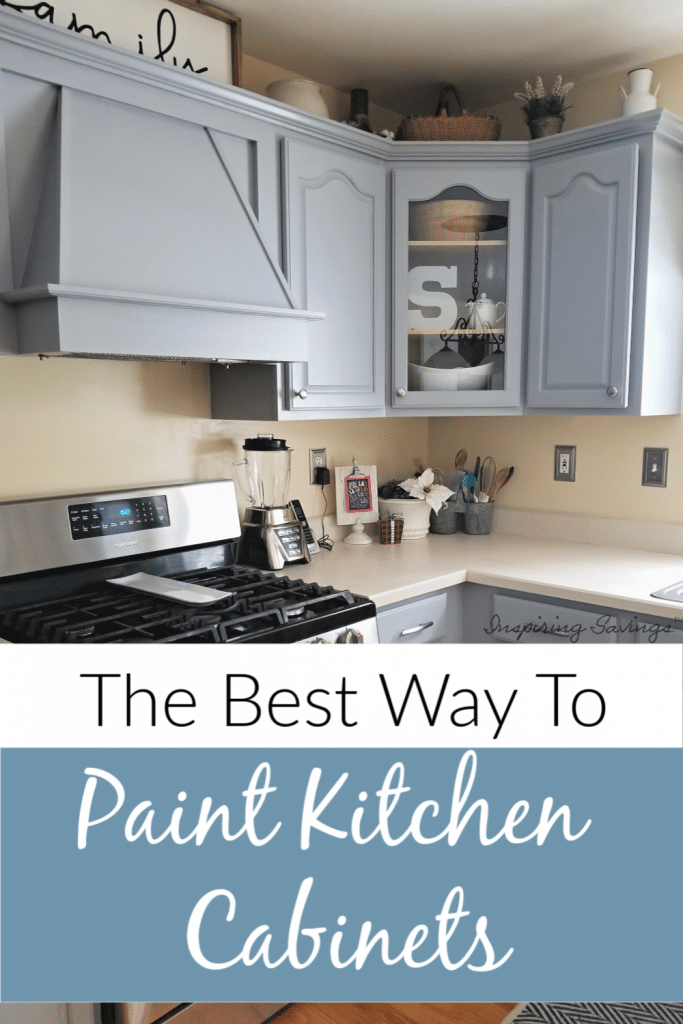
Credit: www.inspiringsavings.com
Choosing The Right Paint
Choosing the right paint for your kitchen cabinets can make all the difference in achieving a stunning finish. You’re probably wondering if you can skip the hassle of removing the cabinets and still get professional-looking results. The answer is yes, but it hinges on selecting the right type of paint and color. Let’s dive into the details.
Types Of Paints Suitable For Cabinets
Not all paints are created equal when it comes to kitchen cabinets. You need something durable and easy to clean. Consider using:
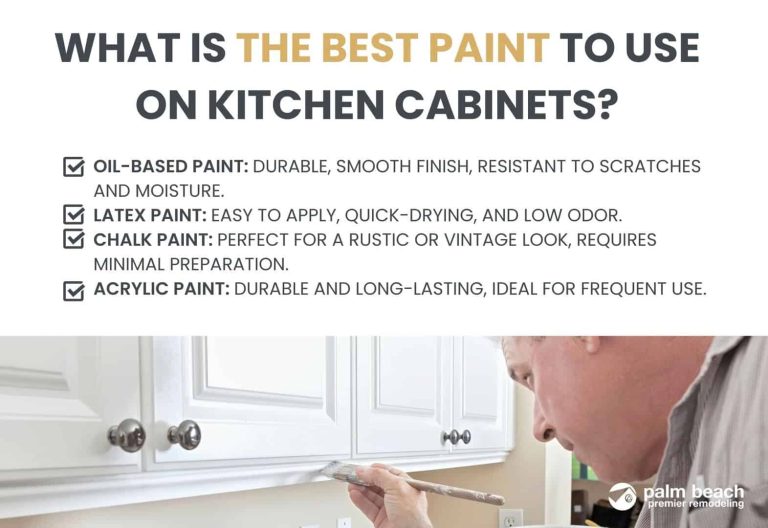
- Acrylic Paint:Known for its durability and resistance to moisture, acrylic paint is a great choice for kitchen cabinets. It’s easy to clean and dries quickly.
- Chalk Paint:Ideal for a rustic or vintage look, chalk paint provides a matte finish that’s easy to work with and doesn’t require a primer.
- Oil-Based Paint:Although it takes longer to dry, oil-based paint offers a smooth, hard finish that can withstand heavy use.
Have you ever tried applying oil-based paint and found it challenging? It might be worth the patience for a kitchen that sees a lot of action.
Color Selection Tips
Picking the perfect color can transform your kitchen into a space you love. Here are some tips:
- Consider the Space:Light colors can make a small kitchen feel bigger, while dark shades add warmth to a spacious area.
- Match with Existing Decor:Coordinate your cabinet color with the countertops, walls, and flooring for a cohesive look.
- Test Samples:Before committing, apply a few swatches on the cabinets to see how they look under different lighting conditions.
Have you ever been surprised by how a color changes throughout the day? Testing samples can save you from an unexpected color mismatch.
Sanding And Priming
Sanding and priming cabinets allow for a smooth paint finish without removal. Use fine-grit sandpaper to prepare surfaces. Apply primer evenly to ensure paint adheres well.
Painting your kitchen cabinets without removing them can be a game-changer for your home makeover. It saves time, reduces hassle, and still offers a fresh new look. However, the key to achieving a professional finish lies in the preparation—specifically, sanding and priming. Both are crucial steps that set the foundation for a smooth and durable paint job.Sanding Techniques For Best Results
Sanding your cabinets is essential to create a surface that allows paint to adhere properly. Start by using a medium-grit sandpaper, around 120 to 150 grit, to gently sand the surface. This helps to remove the glossy finish and any imperfections. Remember, you don’t need to sand down to the bare wood. Just enough to roughen the surface is sufficient. Consider using a sanding sponge for rounded edges or detailed areas. Don’t forget to wipe down the dust with a damp cloth after sanding. Leaving dust behind can interfere with primer adhesion.Applying Primer Evenly
Once the sanding is complete, it’s time to apply primer. Choose a high-quality primer that works with the type of paint you’ll be using. An oil-based primer is generally more durable and offers better adhesion. Apply the primer in thin, even coats using a brush or a roller. Thin coats prevent drips and uneven surfaces. It’s a technique that ensures a smooth finish once the paint is applied. Pay special attention to corners and crevices. These areas often get missed but are crucial for a cohesive look. Would you want your cabinets to look patchy? Allow the primer to dry completely before you start painting. This step is crucial for the longevity of the paint job. It’s tempting to rush, but patience here pays off big time. By investing time in proper sanding and priming, you set the stage for a successful kitchen cabinet transformation. Can you already imagine the compliments you’ll get on your DIY skills?
Credit: repurposeandupcycle.com
Painting Techniques
Painting kitchen cabinets without removing them can transform your space effortlessly. The right painting techniques are crucial for achieving a professional look. Whether you’re using brushes or rollers, mastering the art of applying smooth and even coats will be your key to success.
Using Brushes And Rollers Effectively
Getting the right tools is your first step to success. Choose high-quality brushes that suit the type of paint you’re using. Synthetic brushes work well with latex paints, whereas natural bristles are ideal for oil-based paints. Rollers can cover larger areas more quickly, but a brush might be necessary for edges and corners.
Have you ever noticed streaks after painting? This often happens when the brush is overloaded with paint. Dip only a third of the bristle length into the paint, and tap off excess to prevent drips. Rollers should be loaded evenly, ensuring full coverage to avoid patchiness.
Switch between brushes and rollers strategically. Use brushes for detailed work and rollers for flat surfaces. This combination can speed up the process and deliver a flawless finish.
Ensuring Smooth And Even Coats
A smooth finish starts with preparation. Clean your cabinets thoroughly to remove grease and dust, which can cause uneven paint distribution. Sanding lightly can help the paint adhere better, especially if your cabinets are glossy.
Applying thin layers is more effective than one thick coat. This not only helps in drying faster but also prevents visible brush strokes or roller marks. Consider using a primer first; it can create a uniform base and enhance paint adhesion.
Ask yourself: Is patience really a virtue? When painting, it certainly is. Allow each coat to dry completely before applying the next. Rushing can lead to a messy, uneven appearance that requires more work to fix.
Drying And Curing Process
Painting kitchen cabinets without removing them is convenient. One key aspect is the drying and curing process. Proper drying ensures a smooth finish. It helps avoid smudges and imperfections. Understanding this process is crucial for a flawless outcome.
Allowing Adequate Drying Time
Patience is vital in the drying phase. Paint needs time to settle. Typically, it requires 24 hours for the first coat. This time allows the paint to adhere properly. The second coat might need longer. A full cure can take up to 7 days. During this time, avoid using the cabinets. This prevents damage and ensures longevity.
Avoiding Common Mistakes
Rushing the drying process leads to problems. Sticky surfaces are a common issue. They occur when cabinets are used too soon. Also, applying too thick coats causes uneven drying. Thin, even layers dry more efficiently. Another mistake is poor ventilation. Good airflow speeds up drying. It helps paint cure evenly. Addressing these mistakes improves results significantly.
.jpeg)
Credit: www.architecturaldigest.com
Finishing Touches
Painting kitchen cabinets without removing them is possible with careful preparation. Clean surfaces thoroughly and use painter’s tape to protect walls and hardware. Apply primer and paint with a brush or roller for a fresh, updated look.
Finishing touches can transform your kitchen cabinets from good to great. After painting, adding these elements ensures durability and a polished look. They not only enhance the appearance but also protect your hard work. Here’s how you can perfect your cabinets with the right finishing touches.Applying A Protective Topcoat
A protective topcoat shields your paint from scratches and stains. Choose a clear, water-based polyurethane for a smooth finish. Use a high-quality brush for even application. Apply thin, even layers, allowing each to dry fully. This ensures a strong, glossy finish that lasts.Reattaching Hardware And Accessories
Once the paint and topcoat are dry, reattach your hardware. Clean the handles and knobs for a fresh look. Tighten any loose screws to ensure they are secure. Consider updating outdated hardware for a modern touch. This simple step can greatly enhance your kitchen’s style.Maintenance Tips For Painted Cabinets
Painting kitchen cabinets without removing them saves time and effort. Clean surfaces with a gentle cleanser before painting. Regular dusting and using non-abrasive cleaners help maintain their look.
Maintaining painted kitchen cabinets is crucial for keeping them looking fresh and vibrant. With proper care, your cabinets can remain beautiful for years. It’s not just about cleaning; it’s about preserving the finish and preventing wear. Here are some essential maintenance tips to ensure your painted cabinets stay in pristine condition.Regular Cleaning
Dust cabinets weekly using a soft cloth. Avoid abrasive cleaners. Use mild detergent and warm water for tougher spots. Rinse and dry thoroughly to prevent moisture damage.Immediate Spill Response
Wipe spills quickly to avoid stains. Use a damp cloth, then dry. Water and grease can harm paint if left too long.Gentle Handling
Avoid slamming doors. Use handles to open, reducing direct contact with paint. Gentle use minimizes chipping and cracking.Protective Measures
Install bumpers inside cabinet doors. They cushion impact when closing. Use mats or liners in drawers to protect from scratches.Touch-up Strategy
Keep leftover paint for touch-ups. Small scratches can be covered quickly. Use a fine brush for precision.Humidity Control
Maintain stable kitchen humidity. Excess moisture can cause paint to peel. Use exhaust fans or dehumidifiers as needed.Uv Protection
Limit direct sunlight exposure. UV rays can fade paint. Consider curtains or blinds to shield cabinets during peak hours.Frequently Asked Questions
Can You Paint Cabinets While Still Attached?
Yes, you can paint cabinets while they are still attached. Clean, sand, and prime them first for best results. Use a high-quality paint and a brush or roller. Ensure proper ventilation and protect surrounding areas. This method saves time and effort compared to removing them.
Do I Need To Remove Kitchen Cabinets To Paint Them?
You don’t need to remove kitchen cabinets to paint them. Painting them in place is possible. Ensure proper preparation by cleaning, sanding, and taping off areas. This saves time and effort. Removing doors and hardware for painting separately can improve the finish.
Can I Just Paint Over My Kitchen Cabinets?
Yes, you can paint over kitchen cabinets. Clean them thoroughly, sand the surface, and use a primer. Choose high-quality paint for durability. Proper preparation ensures a smooth finish.
Can I Just Paint Over My Kitchen Cabinets Without Sanding?
Yes, you can paint without sanding if you use a bonding primer. Clean and degrease the cabinets first. This ensures proper adhesion of the paint and a long-lasting finish.
Conclusion
Painting kitchen cabinets without removing them is a smart choice. It saves time and effort. With the right tools, you can achieve a fresh look. Clean the surfaces well before starting. Use high-quality paint for durability. Proper preparation is key to success.
Remember to protect floors and countertops. Patience during drying ensures a smooth finish. Enjoy the transformation of your kitchen space. Freshly painted cabinets can brighten up the entire room. Try this project for an affordable kitchen update. It’s rewarding and doable.
You can give your kitchen a new life without much hassle.