How to Tile a Backsplash Kitchen: Step-by-Step Guide
Transforming your kitchen into a stunning space doesn’t have to be a daunting task. Imagine walking into your kitchen and being greeted by a beautiful, stylish backsplash that you installed yourself.
Yes, you! Tiling a backsplash may seem intimidating at first, but with the right guidance, it can be a rewarding DIY project that enhances the heart of your home. This guide will show you how to tile a backsplash kitchen with ease, helping you achieve that professional look without the hefty price tag.
Get ready to discover how simple steps can lead to a dramatic change, turning your cooking space into an area of elegance and function. Keep reading to learn how you can bring your kitchen vision to life, step by step.

Credit: southernhospitalityblog.com
Tools And Materials Needed
Gather essential tools like a notched trowel, tile cutter, and level. Prepare materials including tiles, adhesive, and grout. Ensure a smooth installation process with spacers and a sponge for cleaning.
Installing a kitchen backsplash can be a rewarding DIY project, transforming the space with a personal touch. However, before diving into the tiling process, it’s crucial to gather the right tools and materials. Having everything on hand not only saves time but also ensures a seamless installation.Essential Tools For Tiling
A successful backsplash installation requires precision and accuracy. Ensure you have a tape measure for accurate dimensions and a level to keep your tiles straight. A tile cutter or wet saw will be indispensable for cutting tiles to fit around outlets and corners. Don’t forget a notched trowel, which is essential for spreading adhesive evenly. Keep a rubber grout float handy for applying grout, and a sponge for cleaning excess grout and adhesive.Must-have Materials
The materials are equally important as the tools. Choose tiles that complement your kitchen’s decor, whether it’s ceramic, glass, or stone. Tile adhesive, often called thin-set mortar, is needed to secure tiles to the wall. Grout comes next, filling the spaces between tiles and adding strength. You may want to consider tile spacers to ensure uniform gaps. Lastly, sealant is crucial to protect your grout from stains and moisture.Safety Equipment
Safety should never be an afterthought. Protect your eyes with safety glasses, especially when cutting tiles. Use gloves to safeguard your hands from sharp edges and chemicals. A dust mask is wise to wear when mixing grout or cutting tiles, keeping dust at bay. Being equipped with the right tools and materials can make all the difference. Have you ever started a project, only to find you’re missing something critical halfway through? Avoid that frustration by preparing thoroughly. This way, your backsplash project will be smooth and satisfying from start to finish.
Credit: www.youtube.com
Preparing The Surface
Cleaning the wall is essential before tiling. Remove grease and dirt with a gentle cleaner. Ensure the surface is dry and smooth for best results.
Preparing the surface is a crucial step in tiling a kitchen backsplash. A well-prepared surface ensures tiles adhere properly and look seamless. Before starting, make sure the wall is clean, smooth, and ready for tile installation.Cleaning The Wall
Begin by removing any old adhesive or paint. Use a putty knife to scrape off stubborn spots. Wash the wall with warm soapy water. This removes grease and dirt. Rinse and allow the wall to dry completely. A clean surface helps tiles stick better.Measuring And Marking
Measure the area where you’ll place the tiles. Use a tape measure for accuracy. Mark the measurements with a pencil. This guides your tile placement. Plan the layout by marking the center of the wall. Work outward from the center for a balanced look.Choosing The Right Tile
Choosing the right tile for your kitchen backsplash is a crucial step in creating a space that truly reflects your style and meets your functional needs. With a plethora of options available, selecting the perfect tile can seem overwhelming. But fear not, as we’re here to guide you through the process with practical tips and insights.
Types Of Tiles
Understanding the different types of tiles can help you make an informed decision. Ceramic tiles are popular due to their durability and affordability. They come in a variety of finishes, from matte to glossy, allowing you to create the exact look you desire.
Porcelain tiles, on the other hand, are known for their density and water resistance, making them ideal for kitchen areas prone to spills. If you’re looking for something unique, consider glass tiles. They offer a modern look with their reflective surfaces and vibrant colors.
Natural stone tiles like marble and travertine add a touch of elegance and luxury. However, they may require more maintenance to keep them looking pristine.
Color And Design Considerations
Choosing the right color and design is essential to complement your kitchen’s overall aesthetic. Consider the color scheme of your kitchen cabinets and countertops. Do you want your backsplash to blend in or stand out as a focal point?
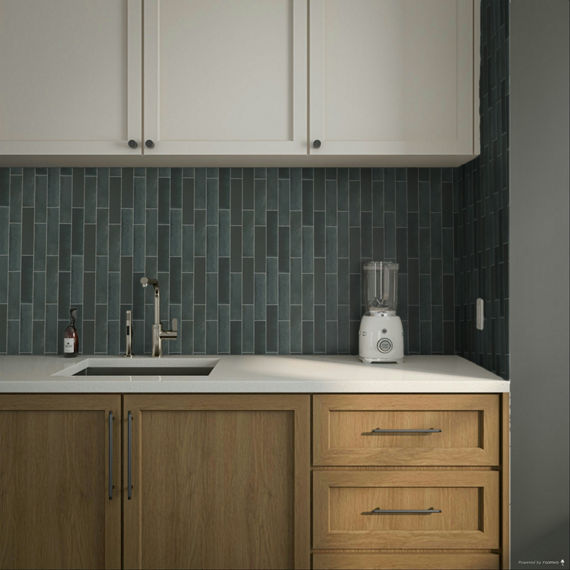
Light-colored tiles can make a small kitchen feel more spacious, while darker tiles add depth and warmth. Patterns and textures can add visual interest. Subway tiles offer a classic look, while herringbone or mosaic patterns provide a contemporary twist.
Think about how the tile color will interact with lighting. Will natural or artificial light enhance or diminish the color’s vibrancy? Picture your kitchen on a daily basis: what mood do you want to set every time you walk in?
By carefully considering these elements, you can choose a tile that not only enhances your kitchen’s beauty but also serves its practical purposes. So, what tile will you choose to transform your kitchen into a space you’ll love?
Credit: www.americanolean.com
Applying Tile Adhesive
Applying tile adhesive involves spreading it evenly on a clean surface. Use a notched trowel for better grip. Press tiles gently into place for a secure fit.
Applying tile adhesive is a crucial step in transforming your kitchen backsplash from a simple wall to a stylish focal point. It’s not just about sticking tiles to the wall; it’s about ensuring they stay put, look even, and resist wear and tear. Getting this right could mean the difference between a backsplash that lasts for years and one that requires constant repair.Mixing Adhesive
Mixing tile adhesive correctly is essential for a successful application. You’ll need to follow the instructions on the packaging closely, usually adding water to the powdered adhesive in a bucket. Use a paddle mixer attached to a drill for best results, as it ensures a smooth and lump-free consistency. Remember, the adhesive should be thick enough to hold its shape yet thin enough to spread easily.Spreading Adhesive Evenly
Spreading adhesive evenly is key to avoiding tile slippage and ensuring your backsplash looks uniform. Use a notched trowel to apply the adhesive, starting at the center of your work area and moving outward. Press the trowel firmly against the wall, creating ridges that help the tiles adhere better. Keep an eye on the thickness of the adhesive layer; it should be consistent to ensure the tiles sit evenly. Applying adhesive can be a meditative process. The rhythm of spreading and the satisfaction of seeing it smooth out is oddly calming. Have you experienced the joy of seeing a perfectly smooth adhesive layer ready for tiles?Laying The Tiles
Place tiles evenly on the adhesive, ensuring alignment with the marked lines. Use spacers for consistent gaps between tiles. Press tiles firmly to secure them in place, checking for levelness.
Laying the tiles is a crucial step in tiling a backsplash kitchen. It sets the foundation for a visually appealing and durable result. With the right approach, you can achieve a professional finish.Starting At The Center
Begin by identifying the center point of your backsplash area. This ensures symmetry and balance in the design. Use a level to draw a vertical line from the center point downwards. This line will guide your tile placement. Place the first tile at the center, aligning it with the vertical line. This method helps maintain even spacing on both sides. Work your way outward from the center, placing tiles in rows. Check regularly with a level to keep the tiles straight.Cutting Tiles For Edges
Measure the space at the edges where full tiles don’t fit. Mark the tile with a pencil where it needs cutting. Use a tile cutter or wet saw for accurate cuts. Safety first. Wear goggles while cutting tiles. After cutting, smooth the edges with a tile file or sandpaper. Fit the cut tiles into place, ensuring they align with the others. Adjust as needed to maintain a uniform look. Use spacers to keep consistent gaps between tiles. The careful cutting and placement of edge tiles enhance the backsplash’s overall appearance.Grouting The Tiles
Grouting completes the look of your tiled backsplash, sealing gaps for a smooth finish. Apply grout evenly using a rubber float, ensuring no spaces are left unfilled. Afterward, clean excess grout from tiles with a damp sponge for a polished appearance.
Grouting the Tiles Grouting is the final step in your backsplash tiling journey, where everything comes together seamlessly. It’s like giving your tiles a warm hug, ensuring they stay in place while adding that extra pop to your kitchen’s aesthetic. But how do you choose the right grout and apply it perfectly? Let’s delve into these aspects.Choosing Grout Color
The grout color you choose can dramatically impact the overall look of your backsplash. Do you want it to blend in or stand out? If your tiles are vibrant, a neutral grout can tone things down. Conversely, a contrasting grout can make subtle tiles pop. Consider the maintenance aspect too. Dark grout tends to hide stains better than lighter ones. Imagine cooking a hearty tomato sauce, and a splash lands on your backsplash—would you prefer a color that masks such mishaps?Applying Grout
Applying grout isn’t just about filling gaps; it’s about achieving a flawless finish. Start by mixing your grout to a creamy consistency, like peanut butter. Ensure every nook and cranny is filled, using a rubber float at a 45-degree angle. Once applied, it’s crucial to clean off excess before it dries. A slightly damp sponge works wonders, wiping away residue and revealing your tiles’ glory. Have you ever noticed how your tiles shine brighter after a thorough clean-up? That’s the magic of proper grouting. Remember, patience is key. Allow the grout to cure fully before exposing it to water. This step ensures durability and longevity, protecting your backsplash investment. Can you picture the satisfaction of seeing your beautifully grouted tiles each time you cook?Sealing The Backsplash
Sealing the backsplash ensures a lasting finish. Apply sealant evenly with a brush, focusing on grout lines. Let it dry completely for protection against moisture and stains.
Sealing the backsplash is an essential step in kitchen tiling that often gets overlooked. It’s like putting the final touch on a painting—necessary and transformative. A well-sealed backsplash not only protects your tiles from moisture but also enhances their appearance, giving your kitchen a polished finish. Benefits of Sealing- Protection from Moisture:A good sealant prevents water from seeping into the tiles and grout. This keeps your backsplash looking new and reduces the risk of mold and mildew.
- Enhanced Durability:Sealing adds a layer of protection, making tiles more resistant to stains, scratches, and wear. This can extend the life of your backsplash significantly.
- Improved Aesthetics:A sealant can enhance the color and texture of your tiles, giving them a rich, glossy finish. This subtle upgrade can make a big difference in your kitchen’s look.
- Choose the Right Sealant:Consider the type of tile you have. Different tiles require different sealants—natural stone needs a penetrating sealant, while ceramic tiles might only need a surface sealant.
- Clean the Surface:Ensure your tiles and grout are thoroughly clean and dry before applying sealant. Any residue can prevent the sealant from adhering properly.
- Apply Evenly:Use a small brush or roller for even application. Make sure to cover all areas, especially the grout lines, as they are most susceptible to damage.
- Allow Proper Drying Time:Patience is key. Give the sealant enough time to dry completely—usually 24 to 48 hours—to ensure a strong protective layer.
Cleaning And Maintenance
Tiling a backsplash in the kitchen transforms the space beautifully. Start by measuring the area and cutting tiles to fit. Apply adhesive evenly, press tiles firmly, and finish with grout for a polished look. Regular cleaning helps maintain its shine and durability.
Keeping your kitchen backsplash tiles clean and well-maintained can be the secret to a sparkling kitchen. With the right care, your tiles will remain as stunning as the day you installed them. But how do you ensure they stay that way without spending hours scrubbing?Regular Cleaning Tips
Regular cleaning is key to maintaining your kitchen backsplash. Use a soft cloth or sponge with a mild detergent and warm water. This combination effectively removes grease and food splatters. Avoid abrasive cleaners that can damage the tile surface. Instead, opt for natural solutions like a vinegar and water mixture. This not only cleans but also disinfects. Rinse thoroughly after cleaning to avoid soap residue. A quick wipe with a dry cloth will prevent water spots. Make it a habit to clean your backsplash after cooking to keep it looking fresh.Dealing With Stains
Sometimes, stains happen despite our best efforts. Don’t panic—many can be tackled with common household items. For stubborn stains, a paste of baking soda and water can work wonders. Apply the paste to the stain, let it sit for a few minutes, and then gently scrub with a soft brush. This method is effective for both ceramic and glass tiles. For oil-based stains, dish soap is your best friend. Its grease-cutting power can dissolve oil stains without much elbow grease. Is there a specific stain that keeps haunting your backsplash? Try different methods to see which works best for your tiles. Consistency in treatment often yields the best results. Regular attention to your backsplash can prevent the buildup of grime and maintain its aesthetic appeal. What’s your go-to cleaning strategy for your kitchen tiles? Share your tips with others who might be facing the same challenges.Frequently Asked Questions
When Tiling A Backsplash, Where Do You Start?
Begin tiling the backsplash from the center of the wall. Align with countertops or focal points. Ensure tiles are evenly spaced. Use spacers for consistency. Adjust as needed for corners or outlets.
Can You Tile Directly On Drywall For A Backsplash?
Yes, you can tile directly on drywall for a backsplash. Ensure the drywall is clean, dry, and flat. Use a suitable adhesive for secure installation. Always seal grout to protect against moisture. Proper preparation helps achieve a long-lasting and attractive backsplash.
How Do You Prepare A Kitchen Wall For Tile Backsplash?
Clean the wall with a degreaser to remove dirt. Repair any holes with spackle. Sand the surface smooth. Apply a primer for better tile adhesion. Ensure the wall is dry before tiling.
What Is The Easiest Way To Install Tile Backsplash?
To install tile backsplash easily, clean the surface, apply adhesive, place tiles, and use spacers. Cut tiles if needed. Grout the tiles after drying. Seal the grout to prevent stains and moisture. Ensure all tiles are aligned for a neat finish.
Follow instructions for best results.
Conclusion
Tiling a kitchen backsplash is a rewarding task. It transforms the space beautifully. With simple tools, you can create a stunning design. The process may seem daunting at first. But patience and planning make it manageable. Follow each step carefully.
Soon, you’ll have a backsplash to admire. It adds value and style to your kitchen. Enjoy the beauty of your new backsplash. Relish in the satisfaction of a job well done. Now, you have a kitchen that shines with elegance.
Ready to impress family and friends.