How Long to Paint Kitchen Cabinets: Quick Guide
Have you ever looked at your kitchen cabinets and thought, “It’s time for a change”? Painting your kitchen cabinets can breathe new life into your space without the hefty price tag of a full renovation.
But, you might be wondering, “How long will this project take? ” Understanding the time commitment is crucial, especially if you need your kitchen back in action quickly. Imagine the satisfaction of transforming your kitchen into a fresh, modern haven with just a few strokes of a brush.
By the end of this article, you’ll know exactly how long you should set aside for this rewarding DIY endeavor. Whether you’re a seasoned DIY enthusiast or a first-time painter, we’ve got the insights you need to plan your project efficiently. Stick around to discover the secrets of a successful cabinet makeover that fits perfectly into your busy schedule.
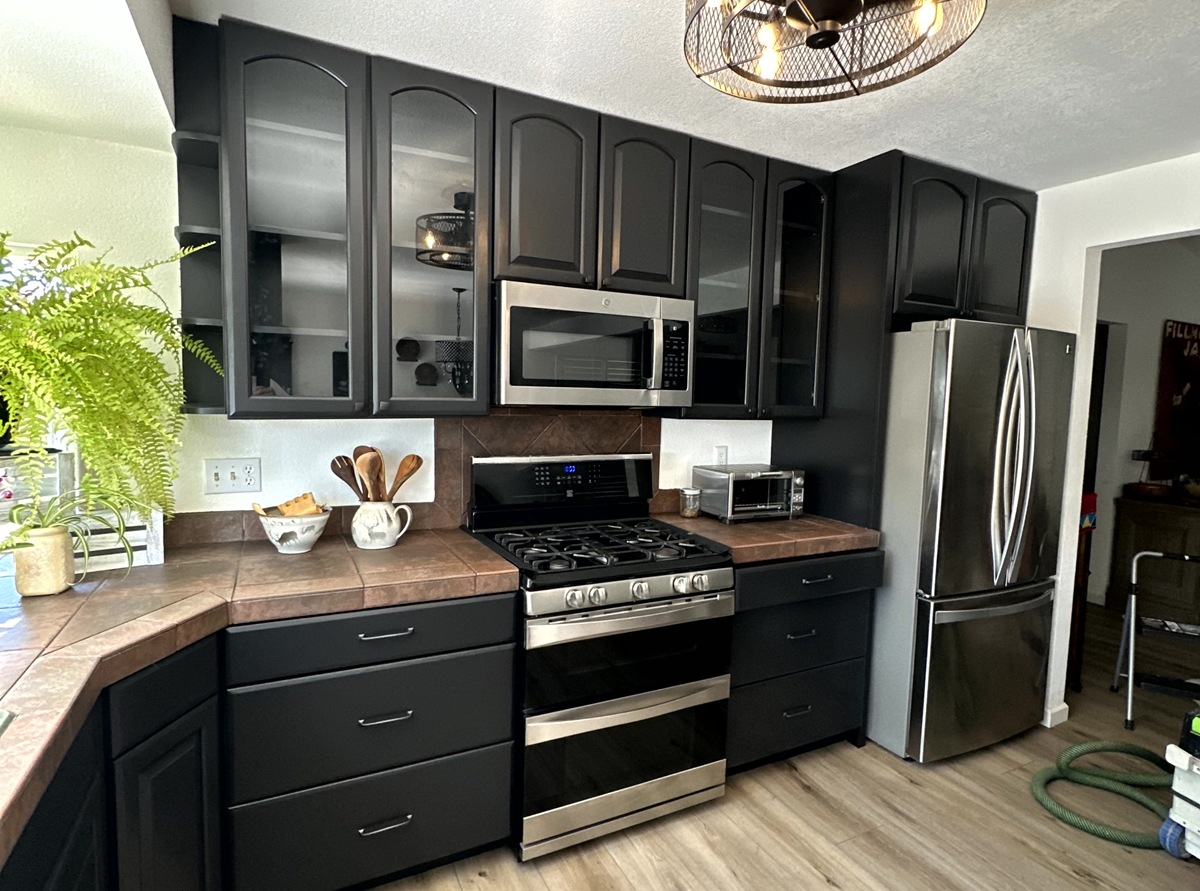
Credit: www.rojaspaintinginc.com
Preparation Steps
Begin by removing cabinet doors and hardware. Clean surfaces thoroughly to remove grease and dirt. Sand all areas lightly for better paint adhesion. Apply primer to ensure even color and finish. Let primer dry fully before painting.
Preparation is key to painting kitchen cabinets effectively. Before you start painting, it’s crucial to prepare the surfaces properly. This ensures a smooth finish and long-lasting results. Let’s explore the essential steps involved in preparing your kitchen cabinets for painting.
Cleaning And Degreasing
Clean cabinets thoroughly to remove dirt and grime. Use a mild detergent mixed with warm water. Scrub each surface using a sponge or cloth. Pay extra attention to areas with grease build-up. Rinse the cabinets with clean water. Let them dry completely before proceeding.
Removing Hardware
Take off all cabinet hardware like handles and hinges. Use a screwdriver to remove screws carefully. Place the hardware in a safe spot or a labeled bag. This prevents loss and confusion later. Removing hardware helps achieve an even paint application.
Sanding Surfaces
Sand the cabinet surfaces to create a smooth base. Use fine-grit sandpaper for this task. Sanding helps the paint adhere better. Focus on rough or glossy areas more. Wipe the dust away with a damp cloth after sanding. Ensure surfaces are clean and smooth before painting.
Choosing The Right Paint
Choosing the right paint for your kitchen cabinets is crucial to ensure durability and aesthetic appeal. The wrong paint can lead to chipping and fading, turning your kitchen makeover into a nightmare. But with the right selection, you can create a stunning transformation that lasts. Let’s dive into some key aspects to consider when selecting paint for your kitchen cabinets.
Types Of Paint
When painting kitchen cabinets, you have several options:
- Oil-based paint:Known for its durability and smooth finish, but it emits strong fumes and takes longer to dry. Suitable for high-traffic kitchens.
- Latex paint:Easier to use with less odor, it dries quickly and cleans up with water. However, it might not be as durable as oil-based paint.
- Acrylic paint:Offers a balance between durability and ease of use, providing a hard finish that resists moisture.
Color Selection
Choosing the right color can set the mood of your kitchen. Do you want a bright, airy look or a cozy, intimate feel? Consider the size of your kitchen and the amount of natural light it receives.
- Light colors:Whites, creams, and pastels can make your kitchen feel larger and more open.
- Dark colors:Navy, charcoal, or forest green can add depth and sophistication but might make a small kitchen feel smaller.
- Bold colors:If you want a pop, consider a vibrant red or turquoise to add personality.
Necessary Supplies
Preparation is key to a successful paint job. Make sure you have all the necessary supplies:
- Sandpaper:Essential for smoothing surfaces and ensuring paint adhesion.
- Primer:Helps the paint stick and ensures even coverage, especially if you’re changing from a dark to a light color.
- Brushes and rollers:Invest in quality brushes for detailed work and rollers for larger surfaces.
- Drop cloths:Protect your floors and countertops from paint drips and spills.
- Painter’s tape:Crucial for clean edges and protecting areas you don’t want painted.
Have you ever chosen a paint color that looked perfect in the store but completely different at home? Testing a few samples in your kitchen before committing can save you from potential regret. Remember, the right paint can breathe new life into your kitchen cabinets, making your cooking space feel like a brand-new room.
Priming The Cabinets
Priming your kitchen cabinets is a crucial step in the painting process. It ensures the paint adheres well and lasts longer. Proper priming can make a significant difference in the finish. Let’s explore why priming is essential and how to apply primer effectively.
Importance Of Priming
Priming provides a smooth surface for paint. It helps cover stains and old colors, ensuring a uniform look. Primers seal the wood, preventing moisture damage. This extends the life of your cabinets. A good primer saves time and effort in the long run.
Applying Primer
Start by cleaning the cabinets thoroughly. Remove any grease or dirt. Use a degreaser for stubborn spots. Sand the surfaces lightly to make them smooth. This helps the primer stick better.
Choose a high-quality primer suitable for kitchen cabinets. Apply it evenly using a brush or roller. Ensure all areas, including edges and corners, are covered. Allow the primer to dry completely before painting. This can take a few hours, depending on the primer type.
Inspect the cabinets after priming. Check for any missed spots or uneven areas. Apply a second coat if needed for a perfect finish. A well-applied primer sets the stage for beautiful, long-lasting cabinets.

Credit: usacabinets.com
Painting Techniques
Refreshing kitchen cabinets with paint can take time. Preparation is key, usually requiring a few days for cleaning, sanding, and priming. Painting and drying typically add another few days, ensuring a smooth finish.
Painting kitchen cabinets can transform your space, giving it a fresh look. The right painting technique impacts both the finish and the time taken. Choosing between brush and spray, applying coats, and understanding drying times are key factors.
Brush Vs. Spray
Brush painting is easy for beginners. It allows for detailed work. Brushes are great for corners and edges. They offer control but can leave brush marks. Spray painting provides a smooth finish. It covers large areas quickly and evenly. Sprays need proper setup and practice. They require ventilation and protective gear.
Applying The First Coat
Start with a clean surface. Remove dirt and grease. Apply primer for better adhesion. Primer helps paint stick and last longer. Use thin layers to avoid drips. Thin coats dry faster and create a smooth finish. Let the first coat dry completely. Ensure an even application with tools.
Drying Time Considerations
Drying time varies by paint type. Oil-based paints take longer. They need up to 24 hours to dry. Water-based paints dry faster. They often dry in 4 to 6 hours. Humidity and temperature affect drying time. Cooler temperatures slow down drying. Warm, dry conditions speed it up. Avoid rushing the process. Ensure each layer dries before adding another. This prevents peeling and uneven surfaces.
Applying Additional Coats
Applying Additional Coats Allow each coat of paint to dry completely before adding another. This ensures a smooth, even finish. Typically, wait 24 hours between coats to prevent smudging or streaking. Patience is key to a professional look.
Applying additional coats of paint to your kitchen cabinets is a crucial step in achieving a flawless finish. It’s not just about slapping on extra layers; it’s about enhancing durability and creating a visually appealing look. Whether you’re a weekend warrior or a seasoned DIY enthusiast, knowing how to effectively apply these coats can make a significant difference in the final outcome.
Determining The Number Of Coats
The number of coats needed depends on several factors. Paint type is a major consideration—some paints have excellent coverage and require fewer coats. However, with lighter shades or when painting over darker colors, more coats might be necessary to achieve uniformity. Your desired finish also plays a role. A high-gloss finish often requires more coats than a matte or satin finish. If you’re aiming for a professional look, patience in layering and allowing adequate drying time between coats is key.
Techniques For Even Coverage
Achieving even coverage is not just about the right number of coats but also the technique you use. Start by using a good quality brush or roller specifically designed for your paint type—this helps in minimizing streaks and brush marks. Make sure to apply paint in thin, even layers. Thick coats can lead to drips and an uneven surface. Applying thin layers also allows for quicker drying and better adhesion between coats. A personal tip: always paint in the direction of the wood grain. This technique helps in blending the paint seamlessly into the cabinet surface, giving a more natural and polished finish. Have you ever found yourself questioning whether one more coat would make a difference? It often does! Taking the time to apply that additional layer can be the difference between a good job and a great one.
Reinstalling Hardware And Doors
Painting kitchen cabinets can take a few days. Reinstalling hardware and doors often takes a couple of hours. Plan accordingly for a smooth process.
Reinstalling kitchen cabinet hardware and doors is a crucial step. It marks the final stages of your cabinet painting project. This task requires careful attention for a polished look. Once the paint has dried, bringing the cabinets back to functionality is essential. Properly reinstalling hardware and hanging cabinet doors ensures durability and style.
Attaching Hardware
- Gather all screws, knobs, and handles.
- Use a screwdriver to attach knobs and handles.
- Ensure each piece is tightly secured.
- Double-check alignment for a uniform look.
Hanging Cabinet Doors
- Align doors with the hinges on the cabinet frame.
- Use a screwdriver to fasten hinges securely.
- Adjust the hinge tension for smooth door movement.
- Test each door to ensure proper opening and closing.
Final Touches And Clean Up
Final touches and clean up can add 1-2 days to the process. Ensure paint is fully dry before reattaching doors and hardware. Dispose of tape and drop cloths, and clean brushes for future use.
Painting kitchen cabinets can transform your space from drab to fab, but the process doesn’t end with the last brushstroke. The final touches and clean-up are crucial to ensure your hard work shines through. After all, you’ve invested time and effort to rejuvenate your kitchen, so why not make sure the finish is flawless?
Inspecting The Finish
Once the paint has dried, take a moment to inspect the finish under good lighting. Move around the kitchen to catch any spots that might look different from various angles. Look for drips, uneven coverage, or small areas you might have missed. If you notice imperfections, don’t fret. Lightly sand the area with fine-grit sandpaper and apply a touch-up coat. This step ensures that your cabinets look professionally done, even if it’s a DIY project. Remember, a thorough inspection now can save you from future touch-ups.
Cleaning Up Paint Supplies
Cleaning up your paint supplies might feel like a chore after the excitement of painting, but it’s essential for future projects. Start by rinsing your brushes and rollers with warm, soapy water until the water runs clear. This prevents paint from hardening and ruining your tools. For latex-based paints, water should suffice, but oil-based paints might require a solvent like mineral spirits. Store your clean tools in a dry place, ready for your next DIY adventure. By maintaining your supplies, you not only save money but also reduce waste. Have you ever considered how a simple clean-up can extend the life of your tools? It’s a small step with a big impact. Embrace these final touches and clean-up strategies to complete your kitchen makeover on a high note. Your gleaming cabinets will be a testament to the care and attention you’ve invested in your home.

Credit: tomcurrencompanies.com
Time Management Tips
Painting kitchen cabinets can transform your space. Managing time is crucial to avoid stress and ensure success. Proper planning helps allocate time efficiently for each step of the process. With a clear schedule, you can enjoy smoother workflow and better results. Let’s dive into some time management tips to make your cabinet painting project a breeze.
Planning The Project
Begin by assessing the scope of your project. Determine how many cabinets need painting. Consider their condition and any repairs needed. Break down tasks into manageable sections. Create a checklist for each step involved. Gather all necessary supplies in advance to avoid interruptions. Plan a realistic timeline to complete the project.
Allocating Time For Each Step
Preparation is key. Allocate time for cleaning and sanding surfaces. Dedicate hours for priming, allowing for drying time. Painting requires patience, so set aside time for multiple coats. Factor in drying time between coats. Consider time for hardware removal and reinstallation. Review your checklist to ensure nothing is overlooked.
Frequently Asked Questions
How Long Does It Take A Painter To Paint Kitchen Cabinets?
Painting kitchen cabinets typically takes 3 to 5 days. Preparation and drying times are crucial. Skilled painters ensure quality and durability. Factors like cabinet size and complexity can influence the duration. Hiring professionals often speeds up the process while ensuring a smooth, lasting finish.
Can Kitchen Cabinets Be Painted In One Day?
Yes, you can paint kitchen cabinets in one day. Preparation is key for efficient results. Use quick-drying paint and proper tools. Start early to allow drying time. Ensure good ventilation for faster drying. Quality may vary based on experience and technique used.
What I Wish I Knew Before Painting Cabinets?
Prepping is crucial; clean, sand, and prime surfaces thoroughly. Choose high-quality paint for durability. Understand that painting cabinets can be time-consuming. Allow ample drying time between coats to prevent smudging. Consider removing hardware and doors for a smoother finish.
Is It Better To Roll Or Brush Paint Cabinets?
Brushing offers better control and detail for cabinets. Rolling provides a smoother finish and covers larger areas quickly. Consider using a combination for the best results.
Conclusion
Painting kitchen cabinets takes time but offers great results. Plan your project wisely. Good preparation ensures smooth progress. Start with cleaning and sanding. Apply primer and let it dry. Paint with patience for even coats. Allow each layer time to dry.
Consider the weather, it impacts drying time. Use quality materials for better finish. Expect to spend several days on this task. It’s worth the effort. Fresh cabinets brighten your kitchen. Enjoy your new space! A little patience brings big changes.
Dive into this DIY project with confidence. Your kitchen will thank you.